
Configuring Additional Instances
DISCLAIMER
Any advice FYB provide in relation to setting up any FYB App, FYB Add-in, FYB Connector and or advice in relation to opening access to your on-premises or in the cloud systems will be general advice only. This means that the advice is of a general nature and will not take into account your network setup, network infrastructure or any security requirements that you may have or in fact need. It is highly advised that you seek advice from internal or external providers to ensure that they are comfortable with what is required prior to going ahead with any deployment, setup or configuration for external access.
OVERVIEW
In cases where additional instances of an application is required, the below steps need to be followed to ensure all instances function as intended.
In cases where Test and Production datasets share a single server environment, it is recommended that the original install is used for your Test dataset, and the copy created is used for your Production dataset.
Doing so allows for over the top installs to be completed when updating your application, whilst not impacting the Production instance. Testing can then be completed using the Test instance, before following the below steps to update your Production instance.
WEB APPLICATIONS
The below steps are required for cases where more than one instance of a web application is required (e.g. separate internal and external instances)
-
Complete the installation of your Web Application, following the relevant Installation Guide
-
Create a root folder for the new site by creating a copy of the "wwwroot" folder within C:\inetpub

-
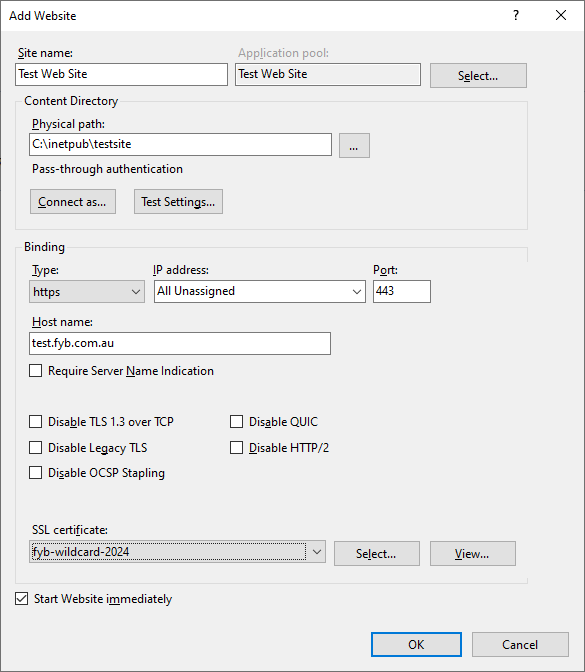
Open IIS Manager, right click on the "Sites" folder and select "Add Website..."

-
Complete the "Add Website" dialog, using the folder created in step 1 for your Physical Path, and ensuring the Host Name is unique to the new site.
-
Right Click on "Application Pools", select "Add Application Pool..." and give your Application Pool a name. Leave all other settings as default.


-
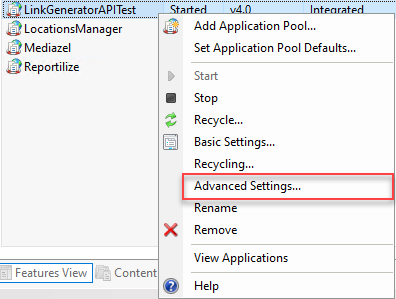
Open the "Application Pools" list, right click on your newly created Application Pool, and select "Advanced Settings..."
-
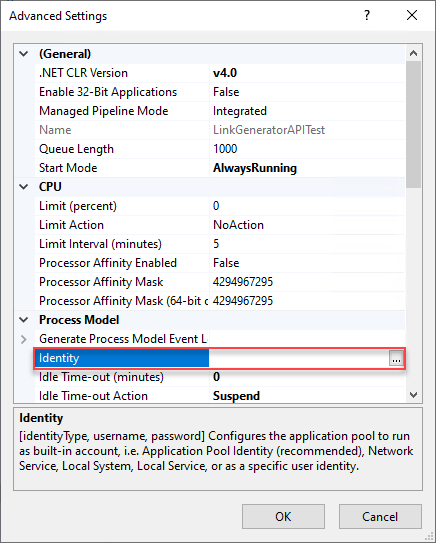
Configure the Application Pool as per the Configuration section of the relevant installation guide, and set the Identity to the account you would like to run the application
-
Create a copy of the installation files for the application you are configuring the second instance

-
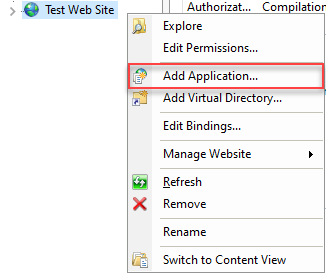
Back within IIS, right click on the new site you have configured, and select "Add Application"
-
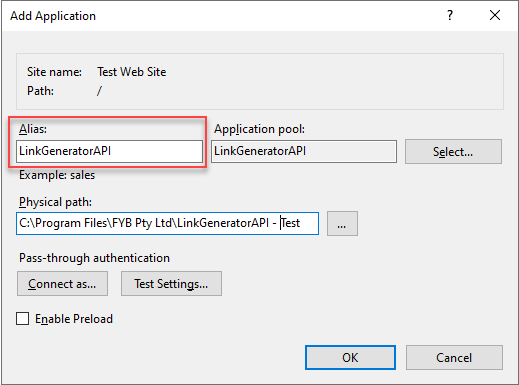
Set the Alias name to match the name used for the initial installation
-
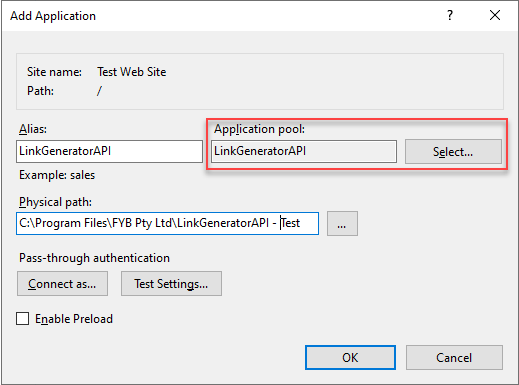
Select the Application Pool created during Steps 5-7
-
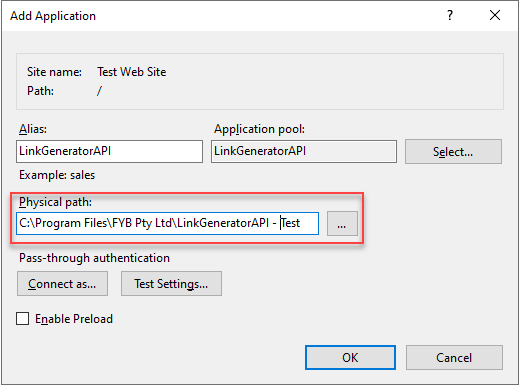
Set the Physical Path to the copy of the installation files taken during step 8 and click "OK"
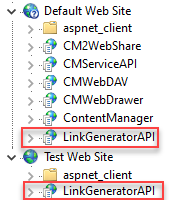
There will now be 2 instances of the application within IIS
-
Complete any IIS Configuration tasks documented within the relevant application's installation guide.
-
Configure the additional instance by following the relevant Admin Guide
REDIRECTING EXISTING LINKSIf upgrading from an older version, additional Redirects may be required to maintain existing links.
Older versions of our Web Applications, that used .NET Framework, could be more easily configured for multiple instances, as they supported custom Application Names. This allowed them to be configured for multiple instances without the need for a secondary Site, by just copying the install files and adding the application in IIS.
EXTERNAL LINK APPLICATIONS
The below steps are required for cases where more than one instance of an External Link Add-in is required (e.g. Separate Test and Production instances)
-
Complete the installation of your Web Application, following the relevant Installation Guide
-
Create a copy of your Add-in's installation files

-
Complete the External Link Configuration steps included in the relevant installation guide
-
Configure the additional instance by following the relevant Admin Guide