
OpenID Confidential Client - Microsoft Guide
OVERVIEW
When using Content Manager with only OpenID Authentication enabled, a Confidential Client is required to be configured for FYB Software applications to Authenticate.
This configuration is only required if your Content Manager dataset has Windows Authentication disabled, and Microsoft EntraID enforced
MODIFY THE CONTENT MANAGER APP REGISTRATION
-
Sign in to Azure web portal using the link below https://azure.microsoft.com/en-gb/features/azure-portal/
-
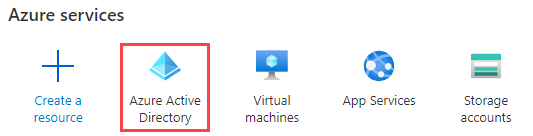
Once signed in, click on the Azure Active Directory button
-
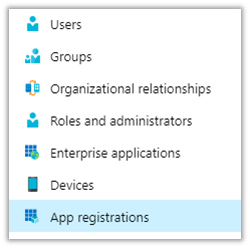
Click on the App Registrations option from the left menu
-
Locate the App Registration used to secure Content Manager
Noteif the user_impersonation custom scope already exits, then the step below can be skipped
-
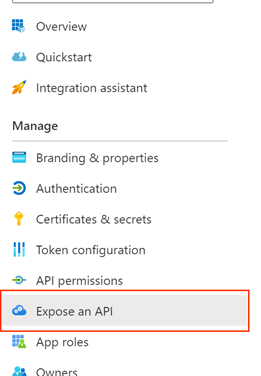
In the Left Menu, click on the Expose an API option
-
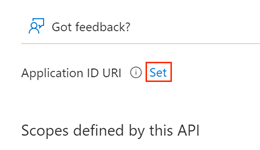
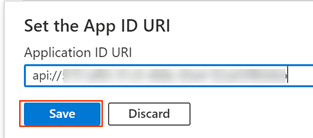
Next to the Application ID URI click on Set
-
Click on the Save button
-
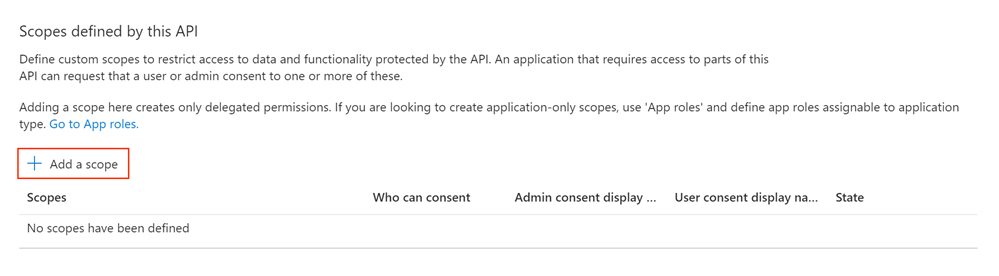
Click Add a scope
-
Specify the values below in the Add a scope window, then click Add scope
NoteThe scope must be named user_impersonation
Field Value Scope Name user_impersonation Who can consent? Admins and users Admin Consent display name Allow SDK Applications To Impersonate Users Admin consent description Allow SDK Applications To Impersonate Users State Enabled 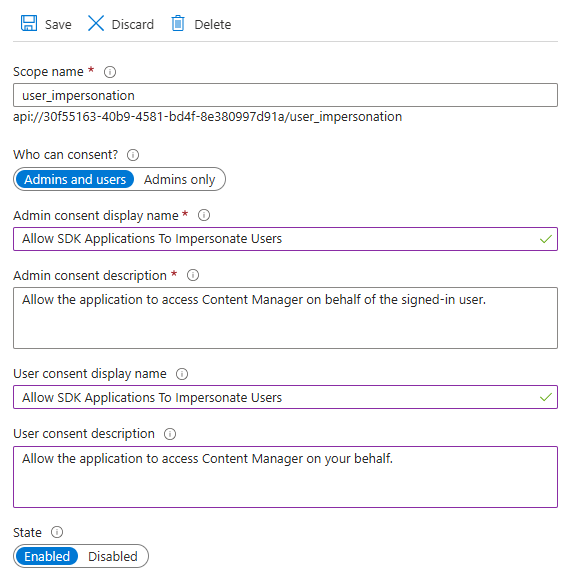
-
Click Save
SETTING UP THE CM CONFIDENTIAL CLIENT LOCATION
If you already have Content Manager Confidential Client location configured then these steps can be skipped
The Content Manager Confidential Client location will allow FYB Connect to connect to Content Manager as the Service Account during the background scheduling process.
CREATE AN AZURE APPLICATION
-
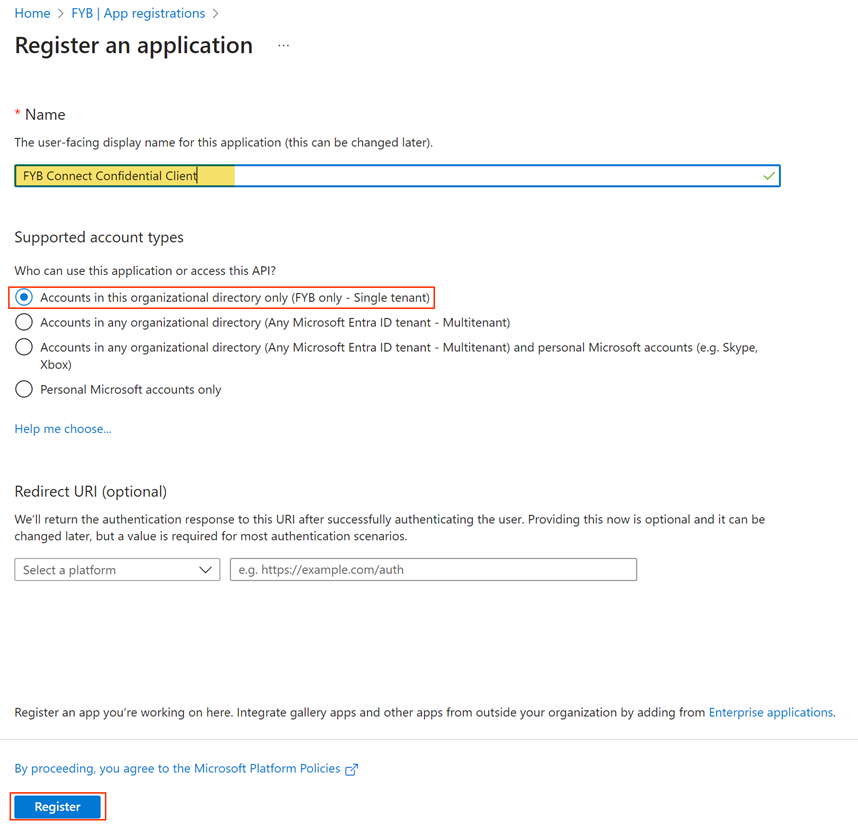
In the App Registrations page, click on New Registration

-
Supply a name for the app and ensure the Single Tenant option is selected.
-
Click Register
-
Navigate to the API permissions section and click Add a permission

-
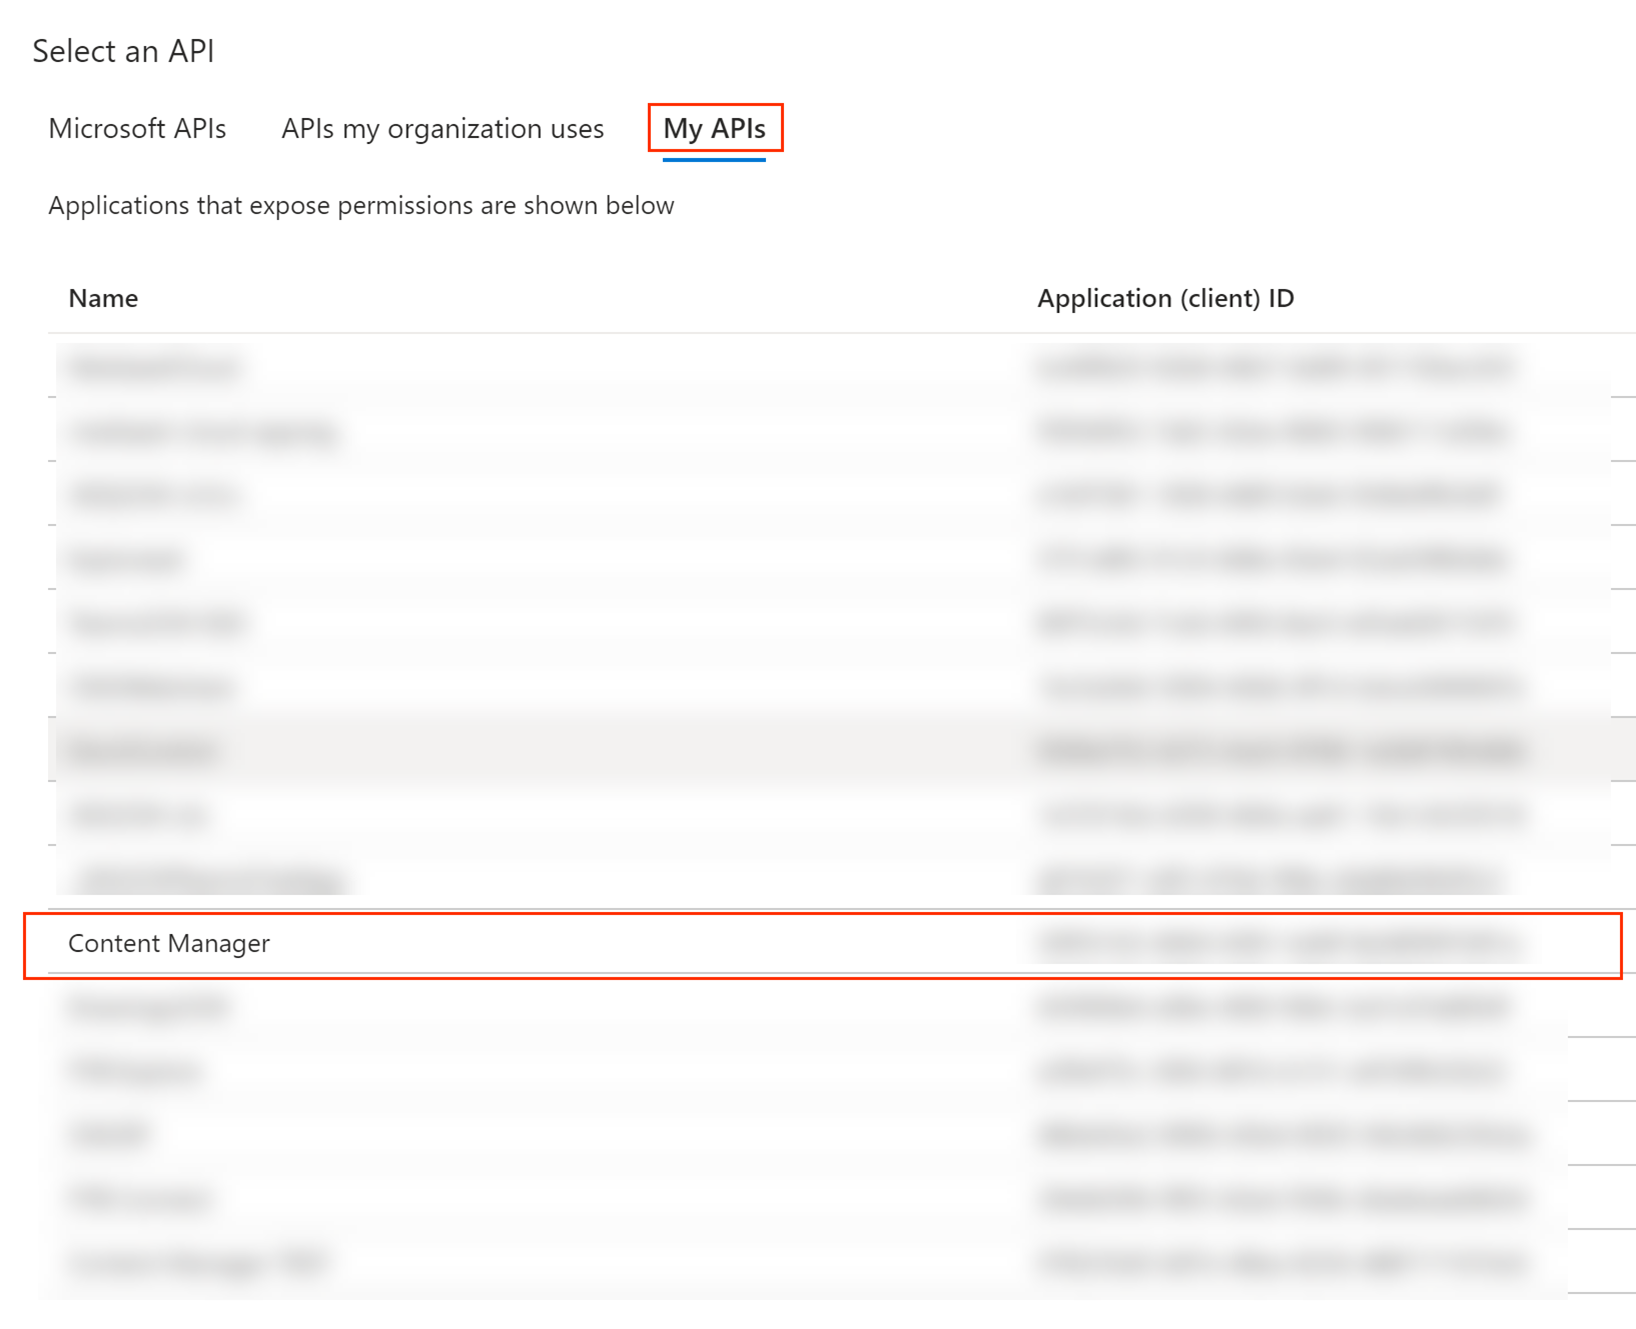
Under the My APIs section, select the app used to secure the Content Manager Service API (the same app used in the MODIFY THE APP REGISTRATION section)
-
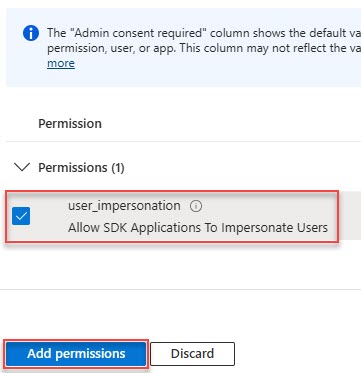
Select the permission configured for the Content Manager Azure app and click Add permissions
-
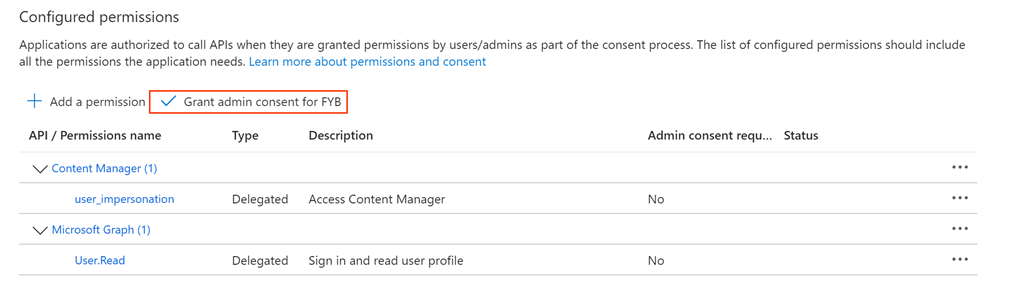
Click Grant Permissions
CREATE THE LOCATION
-
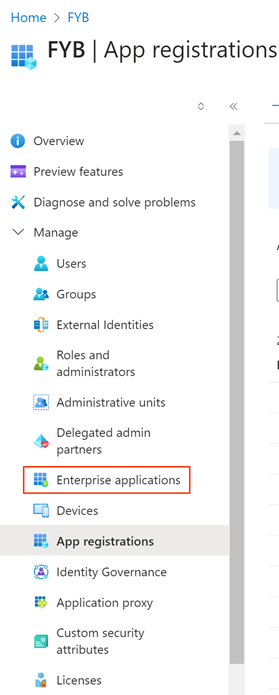
Within the App Registrations section of Entra, click on Enterprise applications
-
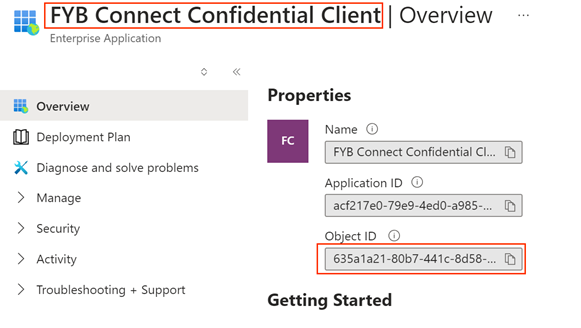
Navigate to the application created in the previous section and copy the Object Id value
-
Navigate to Content Manager
-
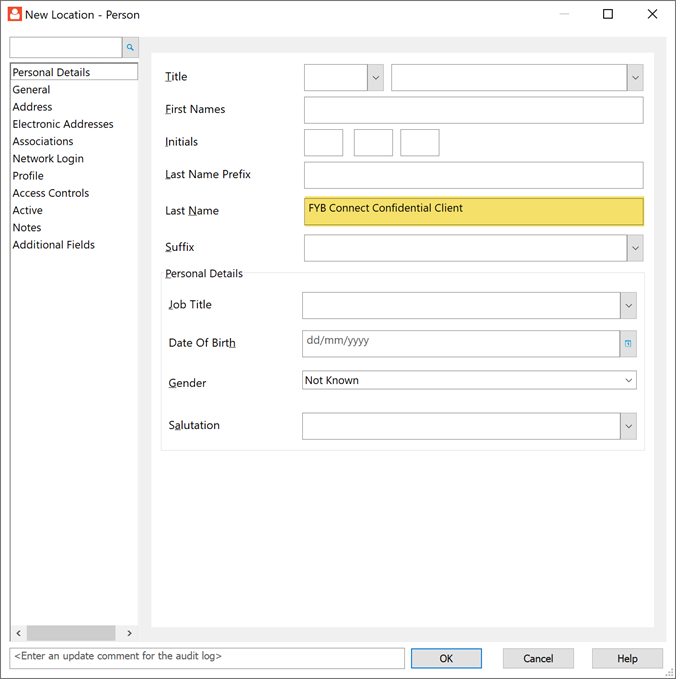
Create a new Person Location
-
Supply a name for the Location
-
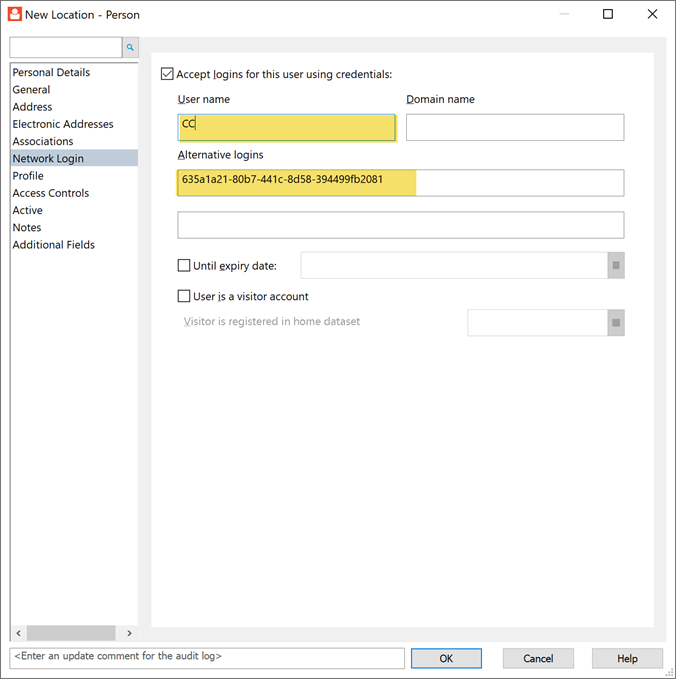
On the Network Login tab, enable the Accept Logins option and supply a username
-
Paste the value copied in step 2 into the Alternative logins field
-
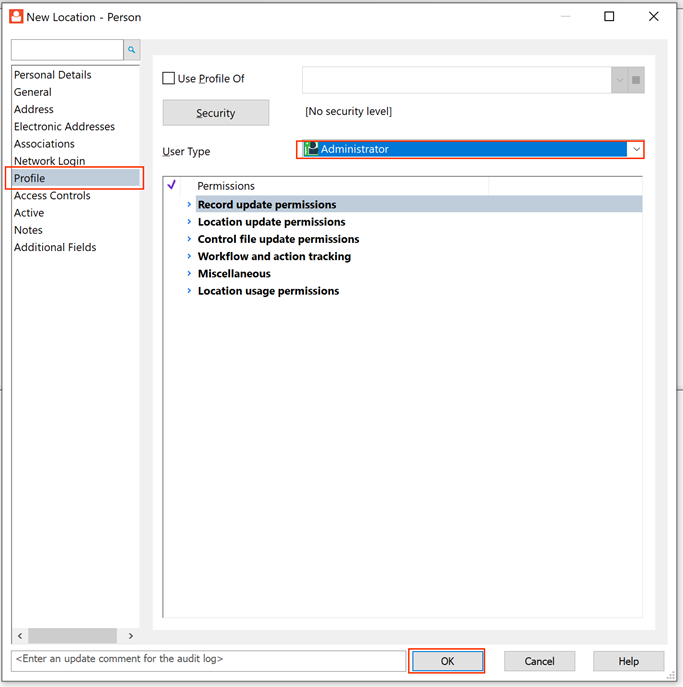
On the Profile tab, set the User Type as Administrator and click Ok
GATHERING APP DETAILS
Please follow the steps below to retrieve the Application ID, Tenant ID and Redirect URL on the Azure portal. These values are required for the installation.
-
Once signed into the Azure portal click on Azure Active Directory
-
Click on App registrations

-
Click on the Content Manager App registration

-
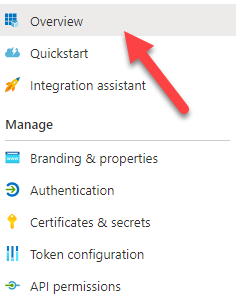
Click on Overview
-
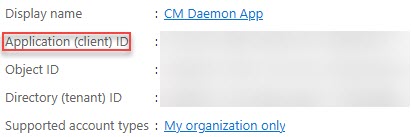
Copy the Application (client) ID and Application ID URI and note them down.

-
Go back to App Registrations and click on the Confidential Client App Registration

-
Click on Overview and copy the Application (Client) ID and note it down
CONFIGURE CONFIDENTIAL CLIENT IN ENTERPRISE STUDIO
-
Log on to the CM Server and open Content Manager Enterprise Studio
-
Right Click on the required dataset and select Properties
-
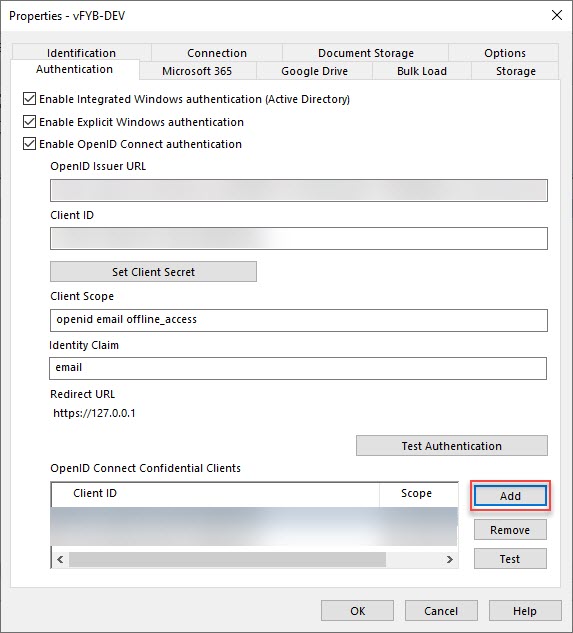
Navigate to the Authentication tab and select Add from the OpenID Confidential Clients section
-
Enter the details as per the below table:
Field Value Client ID The Application ID of the Confidential Client App Registration created above Scope The Application ID URI of the CM App Registration, but with "/.default" appended. 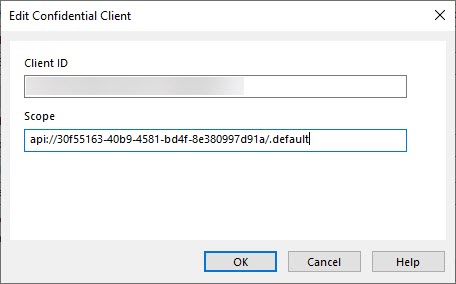
-
Click OK to save and then Test to confirm the Confidential Client is working. Enter the Client Secret from the Confidential Client App Registration when prompted to test.
-
Once tested successfully, click OK and then perform a Save and Deploy to save the changes to CM
VALUES REQUIRED FOR INSTALLATION
The following values will be required for the installation of FYB Connect. Please ensure that the person responsible for the installation has these values.
- Application ID
- Client Secret
- Network Login of Confidential Client Location
Once the above has been completed, you can continue with the installation of your FYB Software