365|2CM Installation Guide
DISCLAIMER
Any advice FYB provide in relation to setting up any FYB App, FYB Add-in, FYB Connector and or advice in relation to opening access to your on-premise or in the cloud systems will be general advice only. This means that the advice is of a general nature and will not take into account your network setup, network infrastructure or any security requirements that you may have or in fact need. It is highly advised that you seek advice from internal or external providers to ensure that they are comfortable with what is required prior to going ahead with any deployment, setup or configuration for external access.
LICENSE DETAILS
Please contact FYB for a valid license if you are yet to obtain one for your Connector.
INSTALLATION COMPONENTS
The following installation components are required to ensure full functionality of 365|2CM:
- 365|2CM web application - this is a server-side installation
AUTHENTICATION
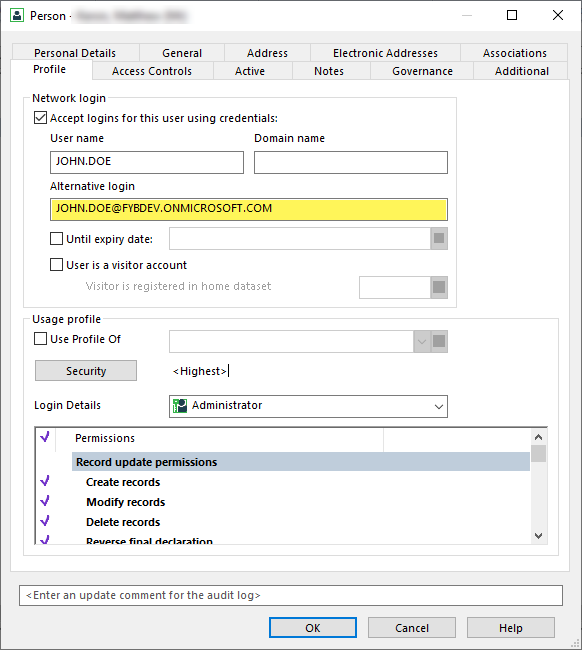
The 365|2CM application uses Azure AD authentication to validate the user’s credentials. Users will be required to enter their M365 login details to sign into the application. The user's M365 login will need to be populated on their Content Manager profile so that the authenticated user can connect to Content Manager, this is done using the alternate login field.
INSTALLING THE 365|2CM WEB SERVICE
LICENSE
-
Create a folder to house the license file (.lic) on the required web server
-
Place the license file in this folder
NoteYou will be asked to enter this location during the installation
TRUSTED USER ACCOUNT
Add the account that will run the application pool as a Trusted User Account in Enterprise Studio. Please refer to your Enterprise Studio help file on adding trusted accounts. If using a system account (application pool identity, network service, etc) you will be required to enter the details as DOMAIN\ServerName$. If using a dedicated Windows service account, you will be required to enter the details as DOMAIN\username. The account running the app pool will need to have a valid Content Manager login.
INSTALLATION
Before running the MSI ensure that all prerequisites are complete. Including deploying the .NET 8 SDK and Hosting Bundle.
To deploy the Net Core SDK and Hosting Bundle to the server, follow these steps:
-
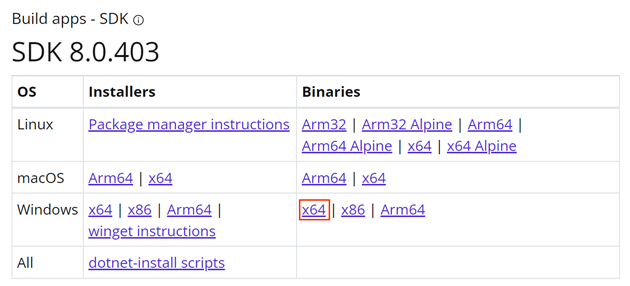
Install the latest .NET 8 SDK (x64) found here
-
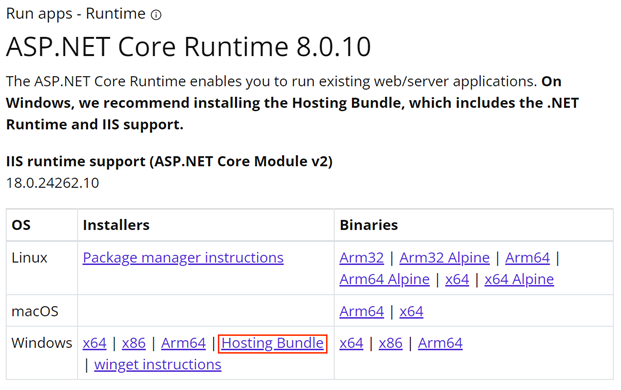
Install the latest ASP.NET Core 8 Runtime Hosting Bundle found here
-
Once both executables have been installed, complete a full server restart to allow for .NET 8 to bind to IIS. If a server restart is not possible an IIS reset can be completed with the following CMDs from an elevated command prompt.
- net stop was /y
- net start w3svc
- iisreset
NoteTo check that the SDK has been attached to the hosting bundle, open Command Prompt and type dotnet --info

To install the 365|2CM web service, follow these steps:
-
Run command prompt as an administrator and launch the 3652cm-xxx.msi
-
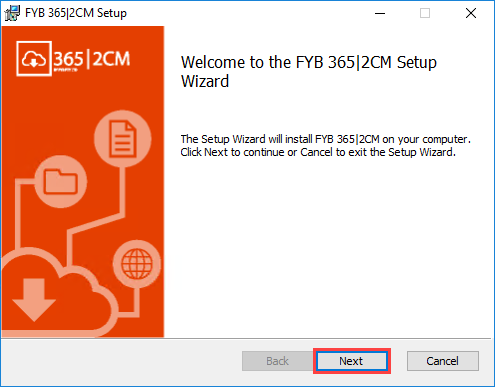
Click on the Next button
-
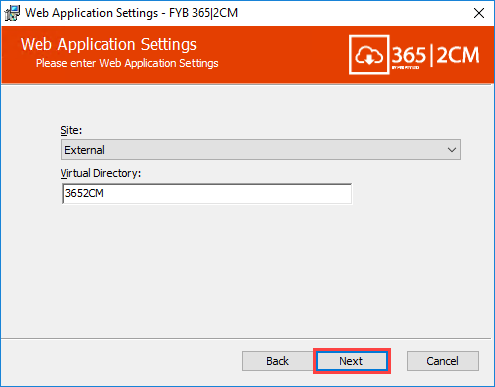
On the Web Application Settings screen select the HTTPS protected dedicated site to host the application. Click on the Next button
NoteA HTTPS site must be selected. The virtual directory name must remain as 3652CM and it cannot be renamed. The virtual directory must match the redirect URI setup for the application on Azure AD
IIS DirectoryThe 365|2CM application must be installed under the dedicated site as an application. It cannot be installed at the site level

-
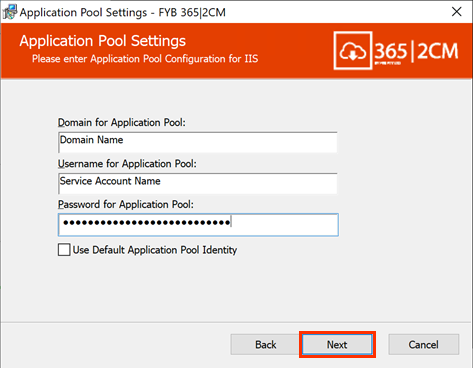
On the Application Pool Settings screen (below), enter the domain, username, and password for the Application Pool identity
-
Click on the Next button
-
On the Configuration Settings screen enter the required information. Further details are in the table below
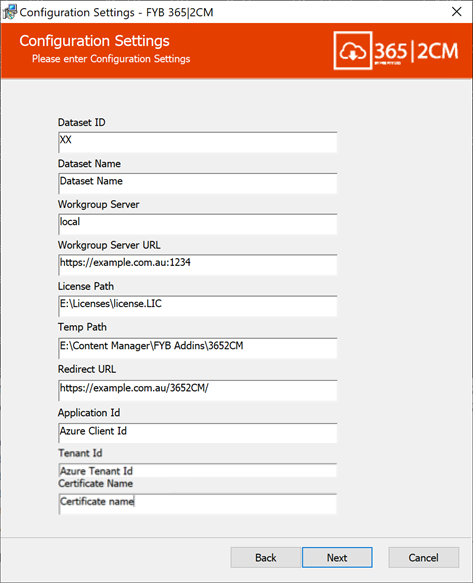
FIELD DESCRIPTION Dataset ID Content Manager two-character dataset identifier Dataset Name The name of your Content Manager Dataset Workgroup Server Content Manager workgroup server name. This should generally be set to local Workgroup Server Content Manager workgroup server URL. License Path Local path to 3652CM license file Temp Path Local temporary directory used by the application to cache content manager documents. Please include the trailing slash, for example: C:\FYB Add-Ins\3652CM\ Redirect URL The URL where Azure will send the authentication payload upon successful authentication. Application ID The application ID for the registered app on AzureAD Tenant ID The organization tenant's unique identifier on AzureAD Certificate Name The friendly name of the nominated certificate (.pfx) installed on the machine. NotePlease refer to the AZURE APP REGISTRATION guide for more information on:
- Application ID
- Redirect URL
- Tenant ID
- Certificate Name
-
On the Email Settings screen, enter the following fields
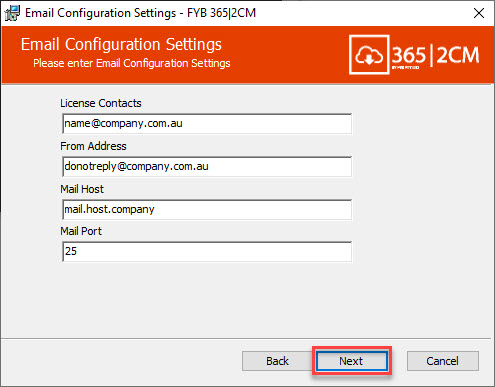
FIELD DESCRIPTION License Contacts Contacts that will receive a notification when the 3652CM license is about to expire. Multiple email addresses can be added if separated with a ; From Address The email address that all email notifications are sent from. Mail Host The mail host that is used to send all email notifications from. Mail Port The mail port -
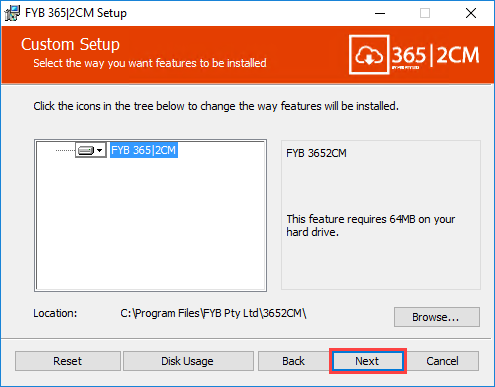
On the Custom Setup screen select the install location and click on Next button
-
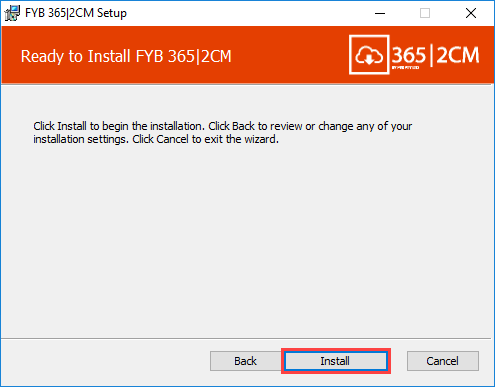
Confirm the installation by clicking on the Install button
-
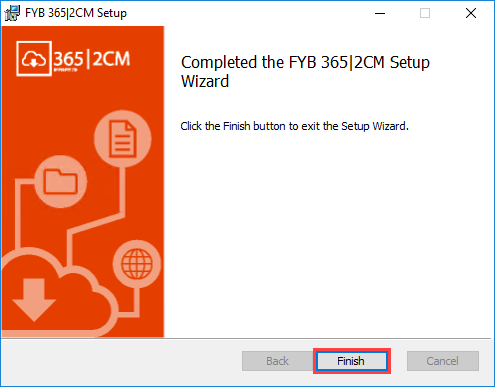
Once the installation is complete click on the Finish button
CONFIGURATION
IIS CONFIGURATION
-
After the installation process is complete, you will be able to locate the application installed within the site selected during installation
-
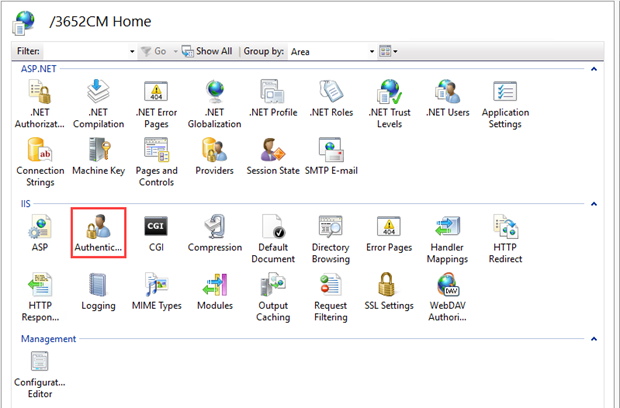
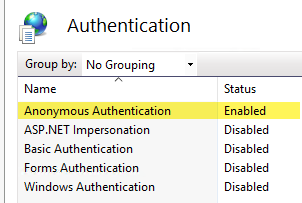
From the Features View double click on Authentication and ensure that only Anonymous Authentication is enabled
-
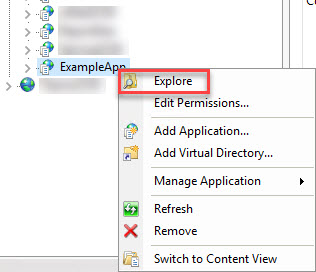
Right click the application in IIS and select explore
-
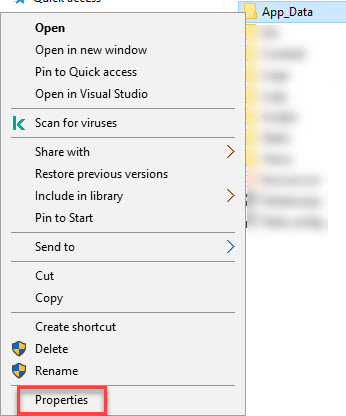
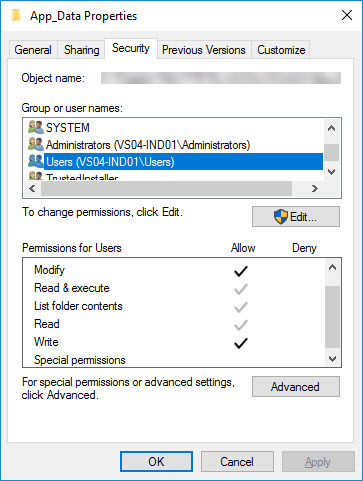
Right click the app data folder and select properties
-
Navigate to the security tab and ensure users have read, write and modify permissions
-
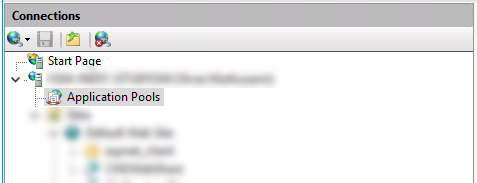
Click on Application Pools
-
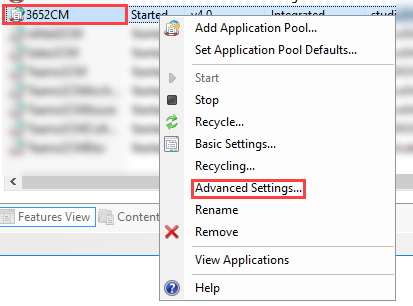
Locate 3652CM and click Advanced Settings
-
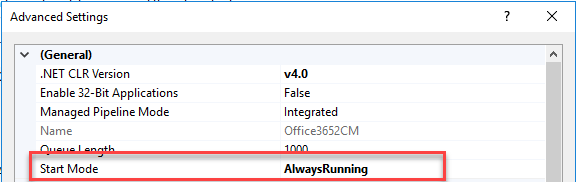
Under General ensure that Start Mode is set to Always Running
-
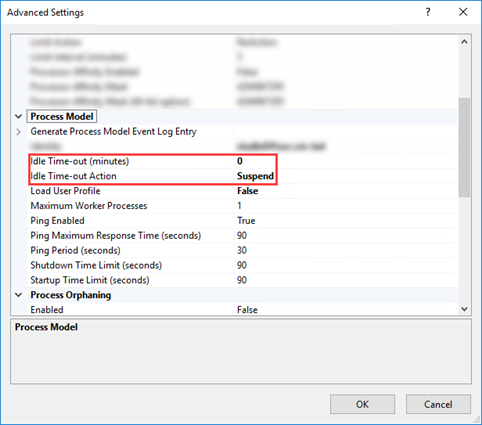
Under Process Model ensure that: • Idle Time-out (minutes) is set to 0 • Idle Time-out Action is set to Suspend
-
Click on the OK button
-
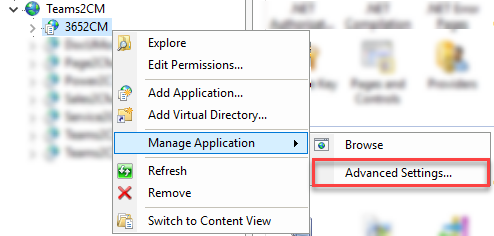
Right click on the 3652CM app > Manage Application > Advanced Settings
-
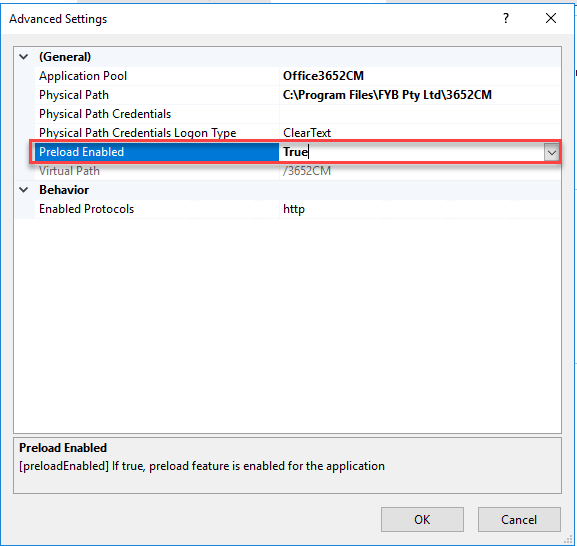
Ensure that Preload Enabled is true
CONTENT MANAGER CONFIGURATION
The following additional fields need to be created in Content Manager. Any record type that you wish to use with 365|2CM will need to have these fields attached.
| Name | Data Format | Description | Record Types |
|---|---|---|---|
| 365ID | String, Maximum Length: 255 | Used to store the unique identifier for the files stored on SharePoint, it is used to establish a one to one relationship for files between the two systems. | Container and Document |
| QuickXorHash | String, Maximum Length: 255 | Used to store the hash of a document from SharePoint to determine if records will need to be updated with new revisions. | Document |
| 3652CM Source | String, Maximum Length: 255 | Used to store the source location of the document to be displayed on the Activities page | Document |
| Drive ID | String, Maximum Length: 255 | Used to store the drive ID of the SharePoint document. This is required for the Edit/View in M365 external links. | Document |
CLIENTLESS CONFIGURATION (OPTIONAL)
If FYB 365|2CM was installed in an environment that does not have the Content Manager client installed, please follow the steps below:
-
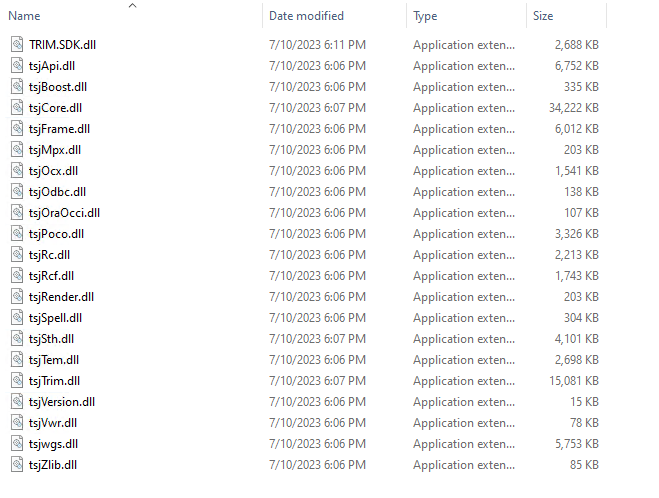
You will need to obtain the following files from an environment where a 64 bit version of Content Manager has been installed by navigating to the install directory of Content Manager (e.g. C:\Program Files\Micro Focus\Content Manager):
-
Copy the files listed above and paste them into the bin folder in the installation directory of 365|2CM (e.g. C:\Program Files\FYB Pty Ltd\3652CM\bin)
-
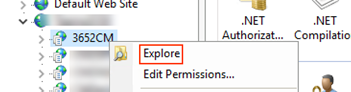
Right-Click the 365|2CM app in IIS and click Explore
-
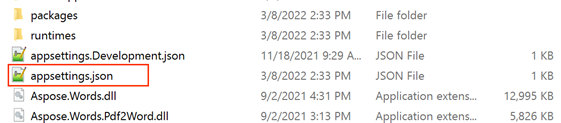
Open the appsettings.json file in the text editor of your choice
-
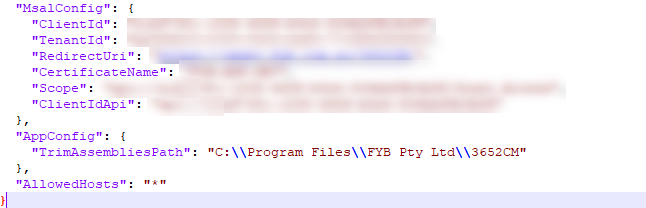
Update the value of the TrimAssembliesPath to the folder specified in step 2
-
Complete an app pool restart
Warning!Ensure the Microsoft Visual C++ Redistributables are installed if using this feature.
EDIT/VIEW IN M365 EXTERNAL LINK (OPTIONAL)
The latest version of CMLauncher is required for this feature.
The Edit/View in M365 External Link allows users to either edit or view documents in Sharepoint that were transferred via 365|2CM. This feature will only work for records that contain valid 365ID and Drive ID additional field values. When the Edit in M365 external link button is clicked, the document is checked out of Sharepoint. Once the user closes the document, the document is checked back into Sharepoint. 365|2CM will update the respective Record with the updated document during the next archiving process.
-
In Content Manager, under the Administration tab, click External Links

-
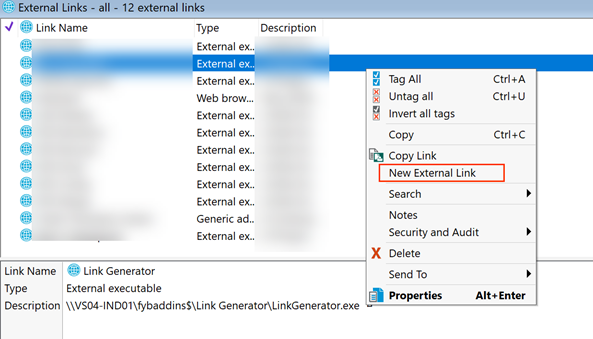
Right-click anywhere in the External Links view and click New External Link
-
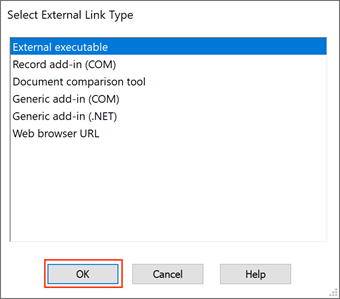
Select External Executable then click Ok
-
Specify the values below:
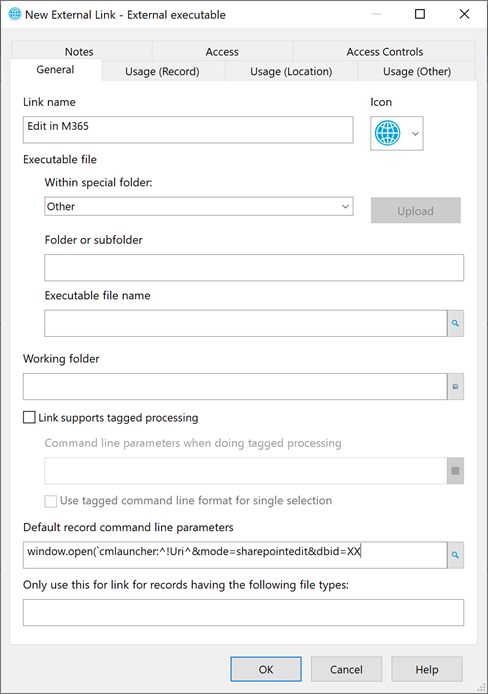
NAME DESCRIPTION Link Name Edit in M365 Command line parameters window.open(`cmlauncher:^!Uri^&mode=sharepointedit&dbid=XX (where XX is the CM Database ID) -
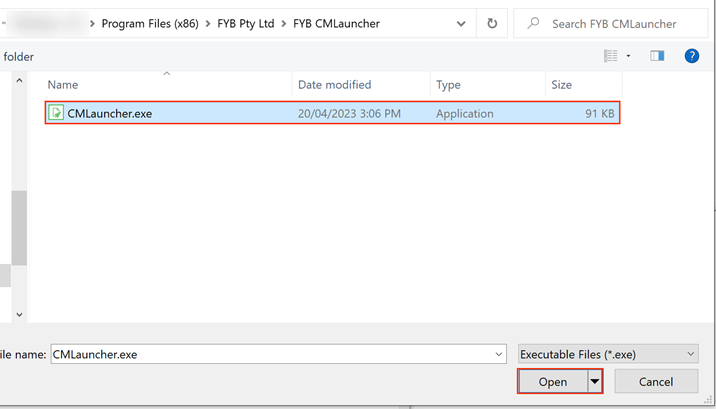
For the Executable File Name click the magnifying glass

-
Navigate to the CMLauncher installation path
-
Select CMLauncher.exe and click Open
-
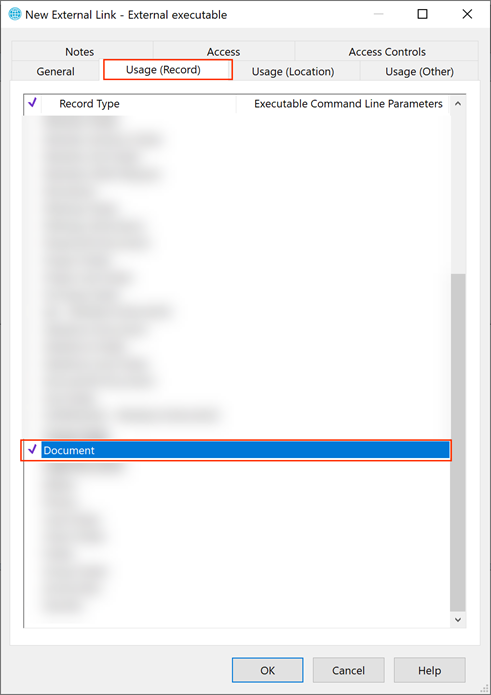
On the Usage (Record) tab, tag the document record types used by 365|2CM
-
Click on the Ok button

Repeat the steps above for configuring the View in M365 External Link except with the below changes.
| NAME | DESCRIPTION |
|---|---|
| Link Name | View in M365 |
| Command line parameters | window.open(`cmlauncher:^!Uri^&mode=sharepointview&dbid=XX (where XX is the CM Database ID) |
INSTALLING TEAMS CHAT CAPTURE (OPTIONAL)
For Teams Chats to be automatically archived, 365|2CM must be created as a Teams Personal Tab App and uploaded to Teams. This is because the user's access token is required to archive their chats without user interaction and without 365|2CM needing to be open in a browser.
The chat capture app is user-specific and every user that wishes to use it must upload it to their own instance of teams. The steps below are for the IT Team/Admin to create an app package that can then be distributed to end-users. Steps for uploading the app package into Teams can be found in the user guide.
CREATING A PERSONAL TEAMS TAB APP
-
Navigate to the Teams Developer Portal
-
Click on the New App button

-
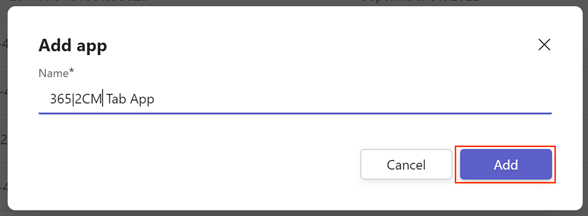
Supply a name and click App
-
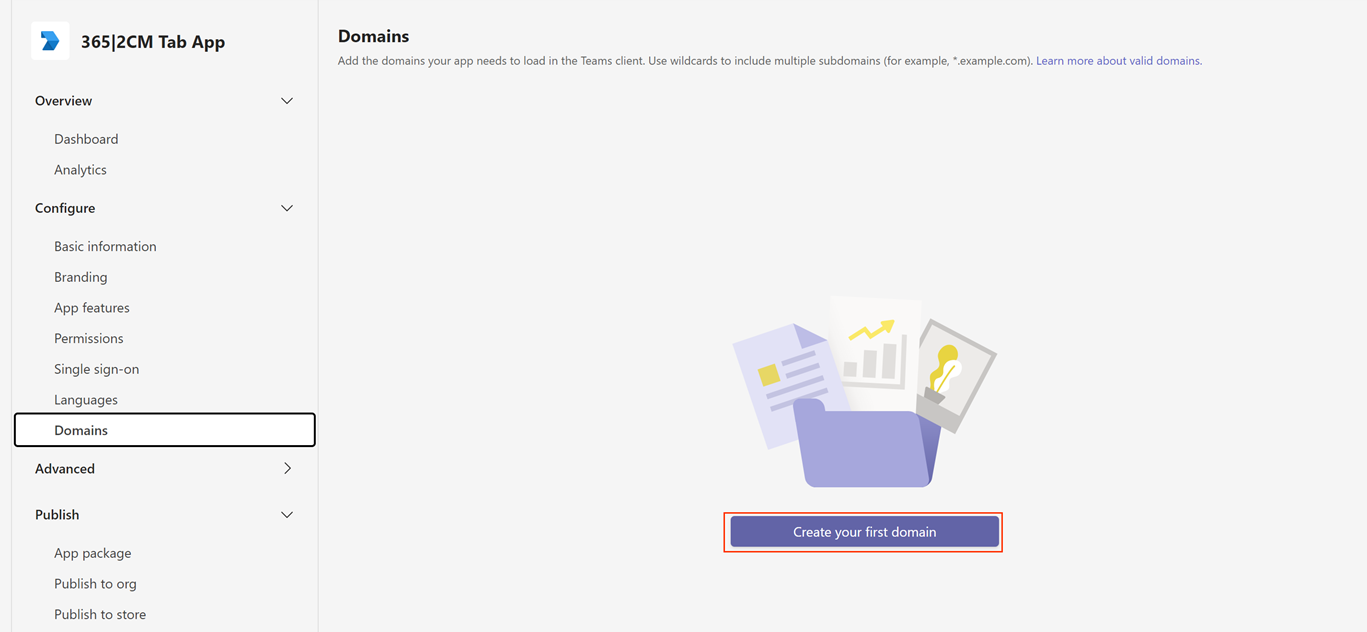
Click on the Domains section and click on Create your first domain
-
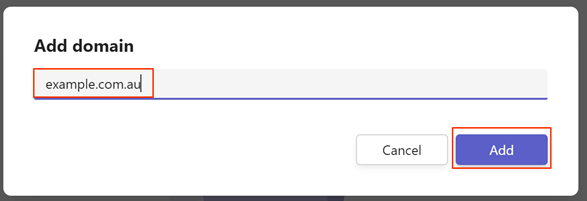
Enter the domain of the site that 365|2CM is installed under and click on the Add button
-
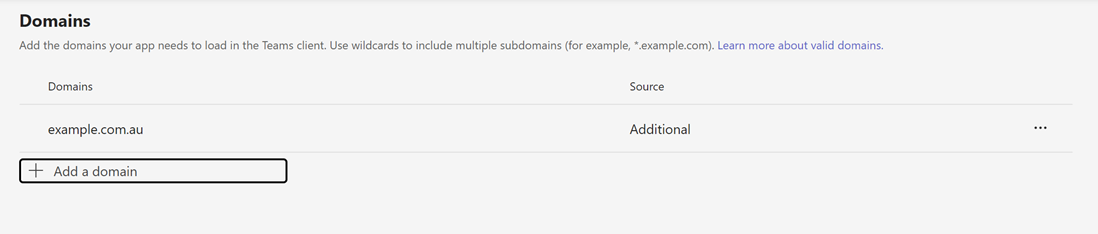
Click Add a Domain
-
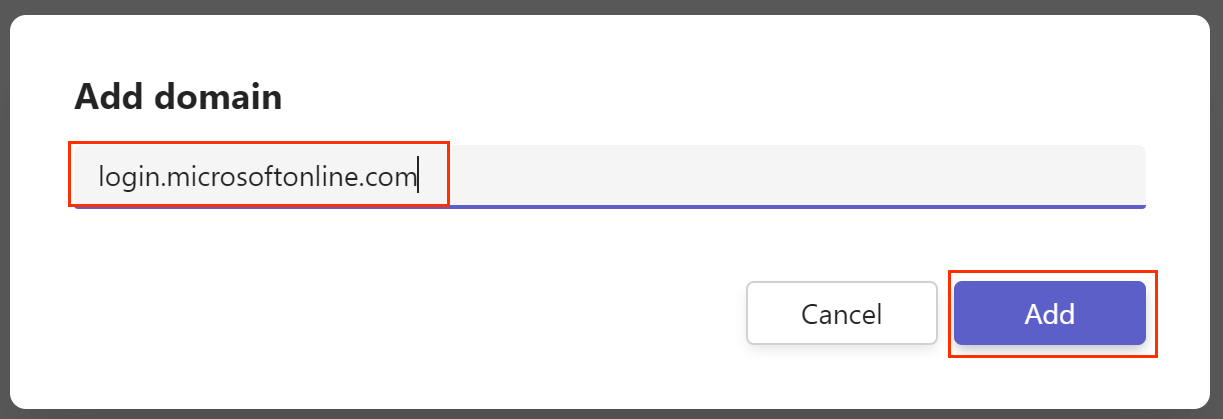
Enter login.microsoftonline.com and click on the Add button
-
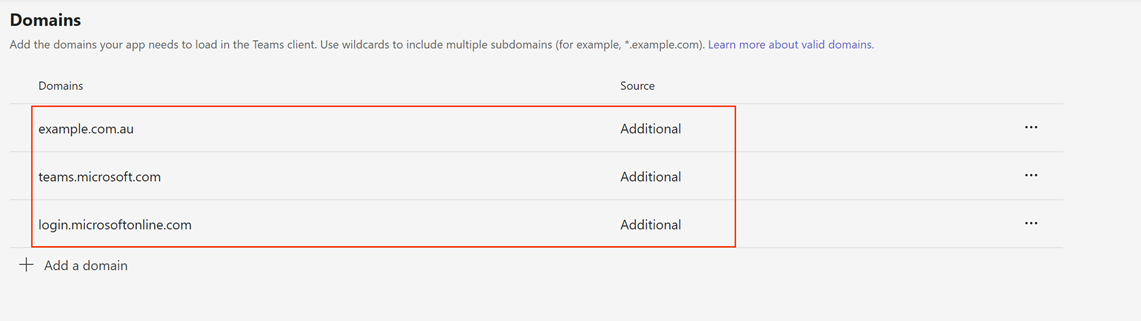
Repeat steps 6 and 7 and add teams.microsoft.com as a domain
-
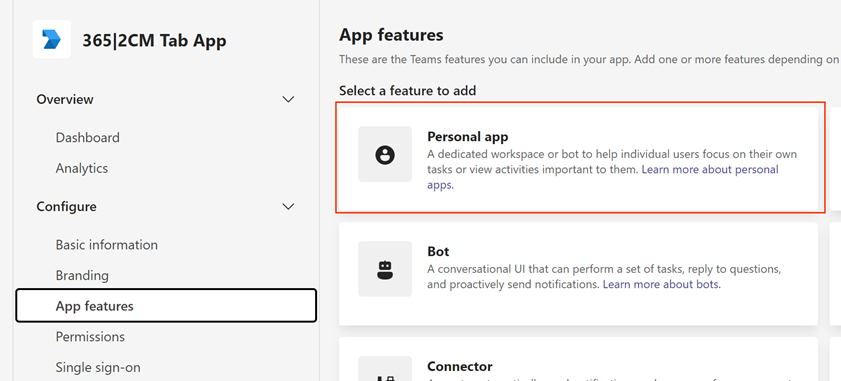
Click on App Features then click Personal App
-
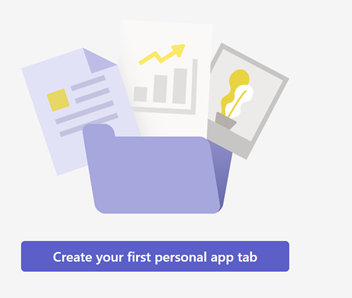
Click Create your first personal app tab
-
Add the information below and click on the Confirm button
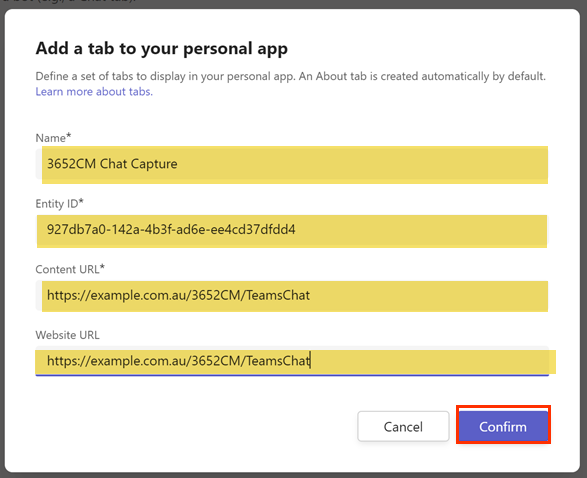
NAME DESCRIPTION Name 3652CM Chat Capture Entity Id Use the supplied default value Content URL The URL of 3652CM followed by /TeamsChat. For example: https://example.com.au/3652CM/TeamsChat Website URL The same value as the Content URL -
Click on the Save button

-
Click on Basic Information then fill in the information below, then click on the Save button
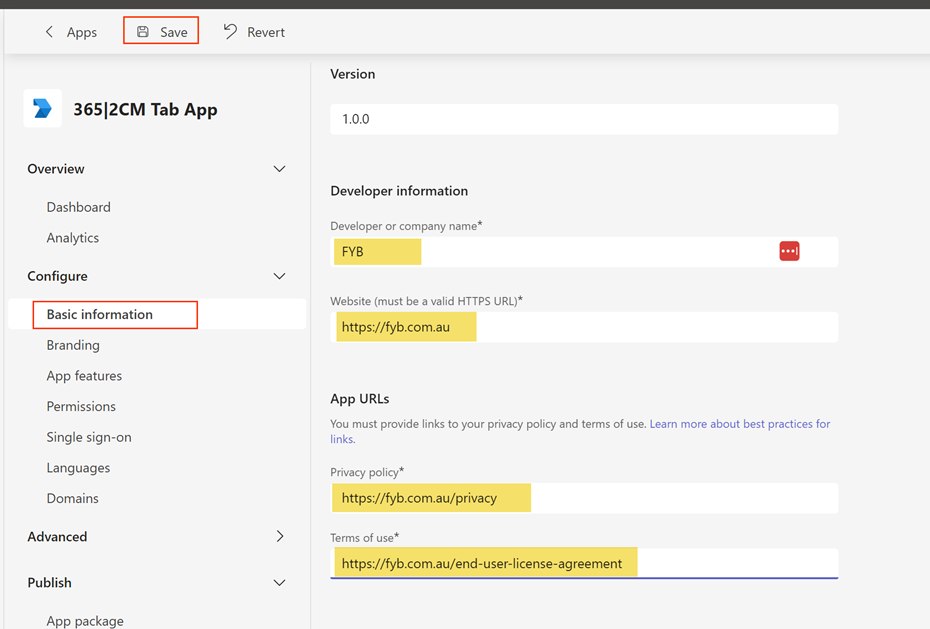
NAME VALUE Developer or company name FYB Website (must be a valid HTTPS URL) https://fyb.com.au Privacy policy https://fyb.com.au/privacy Terms of use https://fyb.com.au/end-user-license-agreement -
Click on Apps

-
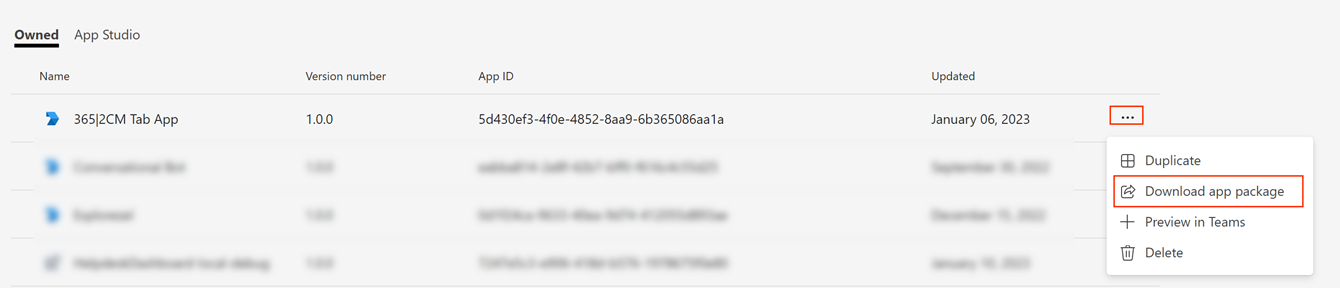
Next to your app click the ellipsis and then click Download App Package. This zip file will be required when uploading the Chat Capture app to Teams
 Note
Please refer to the user guide for details on uploading the app package to your instance of Teams (user-specific). It is recommended that you store the app package somewhere your end-users can access it as each user has to upload it themselves if they wish to make use of it.
INSTALLING CM LAUNCHER (OPTIONAL)
The FYB CMLauncher can be installed if required. It allows users to open records in CM from the 365|2CM activities page or utilize the M365 buttons inside CM. Please refer to the CMLauncher Installation Guide for further details.
UNINSTALLING 365|2CM WEB SERVICE
To uninstall FYB 365|2CM manually please follow the steps below:
-
Navigate to Control Panel

-
Click on Uninstall a program

-
Locate FYB 365|2CM in the list of Programs and feature

-
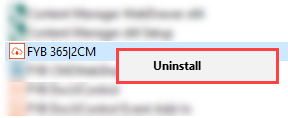
Right click on FYB 365|2CM and click on the Uninstall option
-
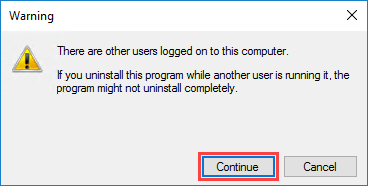
If a warning Prompt appears, click on the continue button
-
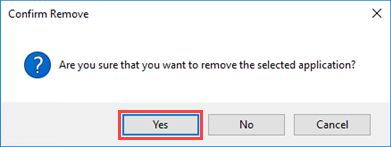
Click on the Yes button

-
The uninstallation process will commence

-
Open IIS once the uninstallation process is completed
-
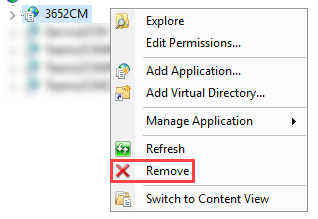
Locate 365|2CM in IIS, right click and click on the Remove button
-
When the prompt appears click on the Yes button