Drawings2CM AutoCAD Plugin Installation Guide
DISCLAIMER
Any advice FYB provides in relation to setting up any FYB App, FYB Add-in, FYB Connector and or advice in relation to opening access to your on-premise or in the cloud systems will be general advice only. This means that the advice is of a general nature and will not take into account your network setup, network infrastructure or any security requirements that you may have or in fact need. It is highly advised that you seek advice from internal or external providers to ensure that they are comfortable with what is required prior to going ahead with any deployment, setup or configuration for external access.
LICENSE DETAILS
Please contact FYB for a valid license if you are yet to obtain one for your Add-in.
INSTALLATION COMPONENTS
The following installation components are required to ensure the complete functionality of the Drawings2CM AutoCAD plugin:
- Drawings2CM AutoCAD plugin - This is a client-side installation
INSTALLING THE DRAWINGS2CM AUTOCAD PLUGIN
INSTALLATION
-
Create an FYB Add-ins folder on the appropriate Content Manager workgroup server

-
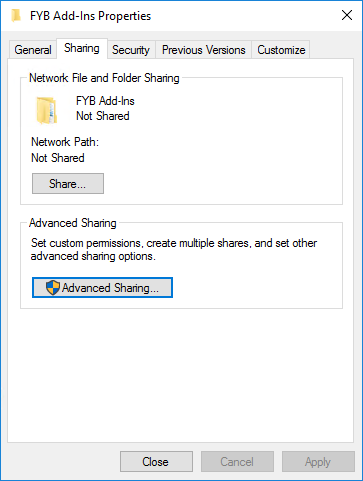
Right-click on the FYB Add-ins folder and navigate to the Properties tab
-
Click on the Sharing tab
-
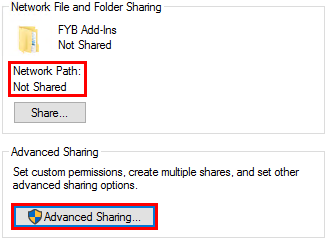
Click on the Advanced Sharing button
-
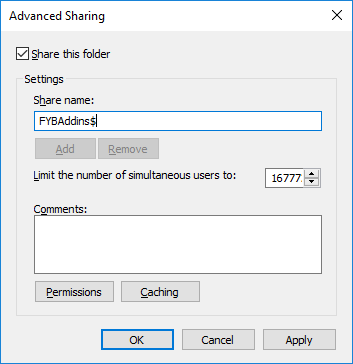
In the Advanced Sharing window, enable Share this folder and remove the space between FYB and Add-ins
-
Within the Share Name field add a ‘$’ sign which will keep the folder hidden
-
Click on the Permissions button
-
Give Everyone the Full Control permission

-
A network path will now be available
-
Create a folder inside the FYB Add-ins folder to house the license file (.lic) on the server

-
Place the license file in this folder
NoteYou will be asked to enter the shared path of this file during the installation
-
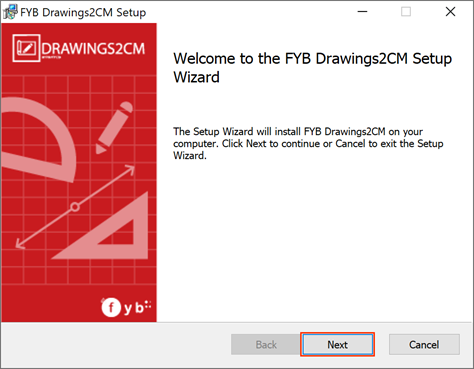
Transfer the drawings2cm-autocadplugin-xxx.msi to the client machine you wish to install it onto. Double-click the MSI to run the installer
-
Click on the Next button
-
On the Configuration Settings screen enter the required information. Further details are in the table below
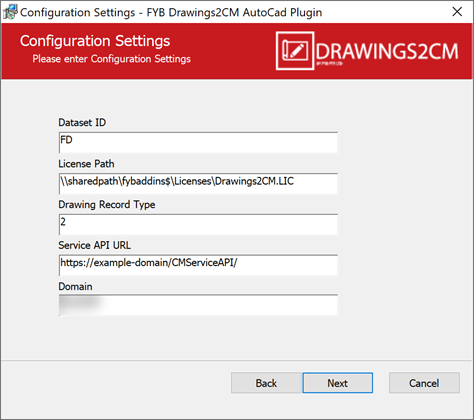
Field Description Dataset ID Content Manager two-character dataset identifier License Path Local path to Drawings2CM AutoCAD Plugin license file Drawing Record Type The URI of the Drawing Record Type Service API URL The URL of the Content Manager Service API Domain The domain of your Content Manager login credentials -
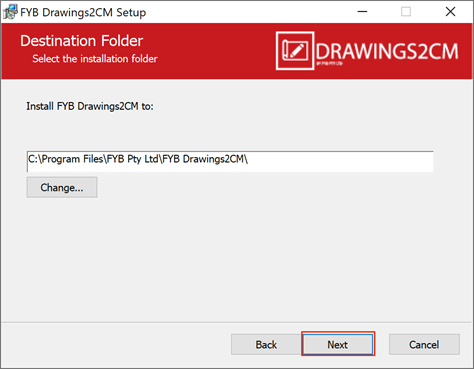
On the Destination Folder screen, select the install location, click on the Next button
-
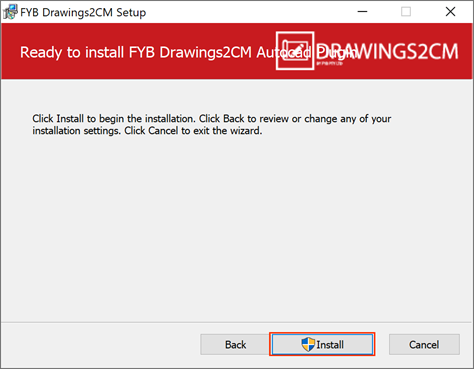
Click on the Install button
-
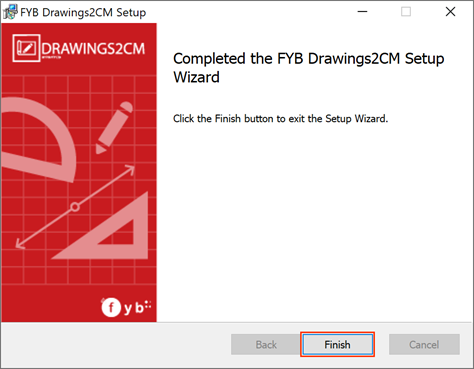
Once the installation process completes, click on the Finish button
CONFIGURATION
-
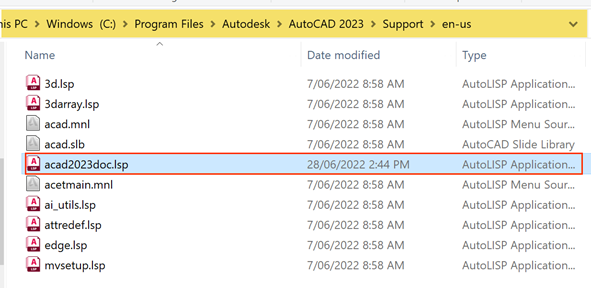
Open File Explorer and navigate to C:\Program Files\Autodesk\AutoCAD 2024\Support\en-us
-
Locate the acad2024doc.lsp and open it in the text editor application of your choice
-
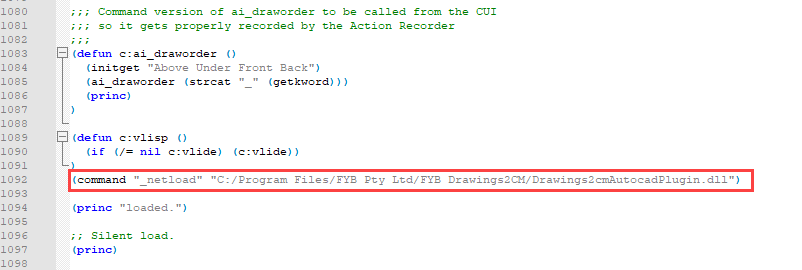
Copy this line: (command "_netload" "C:/Program Files/FYB Pty Ltd/FYB Drawings2CM/Drawings2cmAutocadPlugin.dll")
NoteThe installation path must use forward slashes. Replace any backslashes with forward slashes after pasting the install path.
NoteIf your install path differs to the default path above you will need to update this accordingly.
-
Locate the (princ "loaded.") line and paste the line copied in Step 3 above the (princ "loaded.") line
-
Save the changes made and close the acad2024doc.lsp file
ADDING TO THE RIBBON
-
Run AutoCAD and select an existing file
-
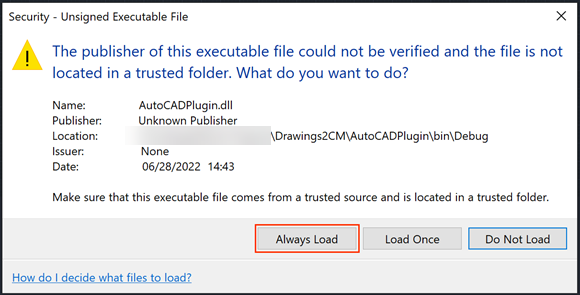
The message below will appear. Click Always Load to ensure the plugin is always loaded whenever AutoCAD is launched
-
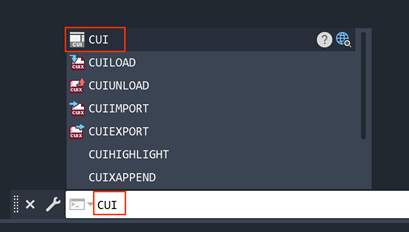
In the command box at the bottom of the screen, type CUI and press Enter on your keyboard
-
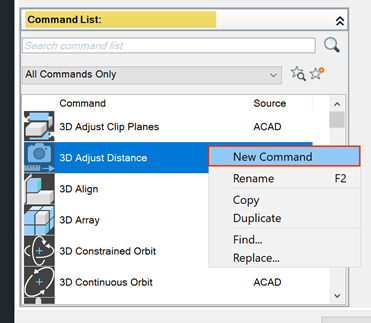
In the Command List panel, right-click on any command and click New Command
-
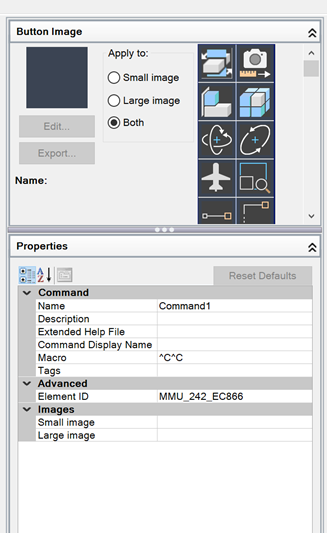
On the right side of the Custom User Interface, a panel will appear to configure the new command
-
Fill out the fields with the information below:
Field Value Name Drawings2CM Desctription Start the Drawings2CM plugin Command Display Name StartDrawings2CM Macro STARTDRAWINGS2CM 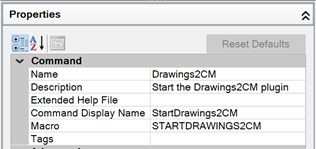
-
In the Images section, click the ... button for the Small image row

-
Navigate to the install directory of the Drawings2CM AutoCAD plugin and select the Drawings2CM Icon.bmp file and click Open

-
Repeat step 8 for the Large Image row

-
Click on the Apply button

-
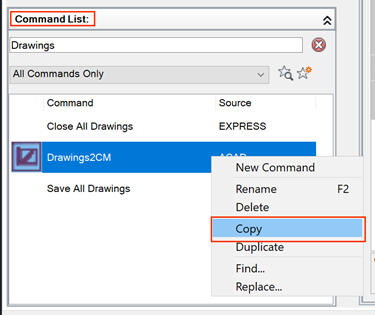
In the Comand List panel, right-click on the Drawings2CM command and select the Copy option
-
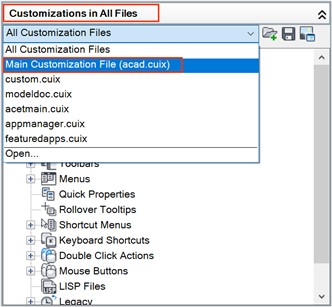
In the Customizations in All Files panel, select Main Customization File (acad.cuix) from the dropdown
-
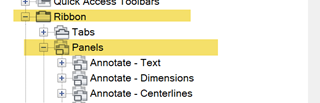
Navigate to and expand the Ribbon > Panels > View Interface section
-
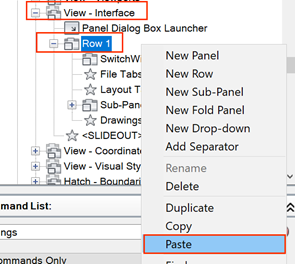
Right-click on Row 1 and select the Paste option
-
Click on the Apply button and proceed with clicking on the OK button


-
The Drawings2CM AutoCAD Plugin can now be launched from the View Ribbon

CMService API Config Update
-
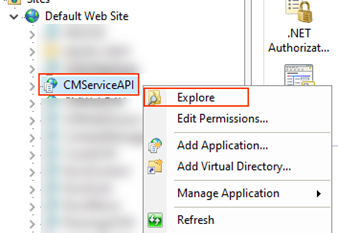
In IIS, locate the CMServiec API app, right-click it and select Explore
-
Locate and open the hptrim.config file as an administrator

-
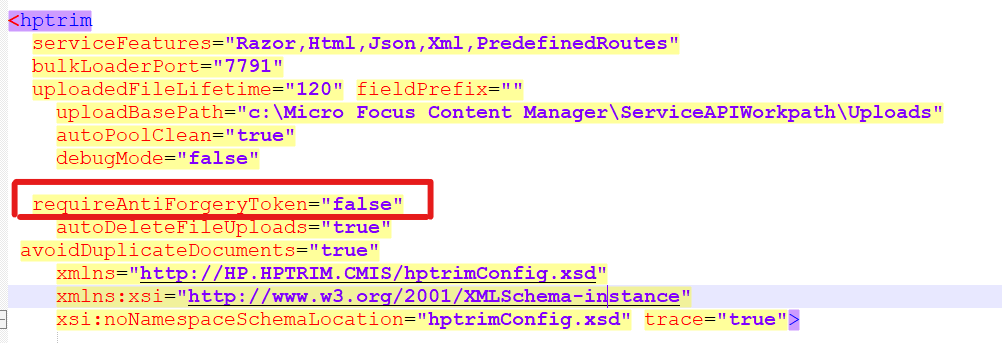
Within the <hptrim> tag, add the requireAntiForgeryToken property (if it hasn't been added already) and set its value to "false"