
InfoSecurity Guard Installation Guide
DISCLAIMER
Any advice FYB provides in relation to setting up any FYB App, FYB Add-in, FYB Connector and or advice in relation to opening access to your on-premise or in the cloud systems will be general advice only. This means that the advice is of a general nature and will not take into account your network setup, network infrastructure or any security requirements that you may have or in fact need. It is highly advised that you seek advice from internal or external providers to ensure that they are comfortable with what is required prior to going ahead with any deployment, setup or configuration for external access.
LICENSE DETAILS
Please contact FYB for a valid license if you have yet to obtain one for your Connector.
INSTALLATION COMPONENTS
The following installation components are required to ensure the full functionality of InfoSecurity Guard:
- Installation of InfoSecurity Guard External Link, this is a server-side installation
- Installation of InfoSecurity Guard Event Add-in, this is a server-side installation
INSTALLING INFOSECURITY GUARD
INSTALLATION
-
Create a folder for FYB Addins on your Workgroup Server For Example: ‘X:\HPE Content Manager\FYB Addins\
-
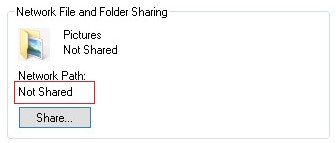
Right click on the FYB Addins folder > Properties > click on the Sharing tab
-
If the Network Path is set to ‘Not Shared’
-
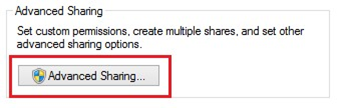
Click on the Advanced Sharing button
-
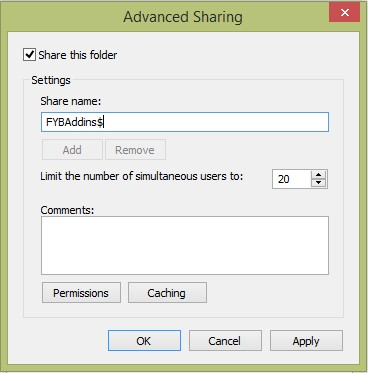
In the Advanced Sharing window, enable Share this folder option and remove the space between FYB and Addins, then add a ‘$’ sign which will keep the folder hidden
-
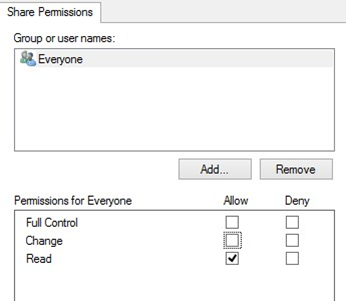
Click on the Permissions button
-
Give Everyone the ‘Read’ permission
-
A Network Path will now be available
-
Create a license folder inside the FYB Addins folder and place the license in this folder. This path will be required during the MSI installation
ExampleX:\HPE Content Manager\FYB Addins\Licenses
-
Once the above folders have been created run the infosecurityguard-111-32bit/64bit.msi from the desired Workgroup Server
-
Before running the installer, please ensure you have administrative privileges.
-
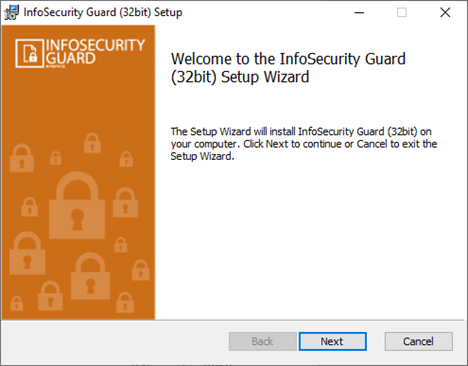
Run the installer and click on the Next button
-
On the Configuration Settings screen, enter the dataset ID, License Path and Internal Domain
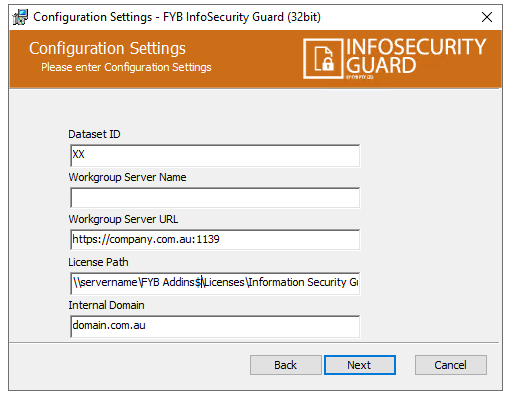
NAME OF FIELD FUNCTIONALITY Dataset ID The ID of the Content Manager dataset to be used with InfoSecurity Guard. Workgroup Sever Name The workgroup server name used to connect to the Content Manager dataset. The workgroup server name OR workgroup URL can be utilised. Workgroup Sever URL The workgroup server URL used to connect to the Content Manager dataset. The workgroup server name OR workgroup URL can be utilised. License Path The path of the license file for InfoSecurity Guard within the network shared folder created in step 9. E.g “\Server\fybaddins$\Licenses\InfoSecurityGuard_ddMMyyyy.lic” Internal Domain Use this option to indicate the domain of the organisation. Prior to sending an email, this domain will be checked to determine if the email is being sent internally or externally. -
Click on the Next button
-
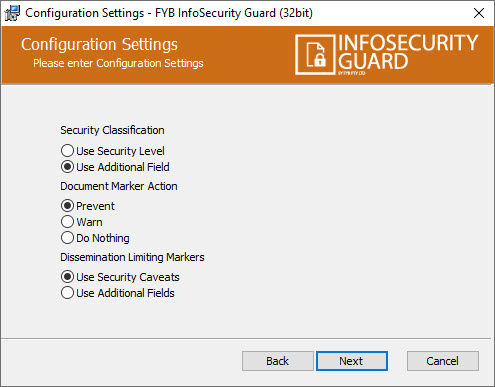
On the Configuration Settings (Cont.) screen, select the configuration for: a. The Security Classification; b. Document Marker Action; and c. Dissemination Limiting Markers.
| NAME OF FIELD | FUNCTIONALITY |
|---|---|
| Security Classification - Use Security Level - Use Additional Field | Use this option to indicate how Security Classifications are to be set in Content Manager. For more information, refer to the section **Creating Security Classifications and DLMs ** |
| Document Marker Action - Prevent - Warn - Do Nothing | Use this option to indicate the action that should happen when security markers are set on a record, but not present in the document. Prevent: Users cannot confirm or send documents that do not contain all the security markers that are on the record. Warn: Users receive a warning message when they email a document that does not contain all the security markers that are on the record. Do Nothing: Users are not notified if a document does not contain all of the security markers that are on the record. |
| Dissemination Limiting Markers - Use Security Caveats - Use Additional Fields | Use this option to indicate how Dissemination Limiting Markers are to be set in Content Manager. For more information, refer to the section **Creating Security Classifications and DLMs ** |
-
Click on the Next button
-
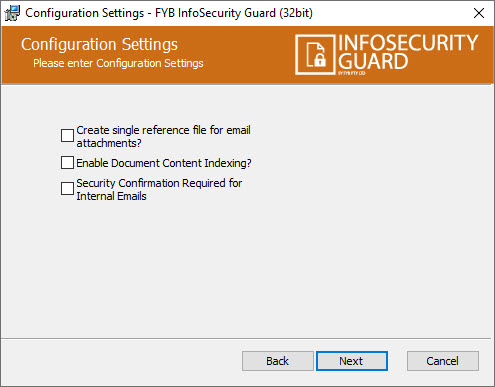
On the Configuration Settings (Cont.) screen, choose additional settings as required.
-
Click on the Next button
-
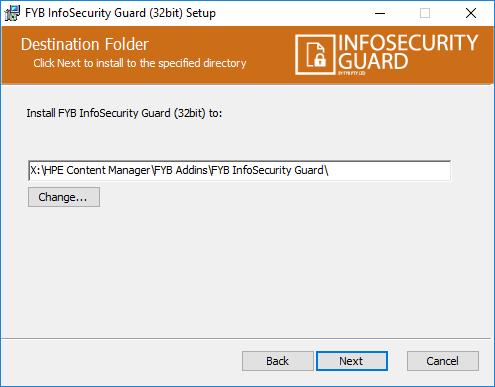
Confirm the install directory. Ensure to use the directory created in step 1 followed by “FYB InfoSecurity Guard\”.
-
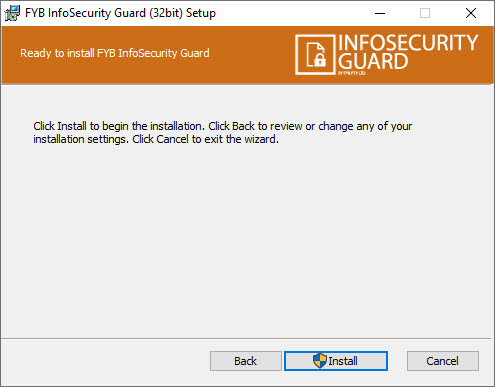
Click on the Install button
-
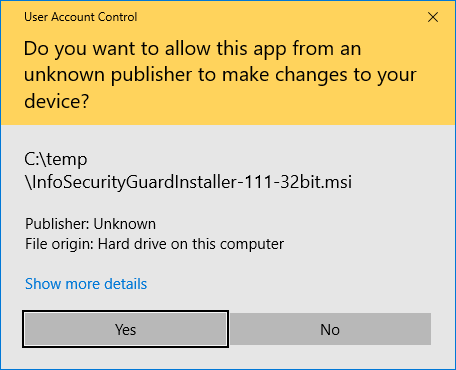
If a security prompt appears, click on the Yes button
-
Once the installation is complete, click on the Finish button
CONFIGURATION
ADDING THE EXTERNAL LINK
-
In Content Manager click on Tools > Administration > External Links

-
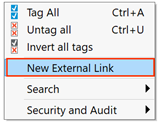
Right click in the Content Manager external links window and select New External Link
-
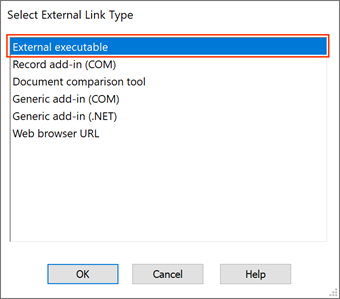
Click on the External Executable listing
-
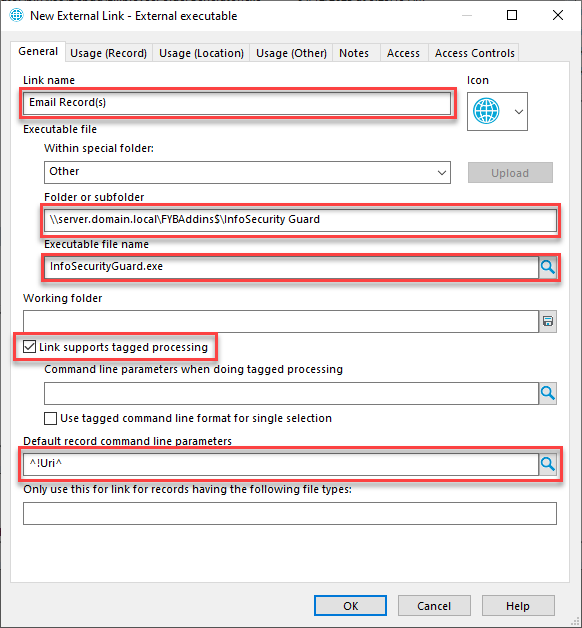
Enter the Link Name as Email Record(s)
-
Under ‘Folder or Subfolder’, enter the Shared Path of the folder InfoSecurity Guard was installed into.
NotePlease use the fully qualified domain name (FQDN) when adding the External Link. For Example: If the share has been set up as \server\FYBAddIns$\InfoSecurity Guard The FQDN is \server.domain.local\FYBAddIns$\InfoSecurity Guard You can obtain the FQDN from the Server you are installing at Computer > Properties
-
Under Executable File Name browse to the InfoSecurity Guard folder and select

-
Check ‘Link supports tagged processing’
-
Enter ^!Uri^ into the Default Command line parameters field
-
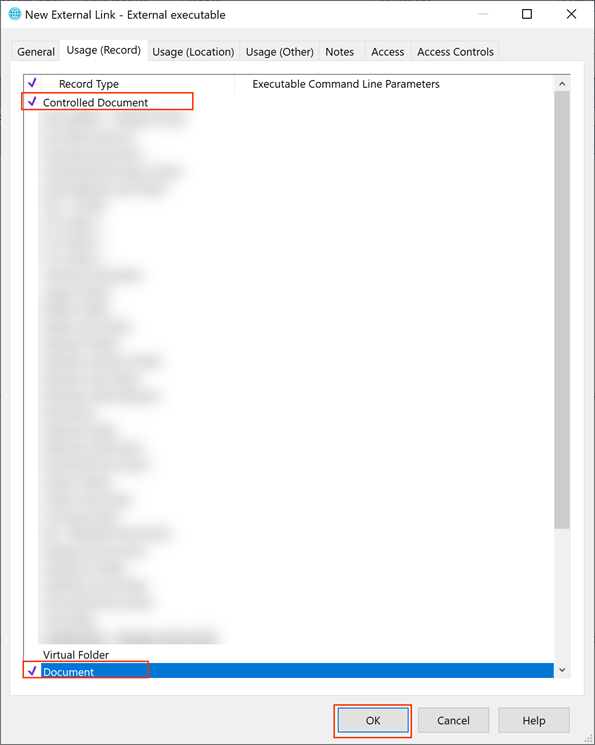
On the Usage(Record) tab, select the appropriate Record Types then click Ok
ADD TO THE CONTENT MANAGER RIBBON
To add the button to the Content Manager Ribbon for all users, you will need to update the Global Settings by following these steps:
-
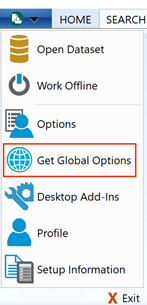
In Content Manager, click on the File button, then click Get Global Options
-
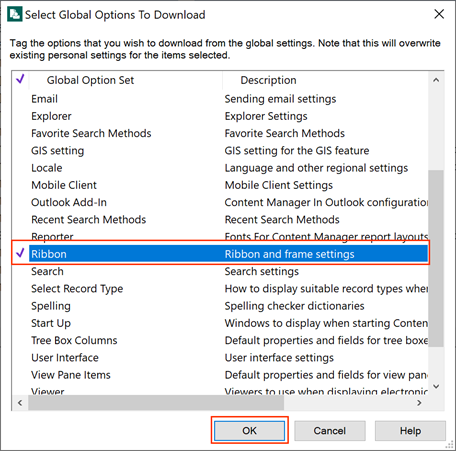
Select the Ribbon option then click Ok
-
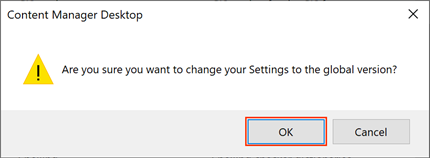
When a confirmation prompt appears, Click OK
-
Add the Email Record(s) button to the Ribbon for both Desktop and Context versions of Content Manager. It can be added under the FYB Add-Ins and Connectors tab, or a different tab can be used.

-
Open Content Manager Context, on the Administration tab, Click Global Settings

-
Select Ribbon and frame settings, click the OK button
-
When a confirmation prompt appears, click the OK button
-
Each user will need to perform a Get Globals for the InfoSecurity Guard buttons to appear in the relevant Ribbon.
REMOVING SEND TO MAIL MENU OPTION (OPTIONAL)
Content Manager users may currently be able to right-click on a record and select Send To -> Mail. This option can be removed if required. To remove the Send To -> Mail menu option, follow these steps for each record type that the option needs to be removed from:
-
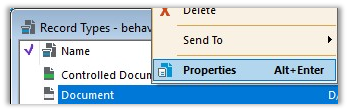
Right click on the record type and select the Properties option
-
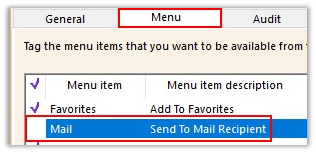
Select the Menu tab
-
Uncheck the Menu item Mail
-
Click on the OK button
CREATING SECURITY CLASSIFICATIONS AND DLMS
To enable the InfoSecurity Guard to be used effectively, Security Classifications and Dissemination Limiting Markers (DLMs) need to be created in Content Manager.
Security Classifications can be managed in Content Manager by using either security levels or additional fields.
DLMs can be managed in Content Manager by using either security caveats or additional fields.
When using additional fields to manage security, it is important to understand that these additional fields add just a ‘stamp’ or marking in the metadata of the record. No system settings are updated when these additional fields are used.
Alternatively, if security levels and security caveats are being used, any users who try to access the record will only be able to see the record if their profile in Content Manager has the appropriate security applied.
If you are unsure how to set up additional security levels, security caveats or additional fields, please contact FYB for advice and assistance.
SETTING UP SECURITY LEVELS FOR SECURITY CLASSIFICATIONS
There needs to be a security level for each security classification.
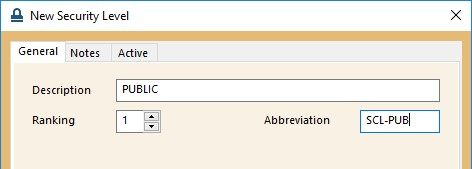
When creating security levels, the level with the lowest risk has a Ranking of 1.
The abbreviation for each Security Classification must include a prefix of ’SCL’, as shown in the screenshot below
SETTING UP ADDITIONAL FIELDS FOR SECURITY CLASSIFICATIONS
To create a new additional field for Security Classifications, firstly a lookup set and lookup items will need to be created. These will then be linked to a new additional field. The steps below provide an outline of this process.
-
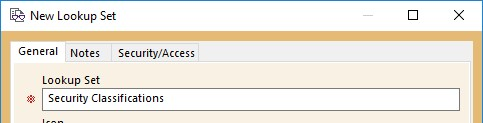
Create a new lookup set called ’Security Classifications’, as shown in the screenshot below
-
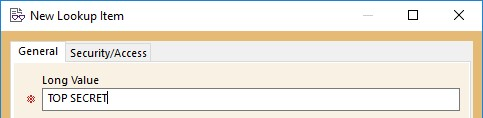
Each security classification needs to be created as a lookup item and added to the Security Classification lookup set, e.g.
-
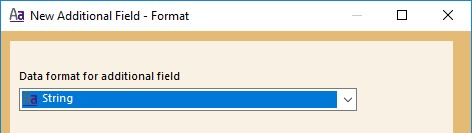
Create a new additional field with the format ’String’
-
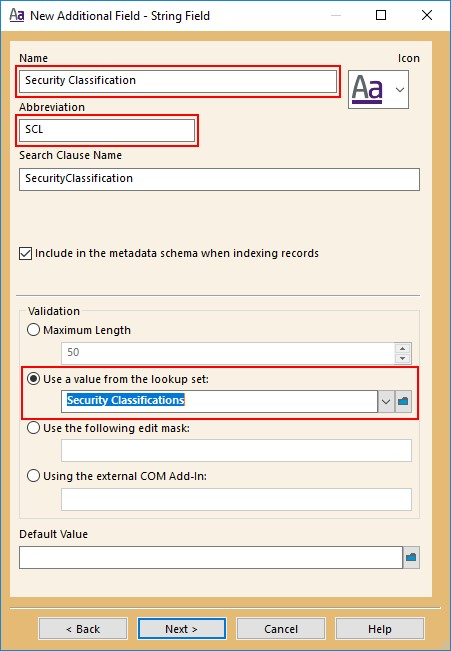
Name the additional field ’Security Classification’ Set the abbreviation to ’SCL’ (or something that includes SCL) In the ‘Use a value from the lookup set’ field, select Security Classifications
-
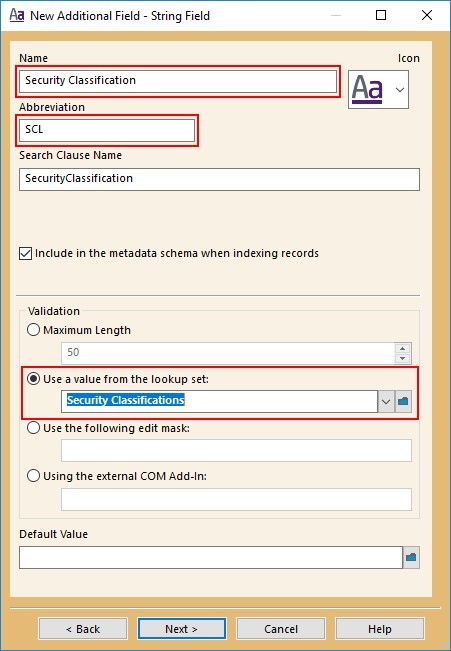
Add the additional field to each record type that InfoSecurity Guard will be used with.
SETTING UP SECURITY CAVEATS FOR DISSEMINATION LIMITING MARKERS
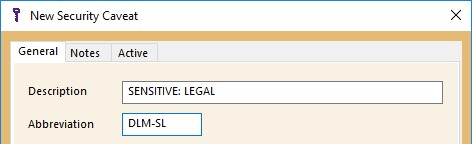
For each dissemination limiting marker, a new Security Caveat will need to be created in Content Manager. The abbreviation for each dissemination limiting marker must include DLM, as shown in the screenshot below.
SETTING UP ADDITIONAL FIELDS FOR DISSEMINATION LIMITING MARKERS
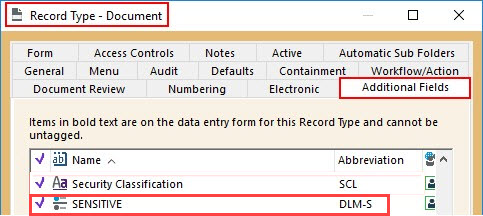
For each dissemination limiting marker, a new additional field will need to be created. The steps below provide an outline of this process.
-
Create a new additional field with the format “Boolean”
-
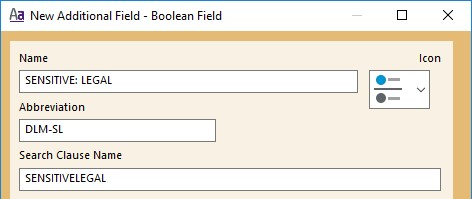
Enter the Name and Abbreviation. The abbreviation must include “DLM”, as shown in the screenshot below
-
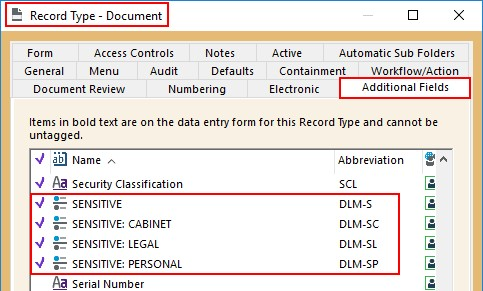
Add the additional field to each record type that InfoSecurity Guard will be used with
CONFIGURING SETTINGS
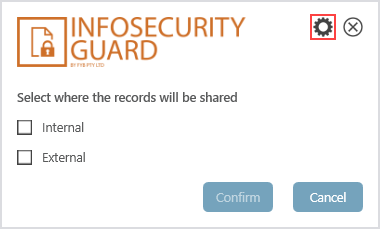
The InfoSecurity Guard Configuration tool is used to configure and customize InfoSecurity Guard settings. To open the configuration tool, run the InfoSecurityGuard and click the setting icon on the first screen
The table below provides an explanation of the different fields in the Configuration Dashboard
| NAME OF FIELD | FUNCTIONALITY |
|---|---|
| Dataset ID | The ID of the Content Manager dataset to be used with InfoSecurity Guard. |
| Workgroup Server Name | The Workgroup Server Name used to connect to the dataset. The workgroup server name or URL can be utilized |
| Workgroup Server URL | The Workgroup Server URL used to connect to the dataset. The workgroup server name or URL can be utilized |
| License | Click the Browse button to select the license file for InfoSecurity Guard. The license file should be in the FYB Addins shared folder and the path specified should be the fully qualified shared path. |
| Internal Domain | Use this option to indicate the domain of the organisation. Prior to sending an email, this domain will be checked to determine if the email is being sent internally or externally. |
| Security Confirmation Required for Internal Emails | Ticking this checkbox means that users will need to confirm the security settings for each record they email internally. If this checkbox is unticked, users will be able to email records internally without confirming the security settings. |
| Create Single Reference File for Email Attachments | When checked, only a single reference file for electronic documents will be generated for internal emails. If unchecked, a reference file will be created for each electronic record. |
| Use Document Content Indexing | When checked, Document Content Indexing will be enabled. When Document Content Indexing is enabled, Security Markings will be displayed for each record that is sent. |
| X Second Delay | There is a delay between a document being updated, and its contents being indexed and searchable via Content Manager. To allow for this, InfoSecurity Guard will evaluate security markings by searching documents directly until the delay period has elapsed. |
| Dissemination Limiting Markers - Use Security Caveats - Use Additional Fields | Use this option to indicate how Dissemination Limiting Markers are to be set in Content Manager. |
| Security Classification | Use this option to indicate how Security Classifications are to be set in Content Manager. |
| Security Classification Ranking | This section is only enabled if the option Use Additional Field is selected for Security Classifications. It shows the ranking of the Security Classifications. Each security classification should be listed here, with the lowest ranking classification numbered 1. These rankings are added by the Configuration tool, it is not necessary to add them to the name of the security classification. Please note: This list of security classifications must match the security classification lookup set in Content Manager. For a new security classification, it should be added to this list, and to the security classification lookup set in Content Manager. |
 | Clicking this button opens a dialogue to enter the name of a new security classification to be added to the list. |
 | Clicking this button removes the selected security classification from the list. |
 | Clicking this button opens a dialogue to rename the selected security classification. |
 | Clicking this button moves the selected security classification further up the list. As the security classification is moved up and down the list, the ranking assigned to the security classification changes. |
 | Clicking this button moves the selected security classification down the list. As the security classification is moved up and down the list, the ranking assigned to the security classification changes. |
| Document Marker Action - Prevent - Warn - Do Nothing | Use this option to indicate what should happen when security markers are set on a record, but not present in the document. Prevent: Users cannot confirm or send documents that do not contain all of the security markers that are on the record. Warn: Users receive a warning message when they email a document that does not contain all of the security markers that are on the record. Do Nothing: Users are not notified if a document does not contain all of the security markers that are on the record. |
| Notes Text | This text will be added to the notes of each Record that has its security settings confirmed through InfoSecurity Guard. The text “(USER)” will be replaced with the username of the user. The text “(INTERNAL OR EXTERNAL)” will be replaced with “internal” or “external”, depending on the recipients of the email being sent. |
| Document Marker Warning Text | This text will be displayed if the Document Marker Action is set to warn. |
| Document Marker Prevent Text | This text will be displayed if the Document Marker Action is set to prevent. |
| Disclaimer Heading | This text will be displayed as the heading of the disclaimer message. |
| Disclaimer Body | This text will be displayed as the body of the disclaimer message. |
| Unauthorised Message Text | This text will be displayed when a user tries to update the security settings for a record for which they do not have the update metadata permission. |
| No Classification Message Text | This text will be displayed when a user tries to confirm the security settings for a record that does not have a security classification set. |
| Confirm Button Tool-Tip | The tooltip text that will appear when hovering the mouse over the Confirm button. |
| Update Button Tool-Tip | The tooltip text that will appear when hovering the mouse over the update button. |
| Email Button Tool-Tip | The tooltip text that will appear when hovering the mouse over the email button. |
 | Click this button to save any changes and close the InfoSecurity Guard Configuration tool. |
 | Click this button to discard any changes and close the InfoSecurity Guard Configuration tool. |
INSTALLING THE INFOSECURITY GUARD EVENT ADD-IN
If the organisation has decided to use additional fields for managing Security Classifications and/or DLMs, then the Event add-in will need to be deployed. The event add-in will update the security values on contained records so that it matches the parent container’s security classification and DLMs when:
- A new record is created within the container.
- The parent container's classification or DLM has been updated
It’s recommended you install this add-in on an appropriate event processing server.
INSTALLATION
To install the event add-in please follow the steps below:
-
Copy the InfoSecurityGuardEventAddIn-XXX.zip file over to the server you wish to install it on NOTE: Please contact FYB if you do not have a copy of InfoSecurityGuardEventAddIn-XXX.zip
-
Extract the zip file, copy the contents, and paste them into Content Manager installation directory. This is usually located at C:\Program Files\Micro Focus\Content Manager\
NoteFor the Event Processing to function, the InfoSecurityGuardEventAddIn.dll needs to be copied to the installation directory. This is a Content Manager requirement, not an FYB InfoSecurity Guard requirement.
-
Locate and open the InfoSecurityGuardEventAddin.xml file and apply the required settings

FUNCTIONALITY DESCRIPTION DLMs Set to true if DLMs is set to use additional fields SecurityClassification Set to true if Security Classification is set to use an additional field LogFolder The path where you would like the log file to be written to License The path of the InfoSecurity Guard license file -
Open Enterprise Studio and drop down the Datasets list
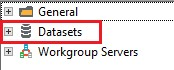
-
Right click on the Dataset that Information Security Guard will connect to, and click on Event Processing, then Configure
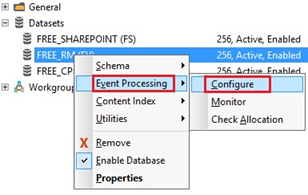
-
Click on the Custom Processes tab and proceed with clicking on the Add button
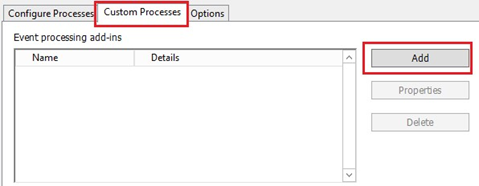
-
Enter the following details and click on the OK button
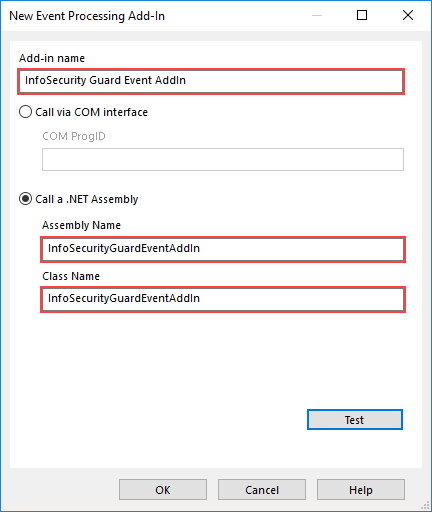 Note
The Class Name/Add-in Name field above is case-sensitive
-
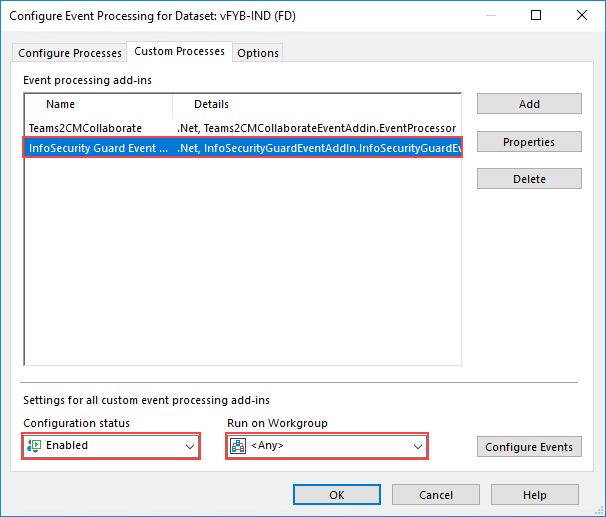
Highlight the InfoSecurityGuardEventAddin. Set the Configuration Status to Enabled and the Run on Workgroup Server to the Event Processing Server
-
Click on the OK button to save the changes
-
Complete a Save and Deploy through Content Manager Enterprise
WarningA Save and Deploy will result in a short outage of Content Manager