Reassign Actions Installation Guide
DISCLAIMER
Any advice FYB provide in relation to setting up any FYB App, FYB Add-in, FYB Connector and or advice in relation to opening access to your on-premises or in the cloud systems will be general advice only. This means that the advice is of a general nature and will not consider your network setup, network infrastructure or any security requirements that you may have or in fact need. It is highly advised that you seek advice from internal or external providers to ensure that they are comfortable with what is required prior to going ahead with any deployment, setup, or configuration for external access.
LICENSE DETAILS
Please contact FYB for a valid license if you are yet to obtain one for your Connector.
INSTALLATION COMPONENTS
The following installation components are required to ensure full functionality of the FYB Reassign Actions, these are server-side components:
- Reassign Actions Add-in
INSTALLING THE REASSIGN ACTIONS ADD-IN
INSTALLATION
-
Create an FYB Add-Ins folder on the appropriate server that contains Content Manager

-
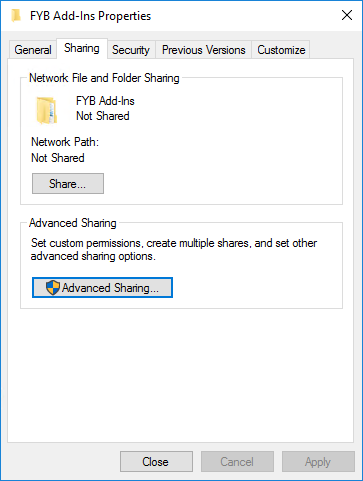
Right-click on the FYB Add-ins folder > Properties > click on the Sharing tab
-
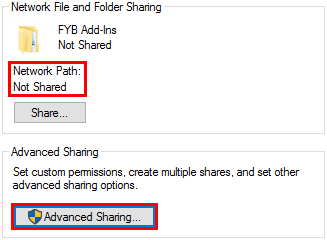
If the Network Path is set to ‘Not Shared’, click on the Advanced Sharing button
-
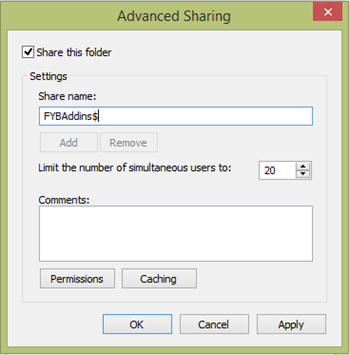
In the Advanced Sharing window, enable the ‘Share this folder’ option and remove the space between FYB and Add-ins, then add a ‘$’ sign which will keep the folder hidden
-
Click the Permissions button
-
Give Everyone the Full Control permission

-
A Network Path will now be available (this path is needed during the installation and settings setup)
-
Create an appropriate folder to house the license file (.lic) on the server. For Example: \server\FYBAddins\License You will be asked to enter this location when configuring the application settings.
-
Move the license file into the license folder
-
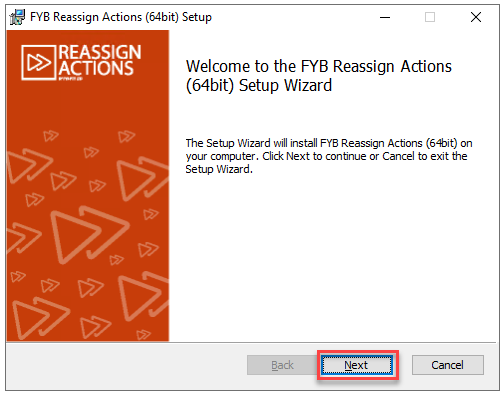
Launch the reassignactions-xxx-32bit/64bit.msi
-
Click on the Next button
-
On the Configuration Settings screen, enter the dataset ID, temp path, license path (network share), and search string
NoteLicense and Temp paths should be network shared paths. For example, \server\fybaddins$\Reassign Actions\
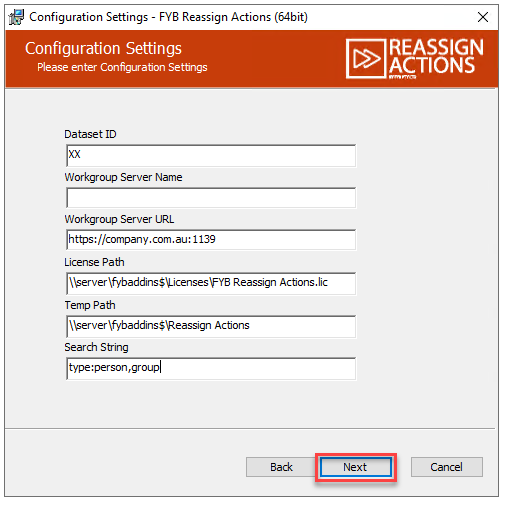
NAME DESCRIPTION Dataset ID The two-character dataset identifier Workgroup Server Name The workgroup server name to connect the dataset. Either the workgroup server name or URL can be used for the connection. Workgroup Server URL The workgroup server URL to connect the dataset. Either the workgroup server name or URL can be used for the connection. License Path The shared path to your license file, including '.lic' Temp Path The shared path to the temporary directory for Reassign Actions Search String A filter string that determines what will appear in the location search window. The search automatically filters to include only active and internal locations. Leave this string blank to include all location types.
For Example:
type:person // filter to only show locations of type person
type:person,group // filter to only show people and groups -
If your environment is configured to only allow OpenId authentication (e.g. Azure AD or ADFS) for your Content Manager, you'll receive the following message:
 Note
If you have not already, please ensure you are using a Workgroup Server URL not the Workgroup Server Name for the connection defined on the previous screen
-
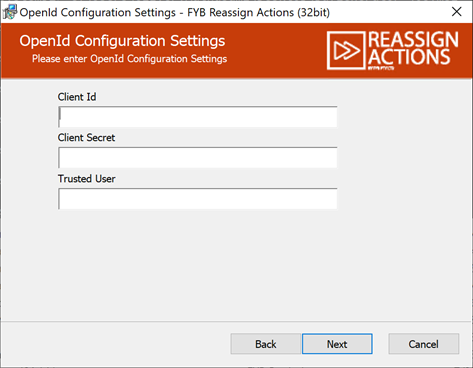
Click OK to navigate to the Open Id settings screen and enter the required values.
 Note
NAME DESCRIPTION Client Id The Client/App Id of the Open Id application used to secure Content Manager. For ADFS authentication, this will be the username of the Confidential Client app. Client Secret The Client/App Secret of the Open Id application used to secure Content Manager. For ADFS authentication, this will be the password of the Confidential Client app. Trusted User The Network Login value of the Content Manager Confidential Client app location. For ADFS authentication, this will be the username of the Confidential Client app. -
On the Email Notification Settings screen, enter the sender, addressee, mail host, and mail port
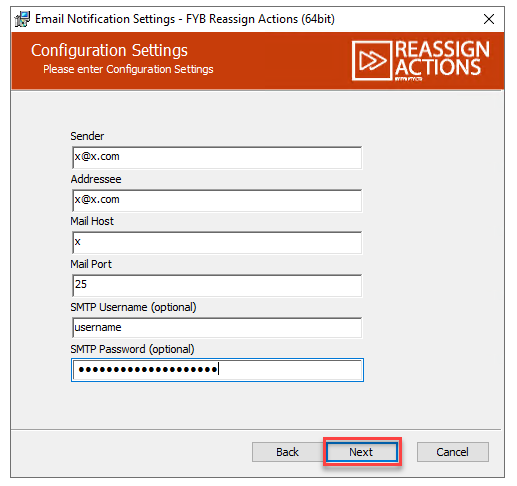
NAME DESCRIPTION Sender The email address that email notifications are to be sent from.
Ideally, it should be set to a do not reply account or equivalentAddressee The email address of the recipient of the email notifications, i.e., an administration account Mail Host The email hosting service that operates the email server Mail Port The port to be used to connect to the mail host SMTP username (optional) The username used to authenticate with your SMTP server SMTP password (optional) The password used to authenticate with your SMTP server 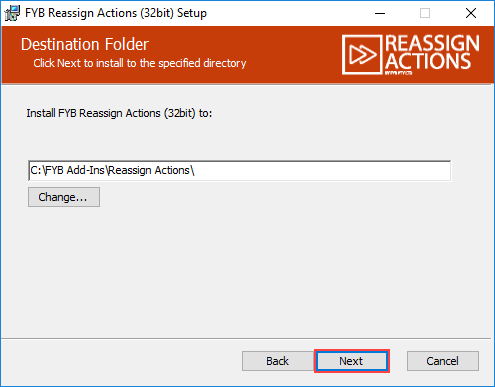
-
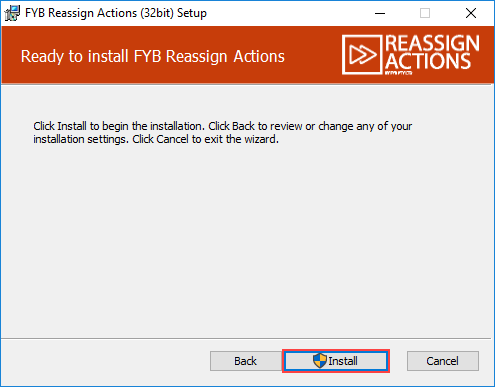
From the Confirm Installation window, click Install
-
The installation will commence
-
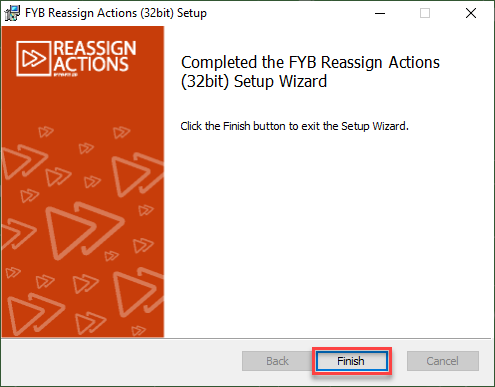
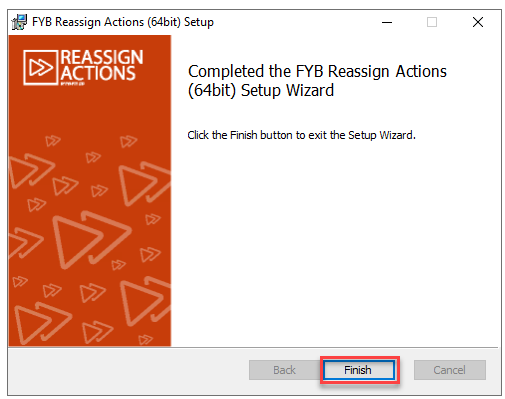
Once the installation is complete, click on the Finish button
COMMAND-LINE ARGUMENTS (OPTIONAL)
The following command-line arguments can be passed to the MSI if required.
| ARGUMENT | PURPOSE |
|---|---|
| DBID | The two-character dataset identifier |
| LICENSE_PATH | The shared path to your license file, including '.lic' |
| TEMP_PATH | The shared path to the temporary directory for Reassign Actions |
| SEARCH_STRING | A filter string that determines what will appear in the location search window. The search automatically filters to include only active and internal locations. If no search string is required, do not include this field |
| SENDER | The email address that email notifications are to be sent from |
| ADDRESSEE | The email address of the recipient of the email notifications |
| MAIL_HOST | The email hosting service that operates the email server |
| MAIL_PORT | The port to be used to connect to the mail host |
| INSTALLFOLDER | The nominated installation directory |
CONFIGURATION
REASSIGN ACTIONS TO ME
-
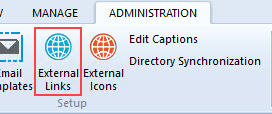
In Content Manager (Context) navigate to the Administration Ribbon and click External Links
-
Right-click, and select the New External Link option

-
From the external link type list, select External executable and click on the OK button

-
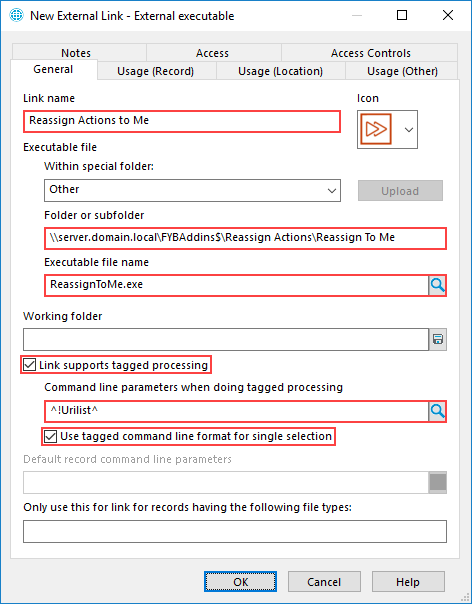
Under Link name, enter Reassign Actions to Me
-
Under ‘Folder or Subfolder’, enter the Network Location of the FYB Add-ins\Reassign Actions\Reassign To Me folder
NOTEPlease use the fully qualified domain name (FQDN) when adding the External Links to stop security prompts For Example: If the share has been set up as \server\FYBAddIns$\Reassign Actions\Reassign To Me
The FQDN is \server.domain.local\FYBAddIns$\Reassign Actions\Reassign To Me
You can obtain the FQDN from the Server you are installing at Computer > Properties -
Under Executable file name browse to the Reassign To Me folder and select the executable file

-
Enable the Link supports tagged processing option
-
Under Command line parameters when doing tagged processing enter ^!Urilist^
-
Enable the Use tagged command line format for single selection option
-
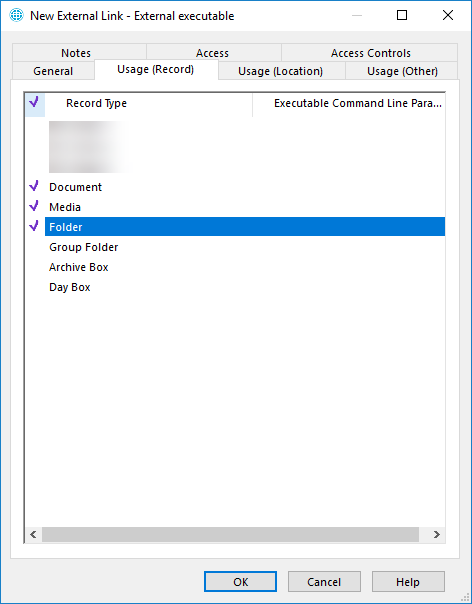
Select the Usage (Record) tab.
-
Tag each of the appropriate record types.
-
Click on the OK button
REASSIGN ACTIONS TO SOMEONE ELSE
-
In Content Manager (Context) navigate to the Administration Ribbon and click External Links
-
Right-click, and select theNew External Link option
-
From the external link type list, select External executable and click on the OK button
-
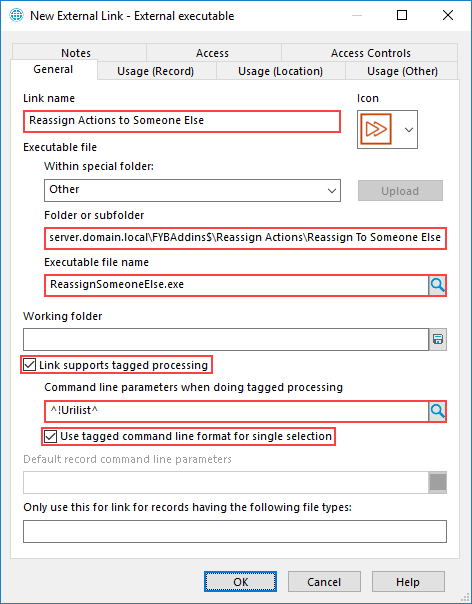
Under Link name, enter Reassign Actions to Someone Else
-
Under ‘Folder or Subfolder’, enter the Network Location of the FYB Add-ins\Reassign Actions\Reassign To Someone Else folder
NOTEPlease use the fully qualified domain name (FQDN) when adding the External Links to stop security prompts For Example: If the share has been set up as \server\FYBAddIns$\Reassign Actions\Reassign To Someone Else
The FQDN is \server.domain.local\FYBAddIns$\Reassign Actions\Reassign To Someone Else
You can obtain the FQDN from the Server you are installing at Computer > Properties -
Under Executable file name browse to the Reassign To Someone Else folder and select the executable file

-
Enable the Link supports tagged processing option
-
Under Command line parameters when doing tagged processing enter ^!Urilist^
-
Enable the Use tagged command line format for single selection option
-
Select the Usage (Record) tab.
-
Tag each of the appropriate record types.
-
Click on the OK button
COMPLETE CURRENT ACTION
-
In Content Manager (Context) navigate to the Administration Ribbon and click on the External Links button
-
Right-click, and select the New External Link option
-
From the external link type list, select External executable and click on the OK button
-
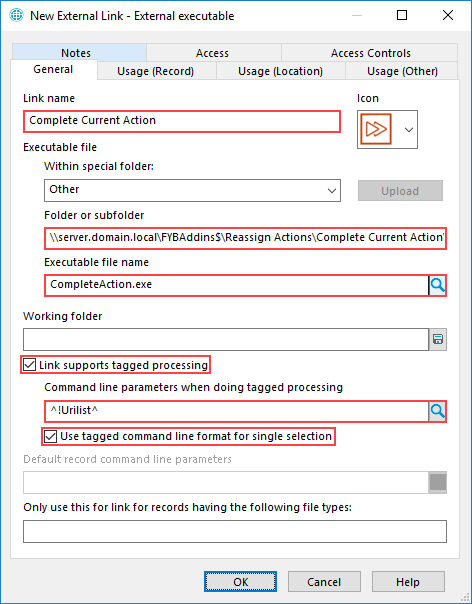
Under Link name, enter Complete Current Action
-
Under ‘Folder or Subfolder’, enter the Network Location of the FYB Add-ins\Reassign Actions\Complete Current Action folder
NOTEPlease use the fully qualified domain name (FQDN) when adding the External Links to stop security prompts For Example: If the share has been set up as \server\FYBAddIns$\Reassign Actions\Complete Current Action
The FQDN is \server.domain.local\FYBAddIns$\Reassign Actions\Complete Current Action
You can obtain the FQDN from the Server you are installing at Computer > Properties -
Under Executable file name browse to the Complete Current Action folder and select the executable file

-
Enable the Link supports tagged processing option
-
Under Command line parameters when doing tagged processing enter ^!Urilist^
-
Enable the Use tagged command line format for single selection option
-
Select the Usage (Record) tab.
-
Tag each of the appropriate record types.
-
Click on the OK button
REASSIGN ACTIONS CONFIG
-
In Content Manager (Context) navigate to the Administration Ribbon and click on the External Links button
-
Right-click, and select New External Link
-
From the external link type list, select External executable, click OK
-
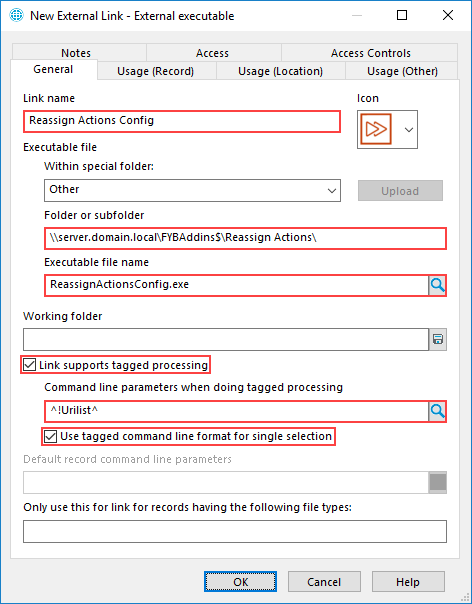
Under Link name, enter Reassign Actions Config
-
Under ‘Folder or Subfolder’, enter the Network Location of the FYB Add-ins\Reassign Actions\ folder
NOTEPlease use the fully qualified domain name (FQDN) when adding the External Links to stop security prompts For Example: If the share has been set up as \server\FYBAddIns$\Reassign Action
The FQDN is \server.domain.local\FYBAddIns$\Reassign Actions
You can obtain the FQDN from the Server you are installing at Computer > Properties -
Under Executable file name browse to the Reassign Actions folder and select the executable file

-
Enable the Link supports tagged processing option
-
Under Command line parameters when doing tagged processing enter ^!Urilist^
-
Check Use tagged command line format for single selection
-
Select the Usage (Record) tab.
-
Tag each of the appropriate record types.
-
Click on the OK button
UNINSTALLING FYB REASSIGN ACTIONS
REMOVE FROM CONTENT MANAGER
-
In Content Manager (Context) navigate to the Administration Ribbon and click on the External Links button
-
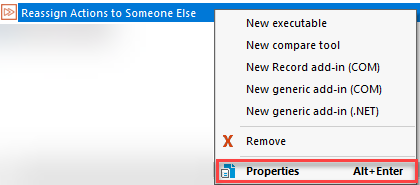
Right-click on the Reassign Action external link you want to remove > Properties
-
Copy the folder path from the Folder or Sub Folder field

-
Navigate to the folder by pasting the path in a window browser to the Reassign Actions folder

-
Delete the Reassign Actions folder and its contents
-
Redirect back to Content Manager click on Administration > External Links
-
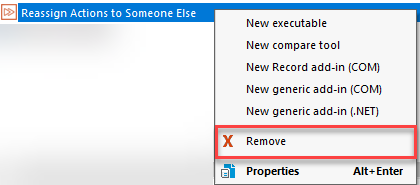
Right-click on the Reassign Action external link you want to remove, and click on the Remove option
-
The external link will be removed from Content Manager
UNINSTALL WITH MSI
To uninstall FYB Reassign Actions using the MSI please follow the steps below:
-
Double click on reassignactions-xxx-32bit/64bit.msi
-
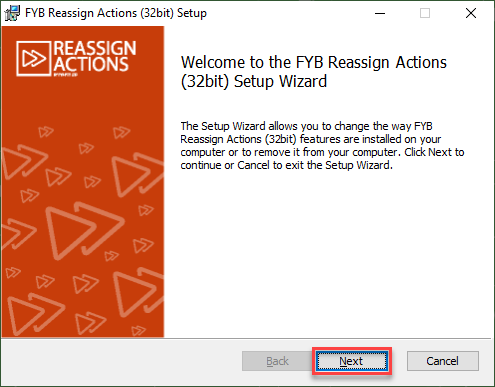
The Reassign Actions uninstallation window will appear
-
Click on the Next button
-
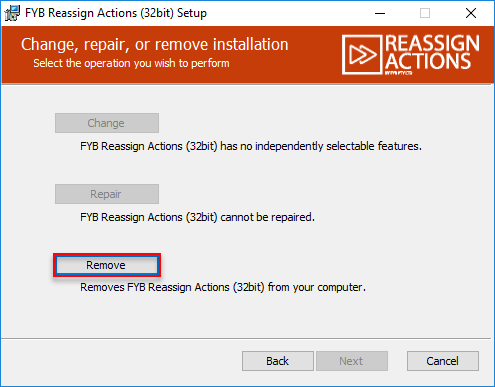
Click on the Remove button
-
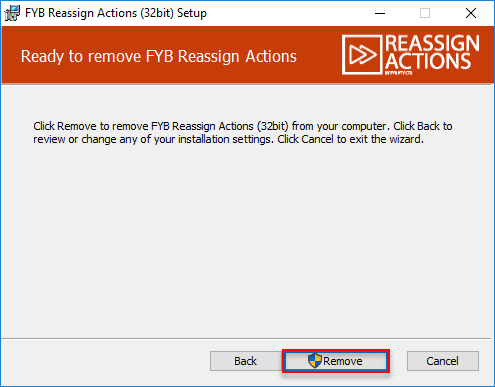
On the next window click on the Remove button
 6. The application uninstallation process will commence
7. Click on the Finish button