
FYB Explore Installation Guide
DISCLAIMER
Any advice FYB provide in relation to setting up any FYB App, FYB Add-in, FYB Connector and or advice in relation to opening access to your on-premise or in the cloud systems will be general advice only. This means that the advice is of a general nature and will not take into account your network setup, network infrastructure or any security requirements that you may have or in fact need. It is highly advised that you seek advice from internal or external providers to ensure that they are comfortable with what is required prior to going ahead with any deployment, setup or configuration for external access.
AUTHENTICATION
FYB Explore does not support Windows Authentication.
OpenID Connect Authentication must be used for both FYB Explore and the Content Manager ServiceAPI, with matching providers.
FYB Explore officially supports EntraID and has not been tested against any other Authentication provider.
FYB EXPLORE SQL DATABASE
An SQL database is required to host all of FYB Explore's configuration, see the Prerequisites for more details If an FYB Explore Database already exists, this step can be skipped.
LICENSE DETAILS
Please contact FYB for a valid license if you have yet to obtain one for your Connector.
CONTENT MANAGER SERVICE API CONFIGURATION
-
Navigate to the C:\Program Files\Micro Focus\Content Manager\Service_API folder
-
Open the hptrim.config file.
-
Ensure the following is set with the openIdConnect section:
- identityClaims is set to email upn preferred_username oid
- appIdURI is set to api://{clientID}

INSTALLING IN NON-CM SERVERS
When installing FYB Explore onto a server that does not have Content Manager installed, the following steps will need to be done.
-
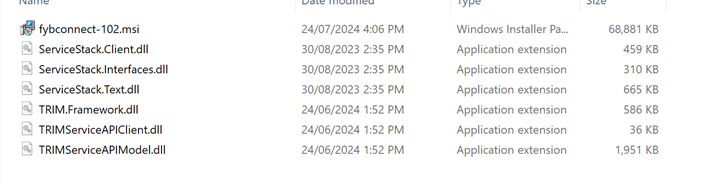
Navigate to a Content Manager server and copy the following files from C:\Program Files\Micro Focus\Content Manager\Service_API:
- ServiceStack.Client.dll
- ServiceStack.Interfaces.dll
- ServiceStack.Text.dll
- TRIMServiceAPIClient.dll
- TRIMServiceAPIModel.dll
-
Copy the following files from C:\Program Files\Micro Focus\Content Manager\bin
- TRIM.Framework.dll
-
Navigate to the server that FYB Explore is installed on
-
Paste the files copied in steps 1 and 2 into a folder that has the FYBExplore MSI
INSTALLATION COMPONENTS
The following installation components are required to ensure the full functionality of FYB Explore:
- FYB Explore web application - this is a server-side installation
INSTALLING THE FYB EXPLORE WEB SERVICE
LICENSE
-
Create a folder to house the license file (.lic) on the required web server
-
Place the license file in this folder
NoteYou will be asked to enter this location during the installation.
PREREQUISITES INSTALLATION
Before running the MSI ensure that all prerequisites are complete. Including deploying the .NET 8 SDK and Hosting Bundle and installing IIS URL Rewrite.
.NET 8 SDK AND HOSTING BUNDLE
To deploy the Net Core SDK and Hosting Bundle to the server, follow these steps:
-
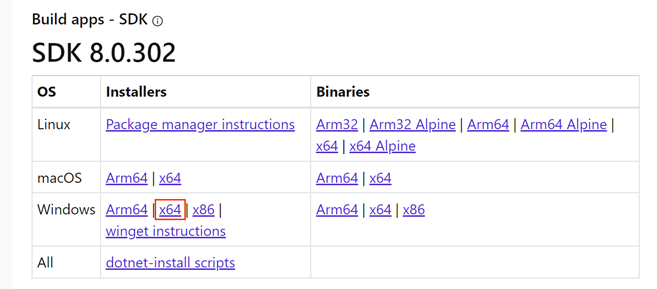
Install the latest .NET 8 SDK (x64) found here
-
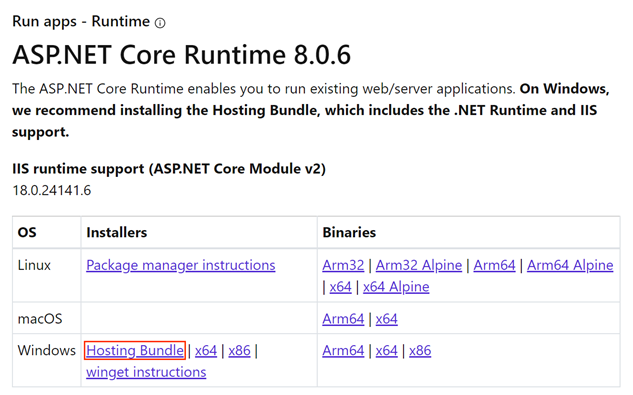
Install the latest ASP.NET Core 8 Runtime Hosting Bundle found here
-
Once both executables have been installed, complete a full server restart to allow for .NET 8 to bind to IIS. If a server restart is not possible an IIS reset can be completed with the following CMDs from an elevated command prompt.
- net stop was /y
- net start w3svc
- iisreset
NoteTo check that the SDK has been attached to the hosting bundle, open Command Prompt and type dotnet --info

IIS URL REWRITE
IIS URL Rewrite is required for the routing in the frontend of FYB Explore to work properly.
-
Navigate to IIS URL Rewrite Download Page
-
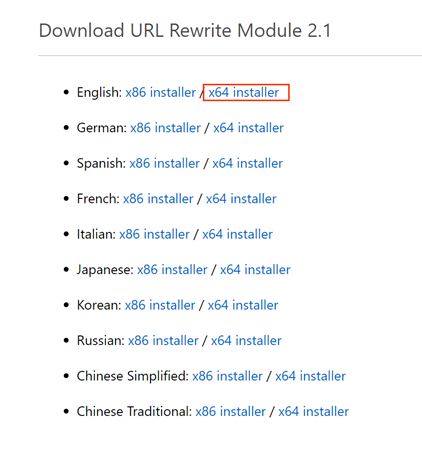
Scroll down and download the latest x64 version
-
Navigate to the server that FYB Explore will be installed on and run the IIS Rewrite MSI.
FYB EXPLORE INSTALLATION
To install the FYB Explore web service, follow these steps:
-
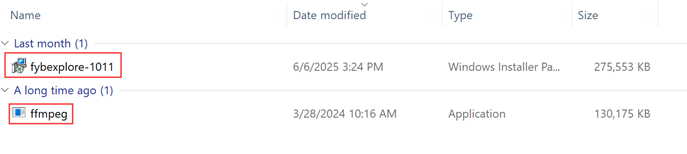
Unzip the ffmpeg.zip file and place the extracted file in the same folder as the FYB Explore msi
-
Run command prompt as an administrator and launch the fybexplore-xxx.msi
-
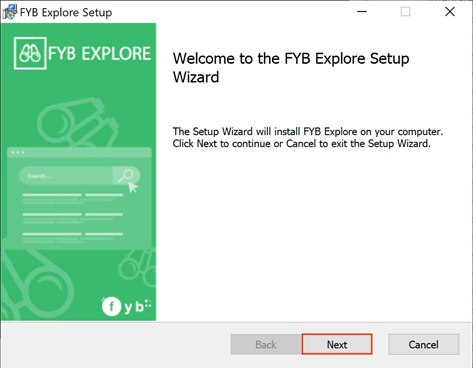
Click on the Next button
-
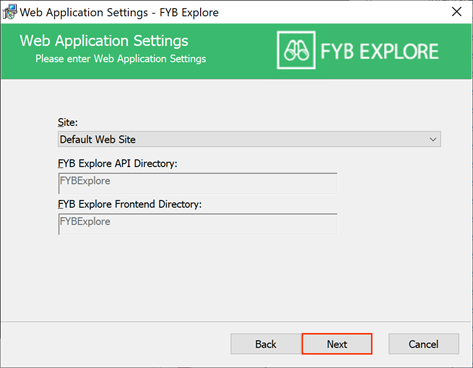
On the Web Application Settings screen select the HTTPS protected dedicated site to host the application. Click on the Next button
NoteA HTTPS site must be selected. The virtual directory for the backend of FYB Explore will be called FYBExploreService. The virtual directory for the frontend will be called FYBExploreService. These cannot be renamed.
IIS DirectoryThe FYB Explore application must be installed under the dedicated site as an application. It cannot be installed at the site level

-
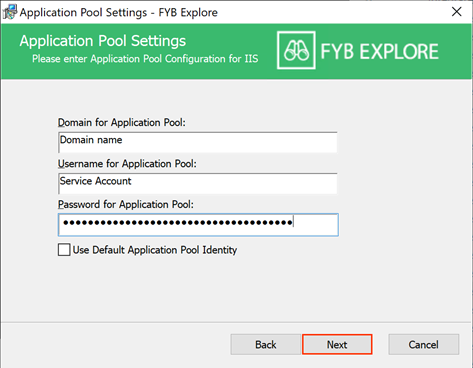
On the Application Pool Settings screen (below), enter the domain, username, and password for the Application Pool identity
-
Click on the Next button
-
On the Configuration Settings screen enter the required information. Further details are in the table below
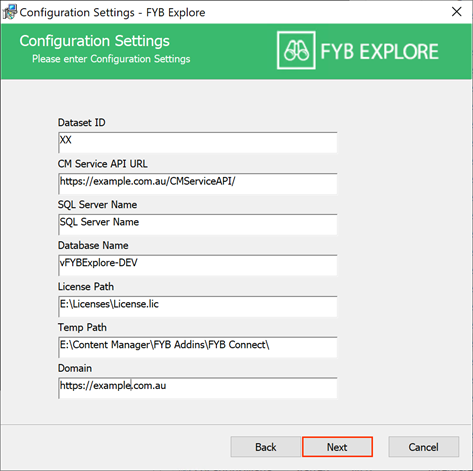
FIELD DESCRIPTION Database Id Content Manager two-character dataset identifier CM Service API URL The Content Manager Service API URL SQL Server Name The name of the SQL Server that will host FYB Explore's settings Database Name The name of the SQL Database that will host FYB Explore's settings. License Path Local path to FYB Explore license file Temp Path Local temporary directory used by the application to cache content manager documents. Please include the trailing slash, for example: C:\FYB Add-Ins\FYBExplore\ Domain The Host URL that FYBExplore will be installed under (e.g. https://example.com.au) -
Open ID Settings. The values of the required fields can be found in the respective Open ID guides. These can be found within the VALUES REQUIRED FOR INSTALLATION header of the respective Open ID guide.
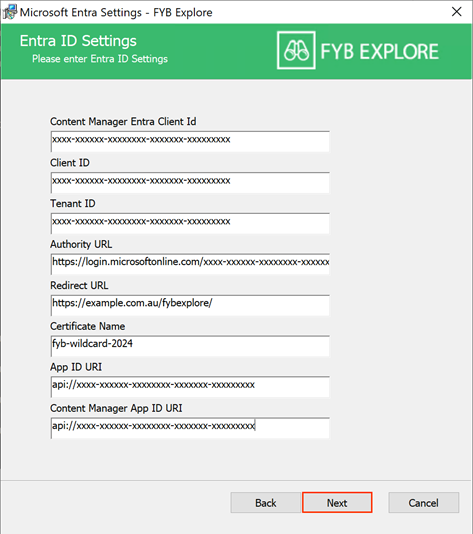
FIELD DESCRIPTION Content Manager Entra Client ID The Client ID of the Entra application used to secure Content Manager Client ID The Client ID of the Entra application used to secure FYB Explore Tenant ID The Tenant ID of the Entra application used to secure FYB Explore Authority URL The Authority URL of the Entra application in the format https://login.microsoftonline.com/\{Tenant Id} Redirect URL The FYB Explore URL. This value must be in all lowercase Certificate Name The friendly name of the nominated certificate (.pfx) installed on the machine. App Id URI The App Id Uri of the Entra application used to secure FYB Explore Content Manager App Id URI The App Id Uri of the Entra application used to secure Content Manager -
In the Email Configuration Settings screen enter the required settings. Please refer to the table below for configuration settings details.
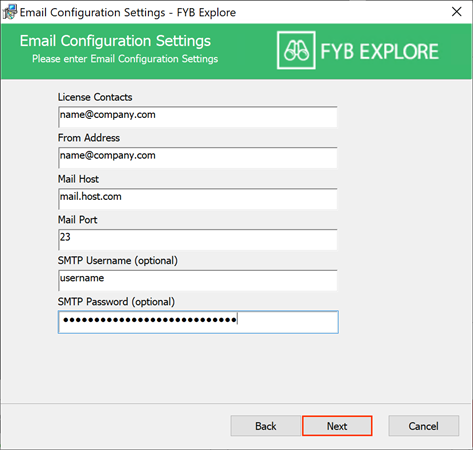
NAME DESCRIPTION License Contacts The list of email addresses that will receive a notification when the FYB Explore License is about to expire. From Address The email address that all emails are sent from. Mail Host The email host system that will send all email notifications. Mail Port The Simple Mail Transfer Protocol port that will assist the host mail system send all emails. SMTP username (optional) The username used to authenticate with your SMTP server SMTP password (optional) The password used to authenticate with your SMTP server -
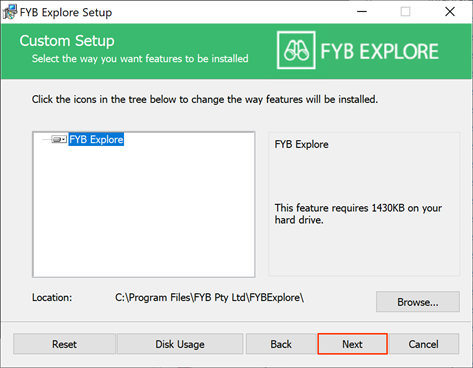
On the Custom Setup screen select the install location and click on the Next button
-
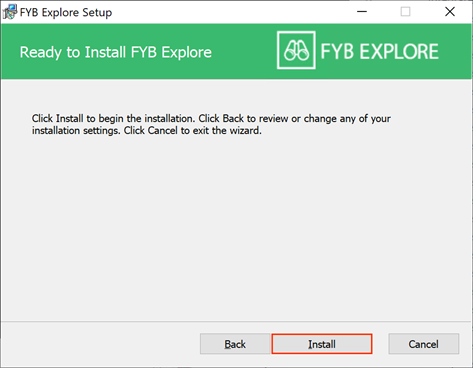
From the Confirm Installation window click on the Install button
-
The installation process will commence
-
Once the installation is complete click on the Finish button
IIS CONFIGURATION

| Name | Description |
|---|---|
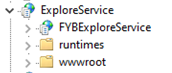
| Explore Service | This app is connected to the GatewayService folder in the FYB Explore install directory. It is responsible for rerouting all the api calls from the FYB Explore frontend to the appropriate service |
| FYBExploreService | This app is connected to the FYBExploreService folder within the FYB Eplore install directory. This app provides all the FYB Explore related services. |
| FYBExplore | This app IIS connected to the wwwroot folder within the GatewayService folder. It is responsible for the frontend for FYB Explore |
SERVICE API CONFIGURATION
The maximum size is 2 GB. See Uploading Large Files to IIS / NET. Core / ASP.NET for more information
The default document size that can be uploaded using the CM Service API is 4MB. To increase this:
WEB.CONFIG UPDATES
- Navigate to the install directory of the CM Service API. (e.g. C:\Program Files\Micro Focus\Content Manager\Service_API)
- Open the Web.config file as an Administrator
- In the httpRuntime element, add maxRequestLength="51200" This value will allow for document uploads up to 50MB. Increase this value as required.
 4. Save the changes
HPTRIM.CONFIG UPDATES
-
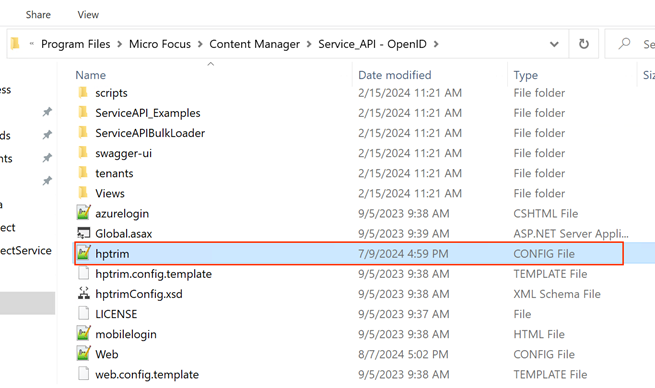
Navigate to the install directory of the CM Service API. (e.g. C:\Program Files\Micro Focus\Content Manager\Service_API)
-
Open the hptrim.config file as an Administrator
-
Within the hptrim section, add ignorePropertyErrors = "true"

SERVICE API OPEN ID CONFIGURATION
-
Navigate to the C:\Program Files\Micro Focus\Content Manager\Service_API folder
-
Open the hptrim.config file.
-
Add the following to the hptrim element: requireAntiForgeryToken="false"

-
Within the hptrim element, add ignorePropertyErrors = "true"
-
Create a new authentication element between the workgroupServer and fileTypes elements (if not already present) and add allowAnonymous="false" slidingSessionMinutes="60"

-
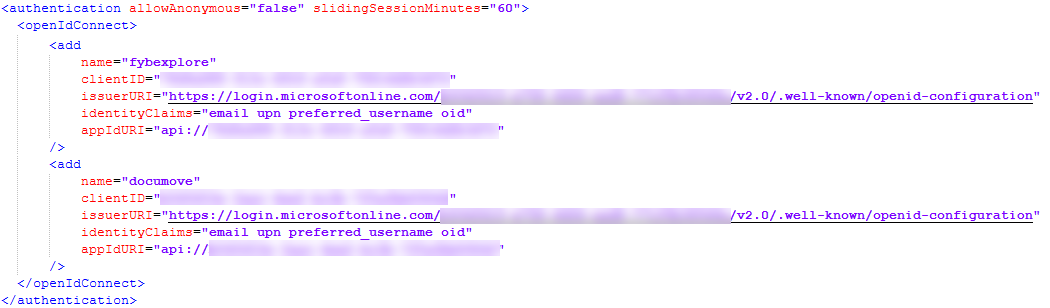
Create a new openIdConnect element within the authentication element (if not already present) and add the below block inserting the relevant details from your app registration
 <add
    name="fybexplore"
    clientID="\{\{appID\}\}"
    issuerURI="https://login.microsoftonline.com/\{\{tenantID\}\}/v2.0/.well-known/openid-configuration"
    identityClaims="email upn preferred_username oid"
    appIdURI="\{\{appIdURI\}\}"
/>

For environments where multiple applications are looking to access the Service API using OpenID Authentication, you can add multiple objects within the openIDConnect element.
Below is an example of how this would be configured:
- Save the changes.
INSTALLING CM LAUNCHER
The FYB CMLauncher is required to view and edit documents from both Content Manager and Sharepoint via FYB Explore. Please refer to the CMLauncher Installation Guide for further details.
UNINSTALLING FYB EXPLORE WEB SERVICE
To uninstall FYB Explore manually please follow the steps below:
-
Navigate to Control Panel

-
Click on Uninstall a program

-
Locate FYB Explore in the list of Programs and feature

-
Right click on FYB Explore and click on the Uninstall option

-
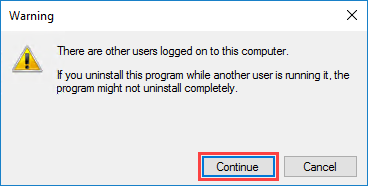
If a warning Prompt appears, click on the continue button
-
Click on the Yes button

-
The uninstallation process will commence
-
Open IIS once the uninstallation process is completed
-
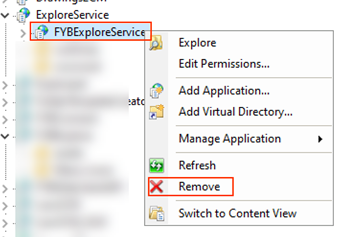
Locate Explore Service in IIS. Expand it
-
Right click FYBExploreService and click on the Remove button
-
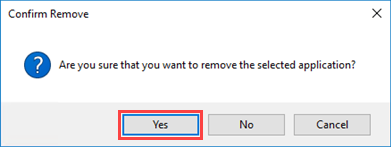
When the prompt appears click on the Yes button
-
Repeat the steps above for the FYBExplore and ExploreService IIS site
-
Contact your Database Administrator to delete the FYB Explore Database.