
(REDUNDANT BUT KEEP) Twitter Connector User Manual
LIMITATIONS
The maximum amount of Twitter connections that can be made using the Twitter Power Automate connector is 2 per user. For a full list of limitations, click here.
SAMPLE FLOWS
We have provided a sample flow to archive posts from Twitter to Content Manager. The sample flow will help you get set up with the Twitter connector and can be used as a basis to design other flows:
- Twitter to CM Flow - This flow will archive posts/comments from Twitter to CM
Prior to importing the sample, you need to create two connections in Power Automate:
- Power2CM Connection
- Twitter Connection
CREATING A POWER2CM CONNECTION
-
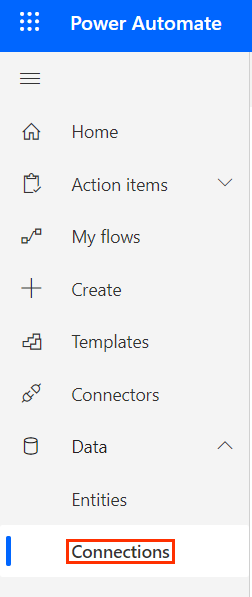
Once you have logged into Power Automate, click on Connections in the left menu under Data
-
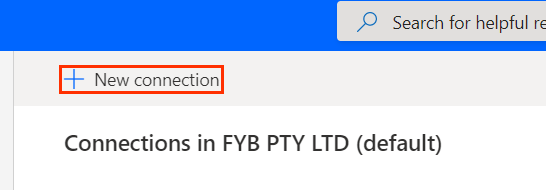
Click New connection
-
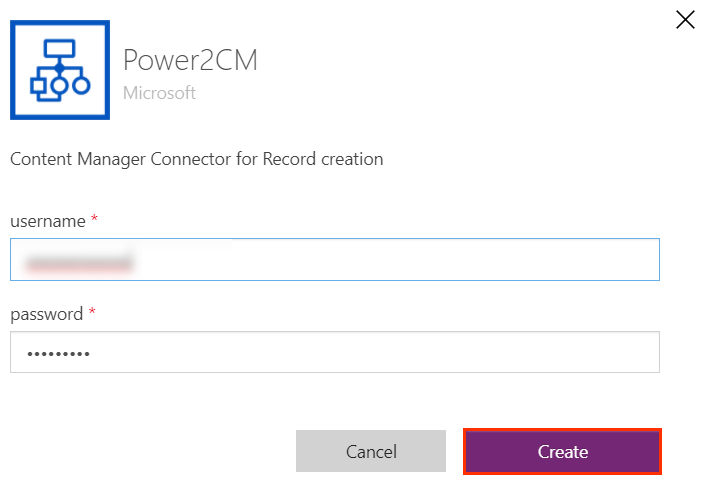
Type Power2CM into the search bar and click on the Power2CM Connector (name may vary depending on the name given for the connector in the Power2CM Installation Guide)

-
Enter your Content Manager username and password into the username and password fields respectively
-
Click Create
-
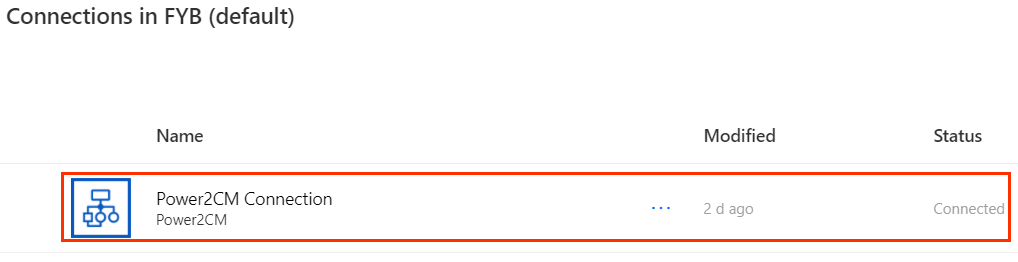
Your connection will now appear in the list of Power Automate connections. The status should say Connected
CREATING A TWITTER CONNECTION
-
Once you have logged into Power Automate, click on Connections in the left menu under Data
-
Click New connection
-
Type twitter into the search bar and select the Twitter Connector

-
Select Use default shared application and Click Create
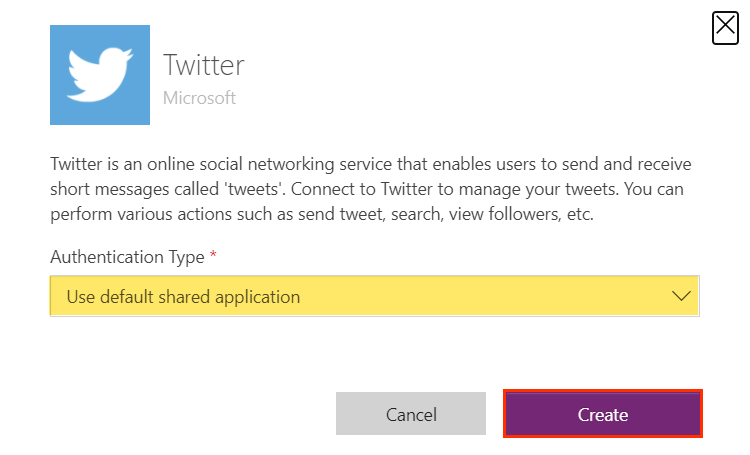
-
Enter your Twitter username and password and click Authorize App
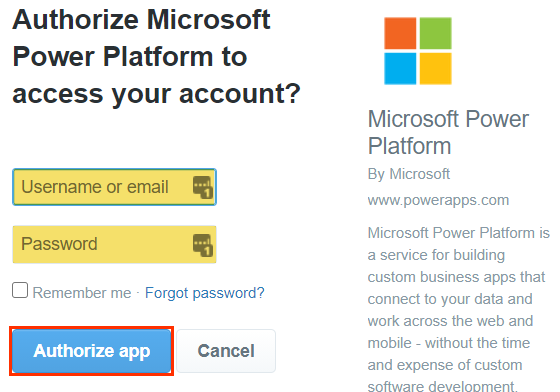
-
Your connection will now appear in the list of Power Automate connections. The status should say Connected

IMPORTING THE FLOW
-
Once you have logged into Power Automate, click on My Flows in the left menu

-
Click Import

-
Click Upload

-
Select the Twitter to CM flow.zip file and click Open

-
Once the file has finished uploading, you will be taken to the page below
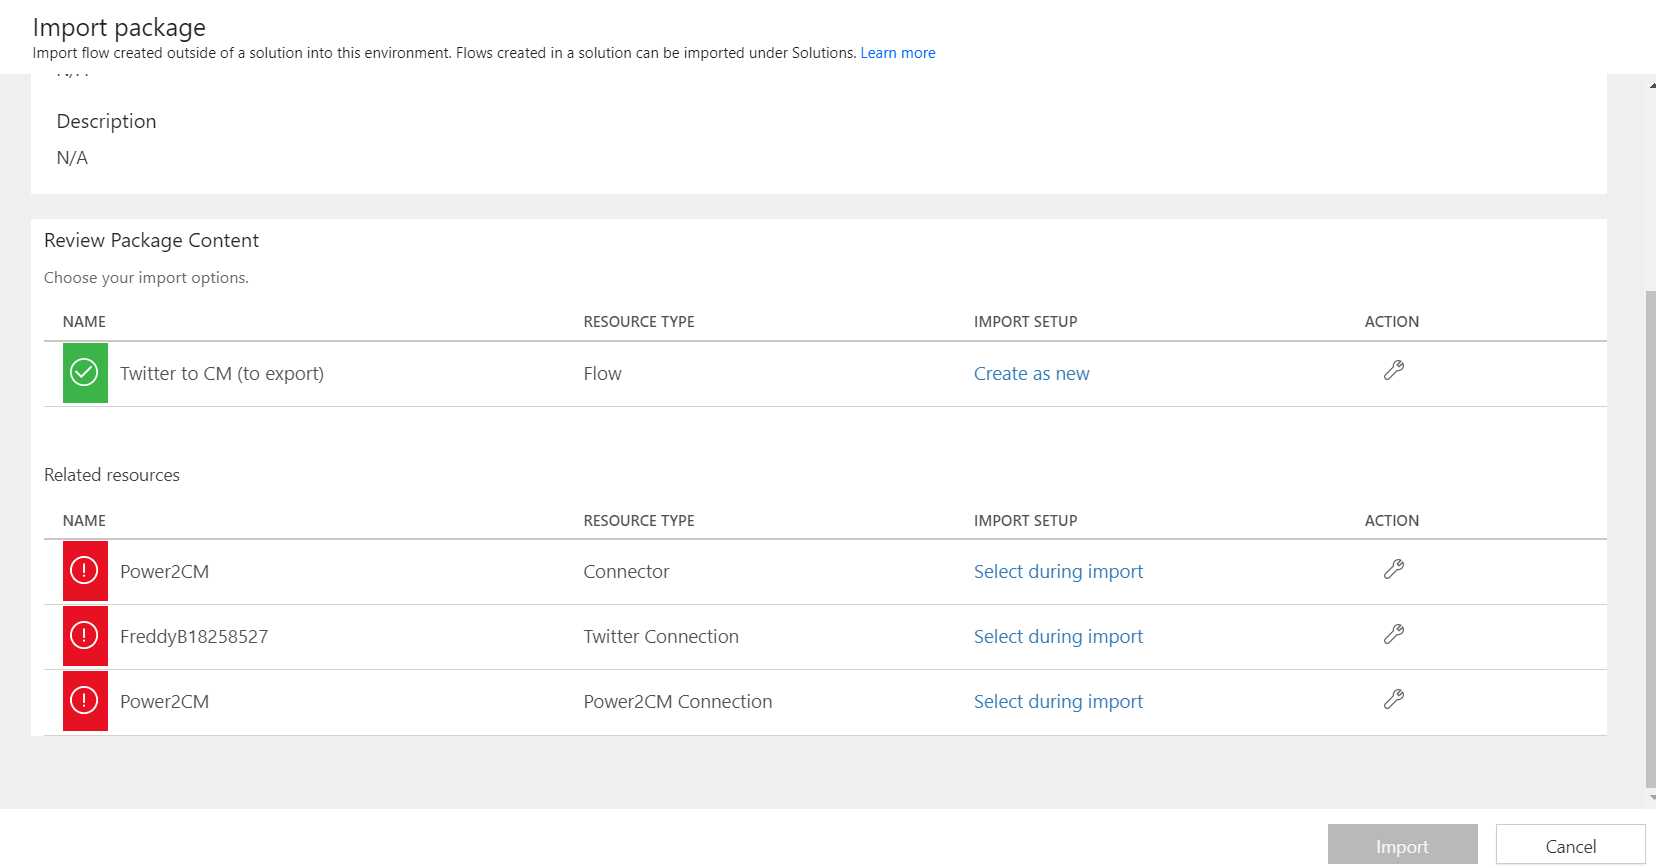
-
The connectors/connections (resources) found in the Related Resources table will need to be mapped to your current connectors/connections. This can be achieved by clicking the Select during import button found in the IMPORT SETUP column and choosing the correct resource.
EXPORTED RESOURCE RESOURCE TO MAP Power2CM Connector Select Power2CM and click Save 
Twitter Connection Select the existing Twitter connection (username will be different) and click Save 
Power2CM Connection Select Power2CM and click Save 
Each time a resource is mapped, its icon will change from  to

-
Click Import

-
You will receive a success message at the top of the page once your flow has imported successfully
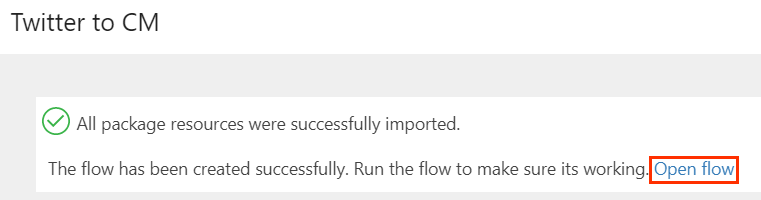
UPDATING THE FIELD VALUES
-
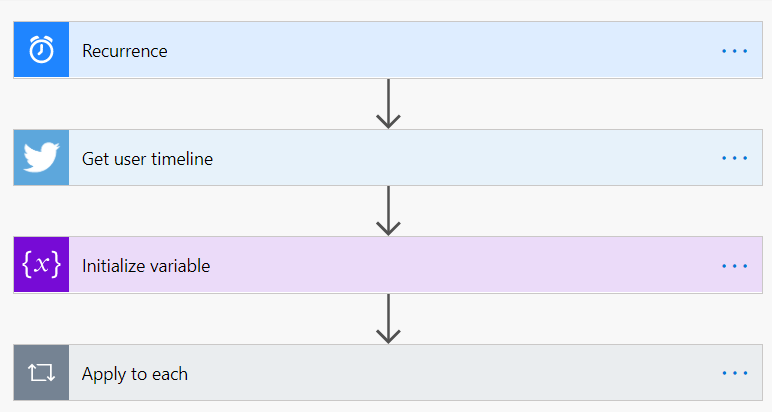
Open to the Twitter to CM flow that was imported in the IMPORTING THE FLOW section
-
Click on the Get user timeline action

-
Enter the Twitter handle of the user you would like to archive posts from (excluding the "@" symbol)

-
Click on the Apply to each action

-
Click on the Create Record in CM action

-
Enter the URI of the record type that you wish to use into the Record Type field. Enter the record number of the container you wish to capture the posts in the Container field
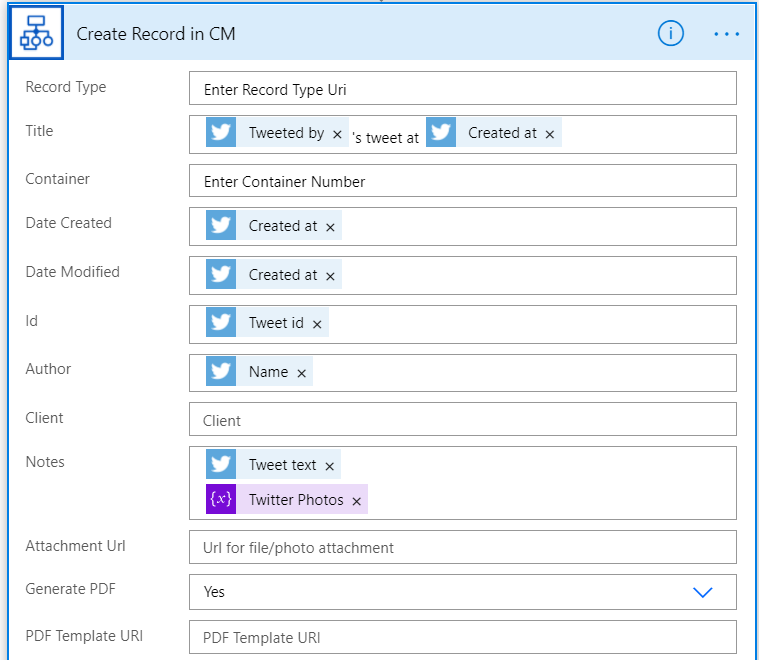
All other fields are set up with baseline values. If you wish to adjust these you can do so by clicking into the field, a popup will appear on the right with available data that can be entered. For more information on the values available from the Twitter Connector, click here
-
Click Save

-
Your flow will be disabled by default. To enable it, click the Left Arrow button

-
Click Turn on

Your flow will now run once a day. Records already created from previous flows will be updated using the id supplied in the Id field of the Create Record in CM action.
ERROR HANDLING NOTIFICATIONS (OPTIONAL)
Power2CM contains the ability to provide email notifications of any errors that occur during the transfer process. This email will be sent once per day. If this error notification is required to be sent after a failed processed request, an additional step can be included in a flow to allow for an instantaneous message to be sent to the nominated person.
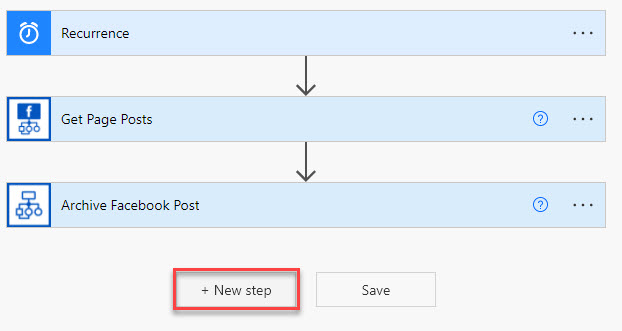
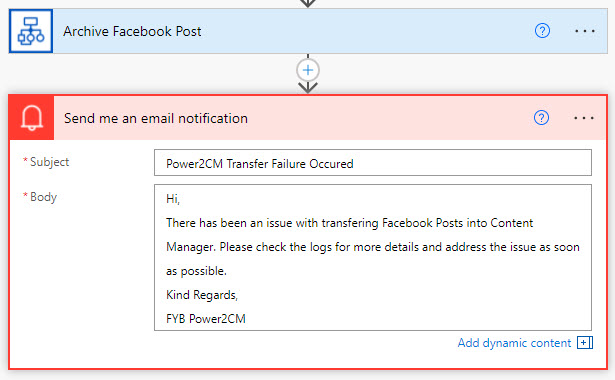
Below is an example of error handling for a facebook flow, this can be completed for all types of flows.
To add an error handling step to the end of the connector, complete the following:
-
Select the flow to change, Click Edit

-
Click the New Step Button , this will add the step to the end of the flow
-
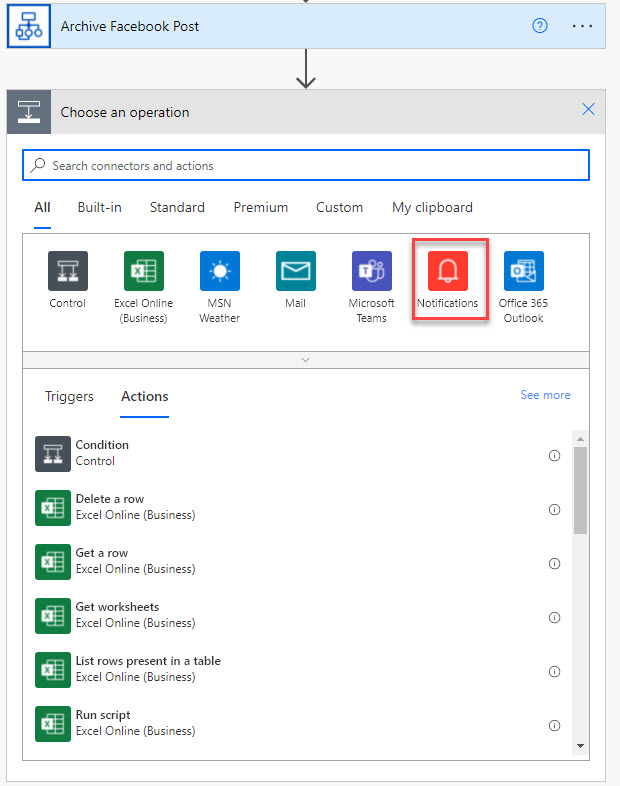
Click the Notifications Operation
-
Select the preferred notification type, Email or Mobile Notification, fill out the required details required.
-
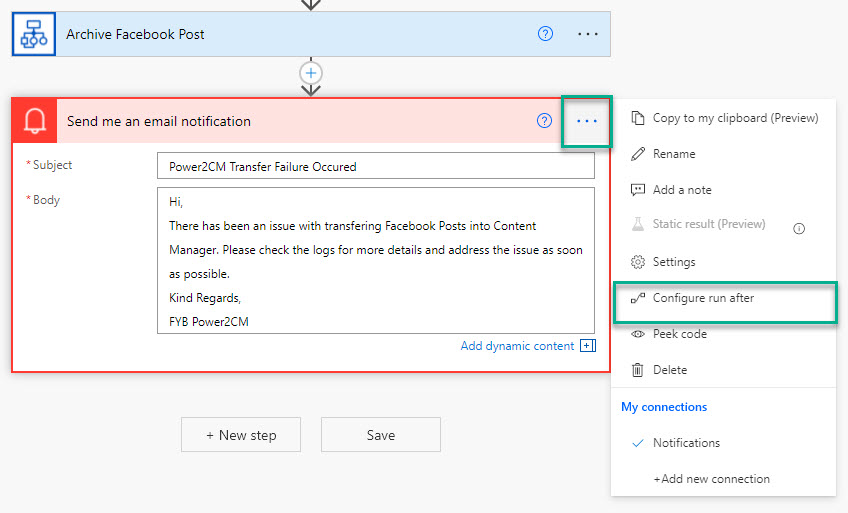
Click the '...' menu in the top right of the action, and click Configure Run After item.
-
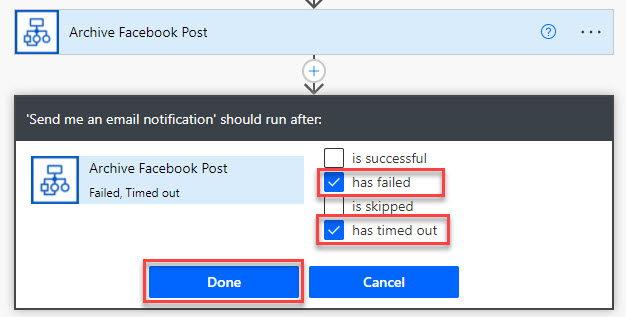
Check the Has Failed and Has Timed Out check boxes only, Click Done
-
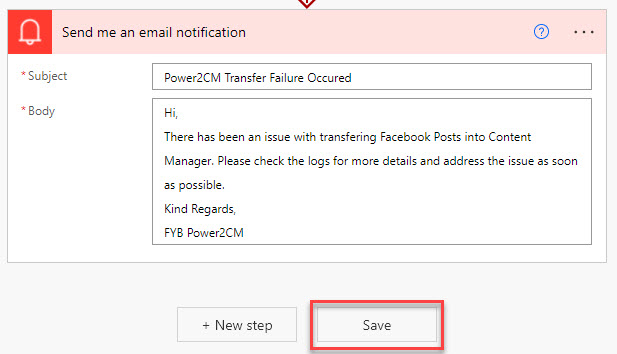
Click Save.
-
Repeat process above for any other flows desired.