
PRONI Exporter Admin Guide
GENERAL
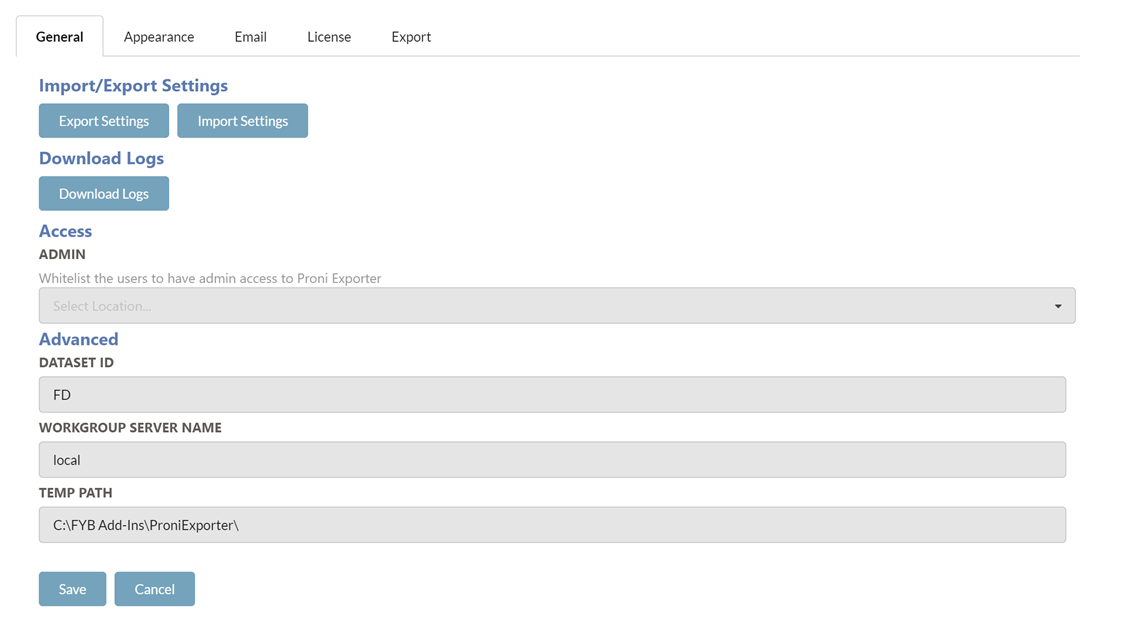
| FUNCTIONALITY | DESCRIPTION |
|---|---|
| EXPORT/IMPORT SETTINGS |  Export existing configuration settings or import previously configured settings. See the EXPORTING AND IMPORTING SETTINGS section of this guide |
| DOWNLOAD LOGS |  Download a zip file containing all the Proni Exporter log files. |
| WHITELIST ADMIN ACCESS |  This field allows you to whitelist Content Manager users who are not an Administrator or Records managers to allow them access to Proni Exporter's admin section |
| DATASET ID |  The ID of the Content Manager Dataset. |
| WORKGROUP SERVER NAME |  The Workgroup server name of your Content Manager Dataset. Changes to this field will require an App Pool restart. |
| TEMP PATH |  The Temp directory for Proni Exporter. This directory will also contain the Proni Exporter log files. Changes to this field will require an App Pool restart. |
EXPORTING AND IMPORTING SETTINGS
You can either export the current configuration settings or import existing settings using the buttons below.

EXPORT
To export Proni Exporter's current settings, click the Export Settings button. This will automatically download the zip file containing the PRONI Exporter configuration files.
IMPORT
To import existing settings, follow the steps below.
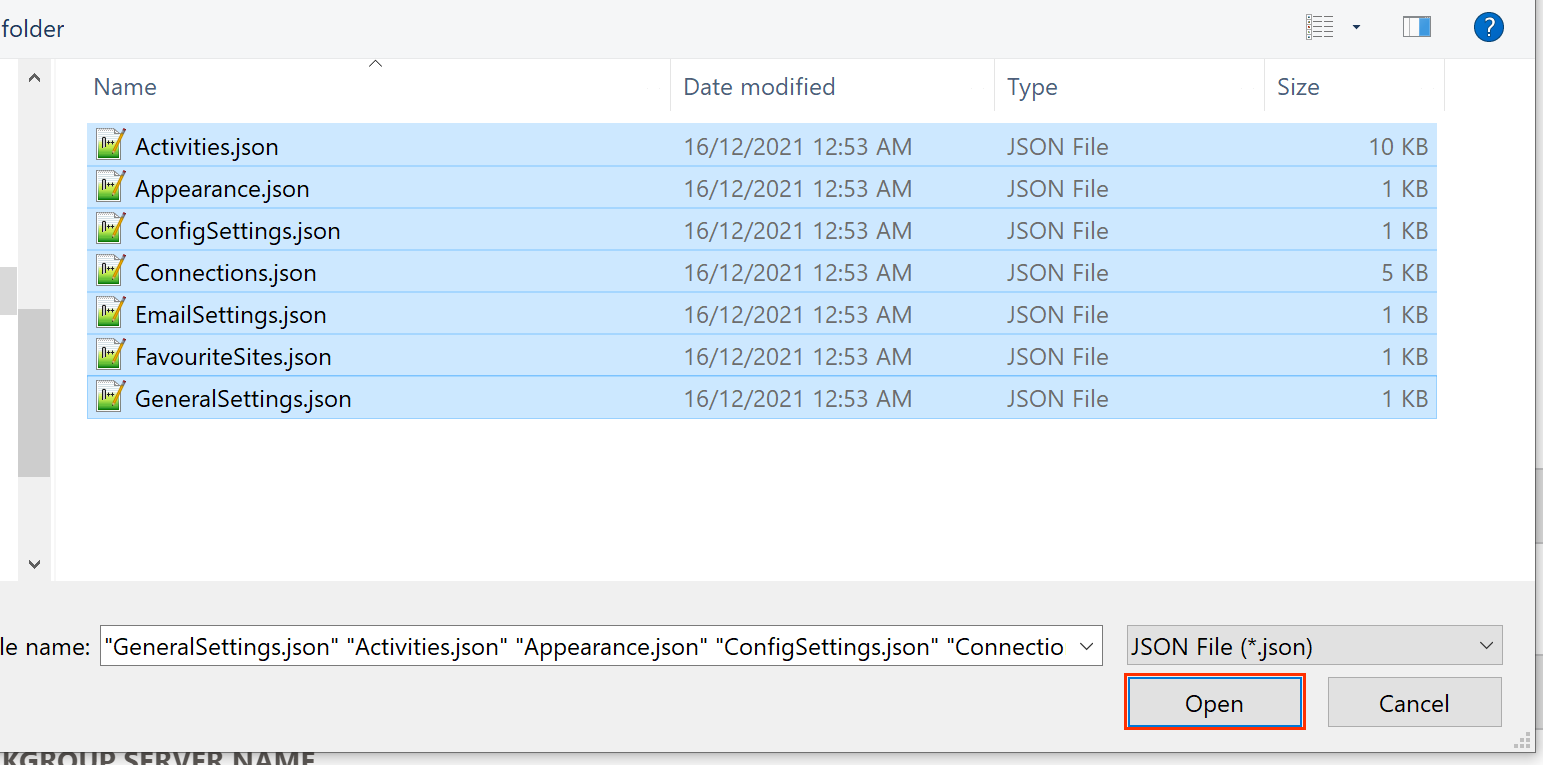
Only import JSON files that were previously taken from the Proni Exporter's App_Data folder or exported from Proni Exporter.
-
Click the Import Settings button

-
Select the settings files then click Open
-
A success message will appear once the settings files have been updated and the admin page will reload shortly after to update the settings
APPEARANCE
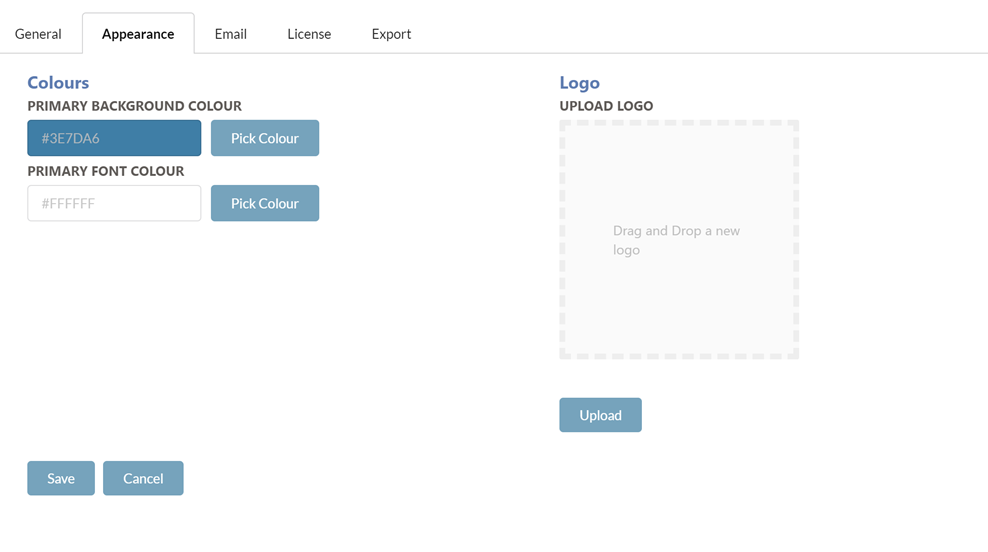
| FUNCTIONALITY | DESCRIPTION |
|---|---|
| PRIMARY BACKGROUND COLOUR | Controls the colour of the header and footers for the application. |
| PRIMARY FONT COLOUR | Controls the font colour of the header and footers for the application |
| LOGO | Sets the logo for the application |
EMAIL SETTINGS
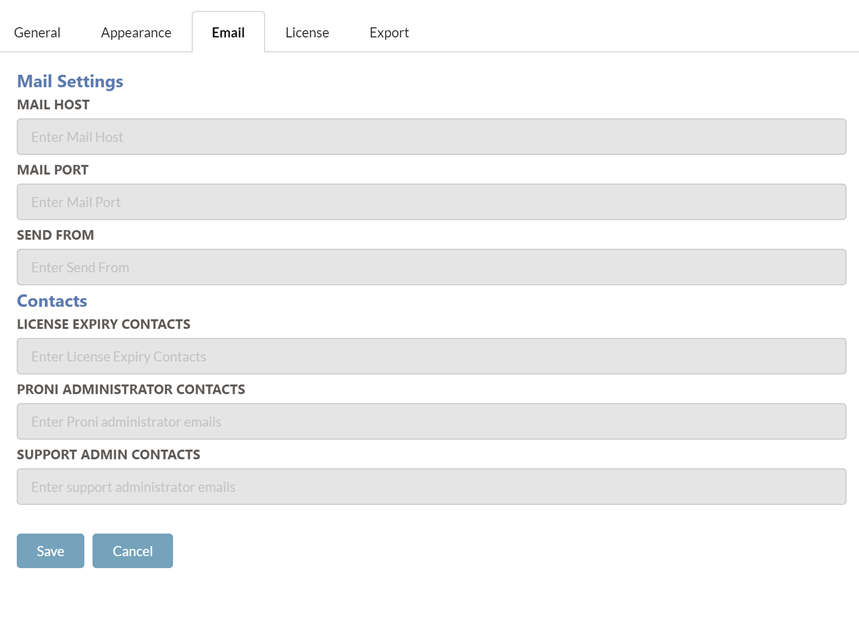
| FUNCTIONALITY | DESCRIPTION |
|---|---|
| MAIL HOST | The mail host that is used to send all email notifications from. |
| MAIL PORT | The mail port to allow for email notifications to be sent. |
| SEND FROM | The email address that all email notifications are sent from. |
| LICENSE EXPIRY CONTACTS | Provide the email addresses of the users that shall receive an email notification when the PRONI EXPORTER license is due to expire. Multiple contacts can be added by adding a ';' between each contact. (e.g. name@company.com.au; secondname@company.com.au). |
| PRONI ADMINISTRATOR CONTACTS | Email addresses added here will receive notifications when successful/failed exports are completed. These contacts will also receive the Inventory CSV file and the Summary Report for each successful export. |
| SUPPORT ADMIN CONTACTS | Email addresses added here will receive notifications when successful/failed exports are completed. |
EXPORT SETTINGS
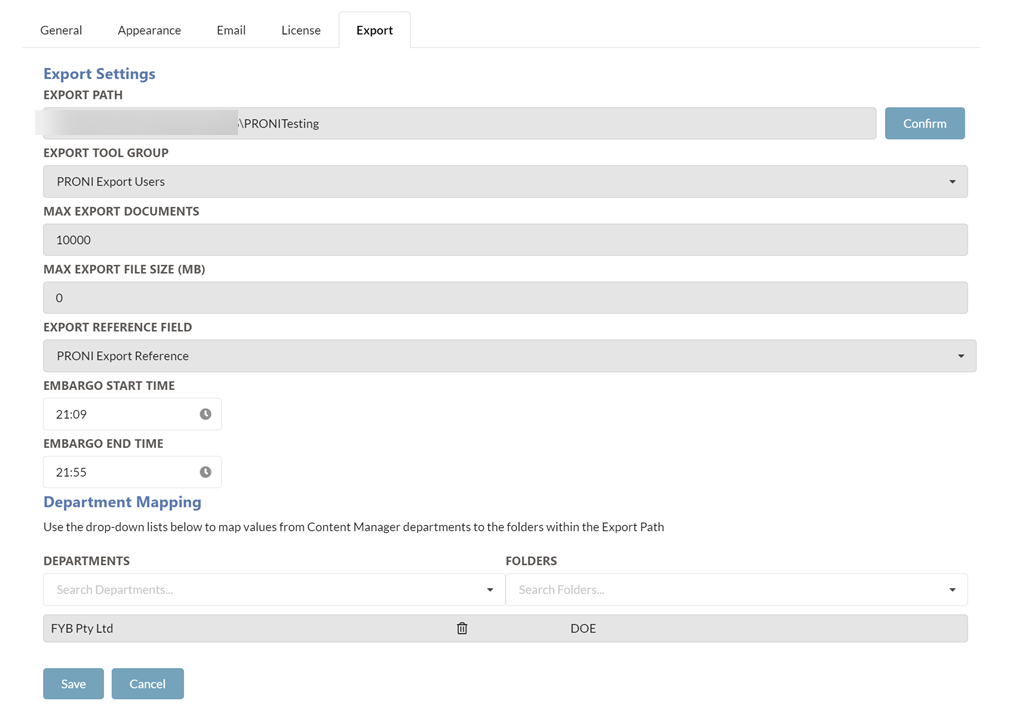
| FUNCTIONALITY | DESCRIPTION |
|---|---|
| EXPORT PATH | The network share path where records will be exported to. |
| EXPORT TOOL GROUP | Only locations who are a member of the selected group can export Records via Proni Exporter |
| MAX EXPORT DOCUMENTS | The total number of document records that can be exported per export. |
| MAX EXPORT FILE SIZE | The total size of documents (in megabytes) that can be exported per export. |
| EXPORT PRONI REFERENCE FIELD | The additional field used to store the folder path of a container after it has been exported. |
| EMBARGO START TIME | The start time for export embargos. Users will not be able to export between these times. |
| EMBARGO END TIME | The end time for export embargos. Users will not be able to export between these times. |
| DEPARTMENT MAPPING | Used to map folders from the EXPORT PATH with Content Manager Departments (locations). |
DEPARTMENT MAPPING
To map a department with a folder:
-
Ensure there is a valid server path in the EXPORT PATH FIELD, then click CONFIRM

-
Select a Content Manager department from the list
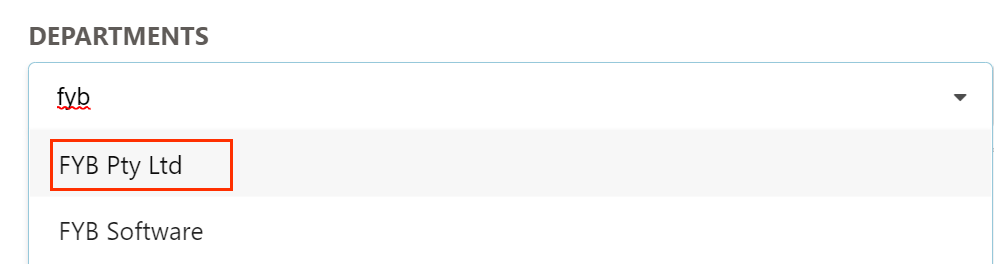
-
Select a folder from the folder list

-
Repeat steps 2 and 3 for any other mappings. Click Save

-
If you need to remove a mapping, click the delete button
