PRONI Exporter Installation Guide
DISCLAIMER
Any advice FYB provide in relation to setting up any FYB App, FYB Add-in, FYB Connector and or advice in relation to opening access to your on-premises or in the cloud systems will be general advice only. This means that the advice is of a general nature and will not consider your network setup, network infrastructure or any security requirements that you may have or in fact need. It is highly advised that you seek advice from internal or external providers to ensure that they are comfortable with what is required prior to going ahead with any deployment, setup, or configuration for external access.
LICENSE DETAILS
Please contact FYB for a valid license if you have yet to obtain one for your Add-In.
INSTALLATION COMPONENTS
The following installation components are required to ensure full functionality of the FYB PRONI Exporter:
- FYB Proni Exporter web application, this is a server-side installation.
INSTALLING FYB PRONI EXPORTER
LICENSE
-
Create a folder to house the license file (.lic) on the IIS Server
-
Place the license file in this folder
NoteYou will be asked to enter this location during the installation.
TRUSTED USER ACCOUNT
Add the account that will run the application pool as a Trusted User account in Enterprise Studio. Please refer to your Enterprise Studio help file on adding trusted accounts. If using a system account (application pool identity, network service etc) you will be required to enter the details as DOMAIN\Server Name$. If using a dedicated Windows service account, you will be required to enter the details as DOMAIN\username.
INSTALLATION
Before running the MSI ensure that all prerequisites are complete. Including deploying the .NET 6 SDK and Hosting Bundle.
To deploy the Net Core SDK and Hosting Bundle to the server, follow these steps:
-
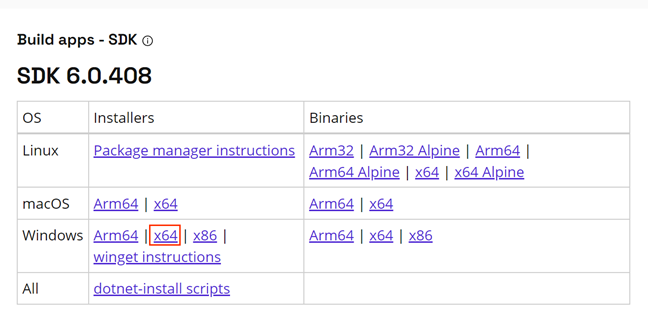
Install the latest .NET 6 SDK (x64) found here
-
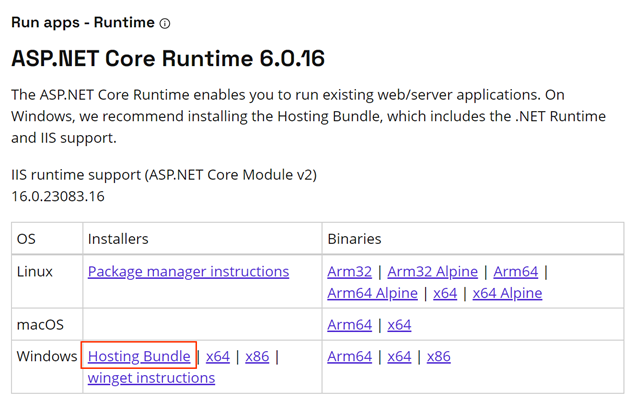
Install the latest ASP.NET Core 6 Runtime Hosting Bundle found here
-
Once both executables have been installed, complete a full server restart to allow for .NET 6 to bind to IIS. If a server restart is not possible an IIS reset can be completed with the following CMDs from an elevated command prompt.
- net stop was /y
- net start w3svc
- iisreset
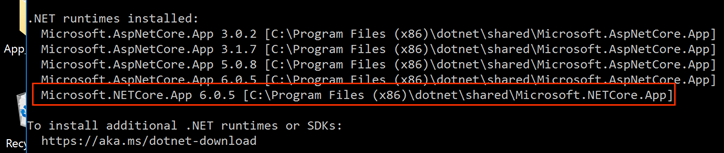
NoteTo check that the SDK has been attached to the hosting bundle, open Command Prompt and type dotnet --info
The FYB PRONI Exporter MSI will:
- Deploy the installation files
- Setup the application pool and application in IIS
- Setup the temp folder
- Configure the application as specified by the user
Installation can be completed by running the MSI or using the command line arguments to prefill most data. To install the FYB PRONI Exporter application, follow these steps:
-
Run command prompt as an administrator and launch the proniexporter-xxx.msi installer
-
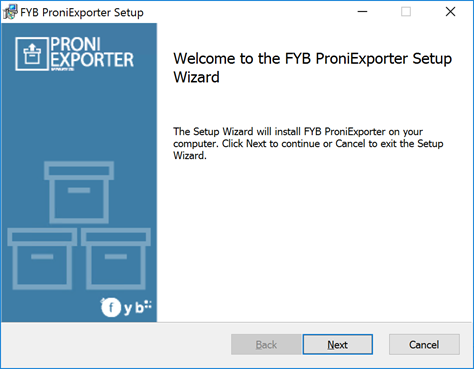
Click on the Next button
-
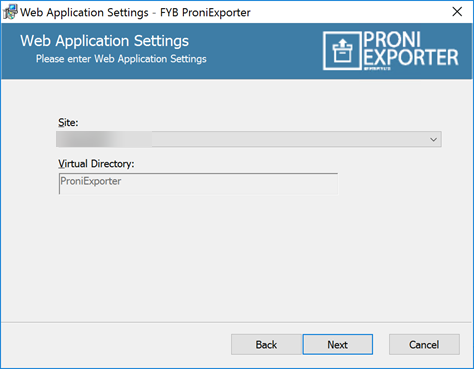
On the Web Application Settings screen select the site to host the application. Click Next
 Note
The virtual directory name must remain as ProniExporter. It cannot be renamed.
-
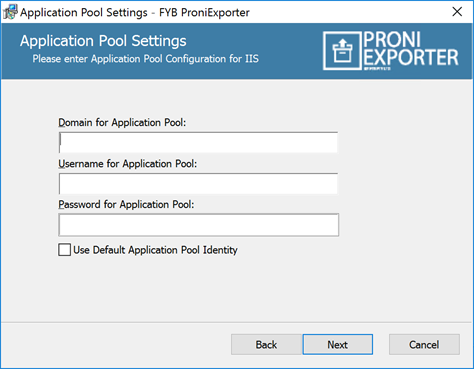
On the Application Pool Settings screen, enter the domain, username, and password for the Application Pool identity. Click Next
-
On the Configuration Settings screen enter the required information. Further details are in the table below. Click Next
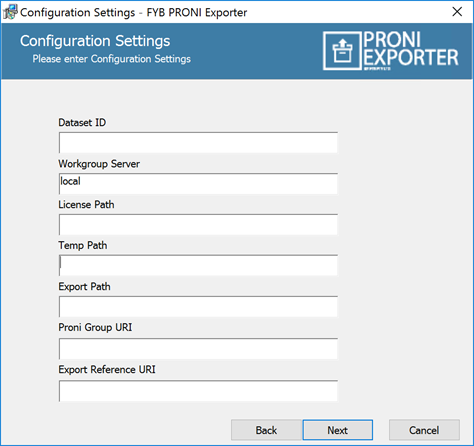
FIELD DESCRIPTION Dataset ID Content Manager two-character dataset identifier Workgroup Server Content Manager workgroup server name. This should generally be set to local License Path Local path to the PRONI Exporter license file Temp Path Local temporary directory used by the application to cache documents Export Path The path that records will be exported to. This should be a network share path. PRONI Group URI The URI of the CM location group for PRONI users. Only members of this group will be able to use the application. See the CONTENT MANAGER ADDITIONAL FIELDS section for further details. Export Reference URI The URI of the additional field used to store the folder path of a container after it has been exported. See the CONTENT MANAGER ADDITIONAL FIELDS section for further details. -
On the Email Configuration screen input the relevant email server details. Click Next
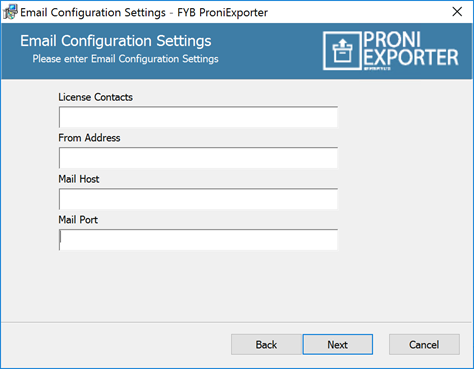
FIELD DESCRIPTION License Contact Recipient of the license expiry notification. From Address Address that any emails will be sent from (e.g. donotreply@domain.com Mail Host SMTP email server address (e.g. domain.mail.protection.outlook.com) Mail Port SMTP email server port (e.g. 25) -
Confirm the install location and click on the Next button
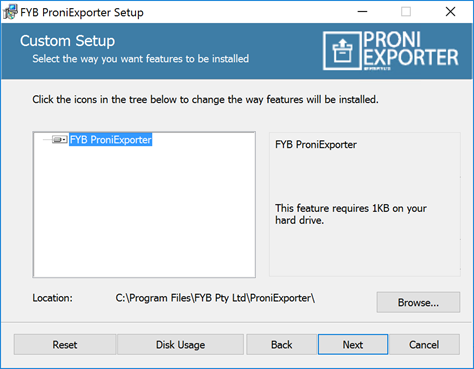
-
Click on the Install button
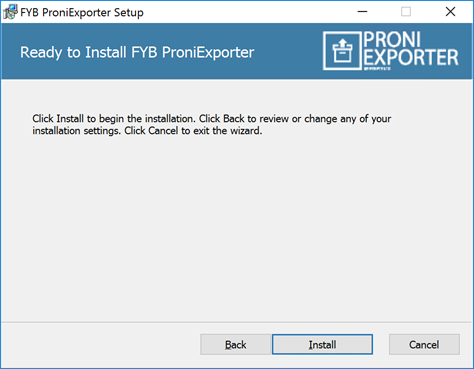
-
Once the installation is complete click Finish
COMMAND-LINE ARGUMENTS
Use "" around values that contain special characters (non-alphanumeric characters)
| ARGUMENT | PURPOSE |
|---|---|
| WEB_APP_POOL_IDENTITY_DOMAIN | Sets the App Pool domain for the application pool |
| WEB_APP_POOL_IDENTITY_NAME | Sets the App Pool username for the account running the application pool |
| WEB_APP_POOL_IDENTITY_PWD | Sets the App Pool password for the account running the application pool |
| DBID | Sets the Database ID that connects to Content Manager dataset to run the application |
| WORKGROUP_SERVER | Sets the Workgroup Server Name that connects to Content Manager dataset to run the application |
| LICENSE_PATH | Sets the license for the application |
| TEMP_PATH | Sets the temp path that connects to the application |
CONFIGURATION
IIS CONFIGURATION
-
After the installation process is complete, you will be able to locate the application installed within the site selected during the installation
-
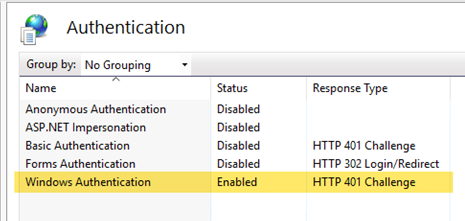
From the Features View double click on Authentication and ensure that only Windows Authentication is enabled
-
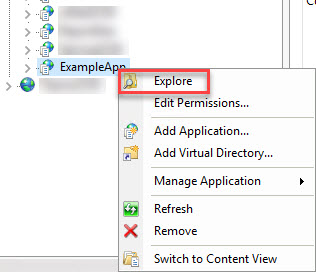
Right-click the application in IIS and select explore
-
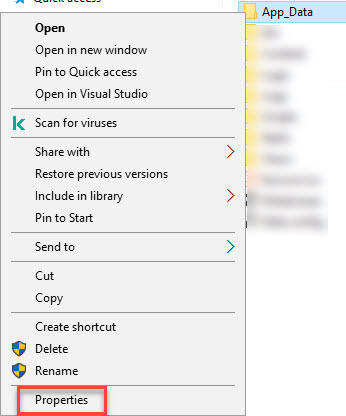
Right-click the app data folder and select properties
-
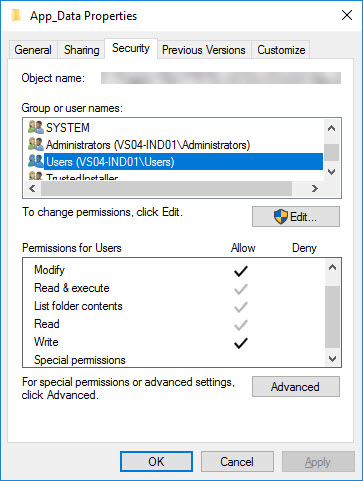
Navigate to the security tab and ensure users have read, write and modify permissions
CONTENT MANAGER ADDITIONAL FIELDS
The following additional fields are required on all record types used with PRONI Exporter.
| Name | Search Clause | Data Format | Description | Record Types |
|---|---|---|---|---|
| Access Decision | AccessDecision | String | Determines whether or not the Access decision permits the digital object to be viewed by the public | Container |
| Closure Reason including PIT | ClosureReasonIncludingPIT | Text | Free text field describing reasons for decisions to close | Container |
| Date Approved | DateApproved | DateTime | Date approved by Departmental Information Manager | Container |
| Date Reviewed | DateReviewed | DateTime | Date file was reviewed | Container |
| Departmental Information Manager | DepartmentalInformationManager | Location | Name of Departmental Information Manager approving decision | Container |
| Exported To Proni | ExportedToProni | Boolean | Used to identify which Records have already been exported to the server | Container and Document |
| PRONI Export Ref | PRONIExportRef | String | Used to identify the location the records were exported to on the server | Container and Document |
| Next Action | NextAction | String | Next Action for record, either Open or Review | Container |
| Next Action Date | NextActionDate | DateTime | The date on which the next action on the record will occur | Container and Document |
| Branch Reviewer | BranchReviewer | Location | Name of person that reviewed file | Container |
| s.23 Security matters (PIT) | S23SecurityMattersPIT | Boolean | Container | |
| s.24 National Security (PIT) | S24NationalSecurityPIT | Boolean | Container | |
| s.26 Defence | S26Defence | Boolean | Container | |
| s.27 International Relations (PIT) | S27InternationalRelationsPIT | Boolean | Container | |
| s.29 The Economy (PIT) | S29TheEconomyPIT | Boolean | Container | |
| s.30(2) Investigations (Confidential Sources)(PIT) | S302InvestigationsConfidentialSourcesPIT | Boolean | Container | |
| s.31 Law Enforcement (PIT) | S31LawEnforcementPIT | Boolean | Container | |
| s.34 Parliamentary Privilege | S34ParliamentaryPrivilege | Boolean | Container | |
| s.36 Conduct Of Public Affairs (PIT) | S36ConductOfPublicAffairsPIT | Boolean | Container | |
| s.37 Royal Family And Honours | S37RoyalFamilyAndHonours | Boolean | Container | |
| s.38 Health And Safety (PIT) | S38HealthAndSafetyPIT | Boolean | Container | |
| s.39 Environmental Information | S39EnvironmentalInformation | Boolean | Container | |
| s.40 Data Protection | S40DataProtection | Boolean | Container | |
| s.41 Info Provided In Confidence | S41InfoProvidedInConfidence | Boolean | Container | |
| s.43 Commercial Interests (PIT) | S43CommercialInterestsPIT | Boolean | Container | |
| s.44 Prohibition On Disclosure | S44ProhibitionOnDisclosure | Boolean | Container |
CONTENT MANAGER EXTERNAL LINK (v10 OR ABOVE)
Once the application has been installed an external link will need to be registered in Content Manager.
-
Open Content Manager and click on Tools > Administration > External Links
-
Right-click and select New External Link
-
From the external link type list, select External executable, click OK
-
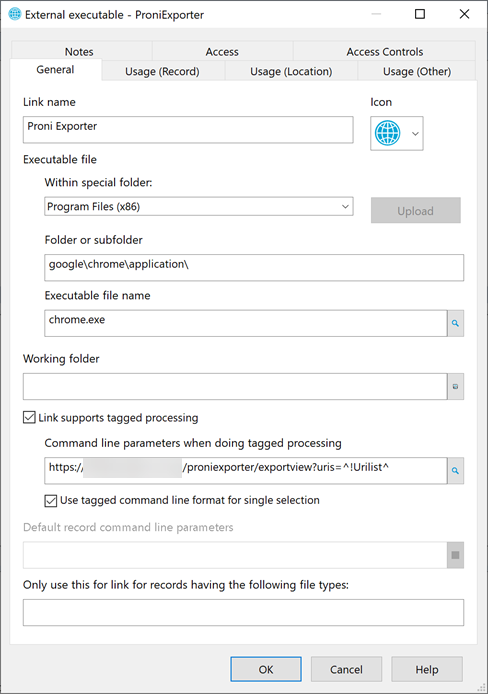
Enter the Link Name as FYB PRONI Exporter
-
Under Folder or Subfolder input the location of your default internet browser (e.g. Chrome would be google\chrome\application)
-
Under Executable File Name browse to and select the Chrome.exe (different exe if a different browser is chosen)
-
Check Link supports tagged processing
-
Under Command line parameters when doing tagged processing enter PRONI Exporters's URL followed by /exportview?uris=^!Urilist^. For example, https://domain-name/proniexporter/exportview?uris=^!Urilist^
-
Check Use tagged command line format for single selection
-
The completed setup should look like the below
-
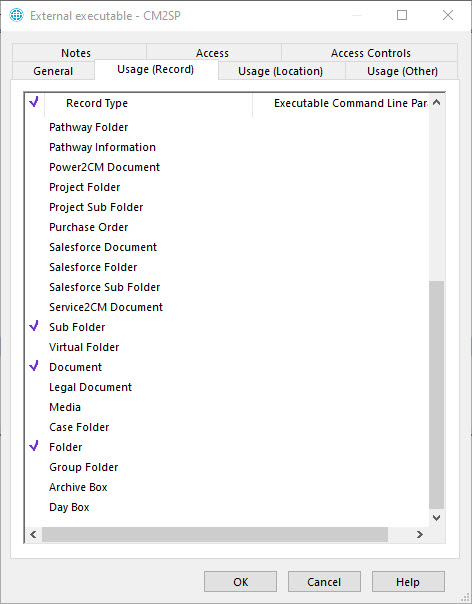
On the Usage (Record) tab, tag each of the appropriate record types
-
Click on the OK button
CONTENT MANAGER EXTERNAL LINK (v9.4 OR BELOW)
Note that the external link for Content Manager v9.4 and below requires an additional PRONI Launcher tool to be deployed to the server.
-
Create an FYB Add-ins folder on the appropriate server that the PRONI Exporter tool has been installed on. For Example: ‘D:\FYB Addins\
-
Right-click on the FYB Addins folder > Properties > click on the Sharing tab
-
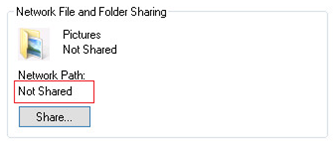
If the Network Path is set to ‘Not Shared’
-
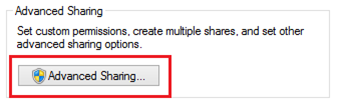
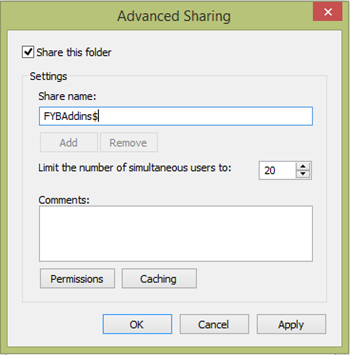
Click on the Advanced Sharing button
-
In the Advanced Sharing window, tick ‘Share this folder’ and remove the space between FYB and Addins, then add a ‘$’ sign which will keep the folder hidden
-
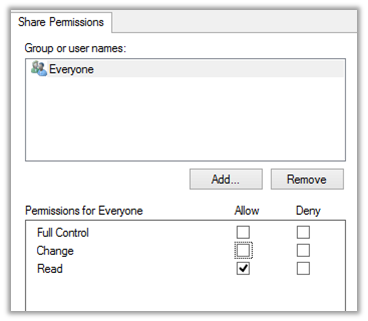
Click on the Permissions button
-
Give ‘Everyone’ the ‘Read’ permission
-
A Network Path will now be available (this path is needed during the settings setup)
-
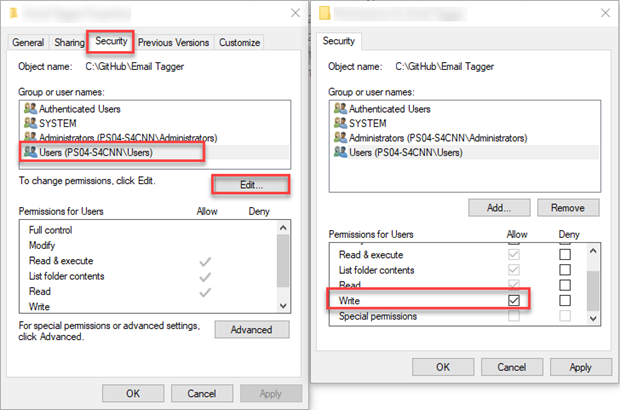
Right-click the FYB Add-ins folder and select Security > Users > Edit and ensure the Write permission is enabled
-
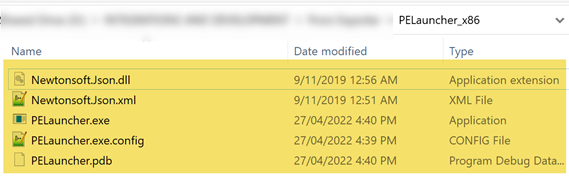
Obtain a copy of the PELauncher zip files

-
Create a folder within the FYB AddIns folder called PELauncher
-
Paste the files extracted from the PELauncher.zip into this folder
-
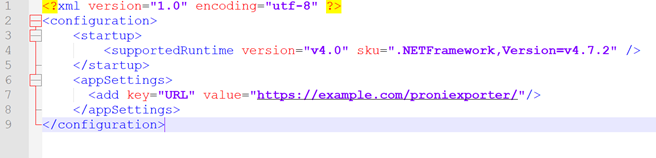
Open the PELauncher.exe.config file in the text editor of your choice and update the URL value with the PRONI Exporter URL (e.g. https://example.com.au/proniexporter/), ensure to include the trailing slash ('/')
-
In Content Manager click on Tools > Administration > External Links

-
Right Click and select New executable

-
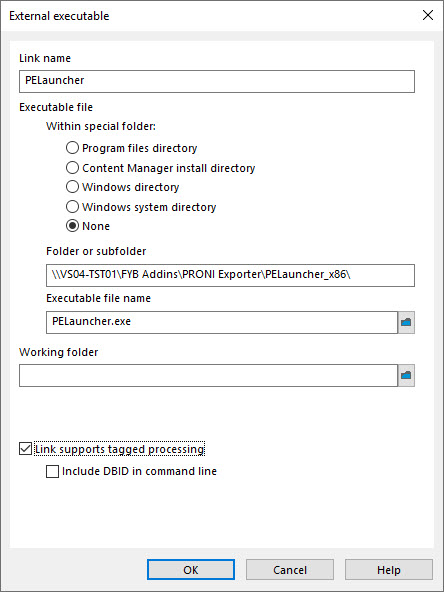
Enter the Link Name as PELauncher

-
Under ‘Folder or Subfolder’, enter the Network Location of the FYB Addins\PELauncher\ folder created earlier in this guide

-
Under Executable File Name browse to the FYB PELauncher folder and select PELauncher.exe
-
Tick Link supports tagged processing. The completed setup should look like the below
-
Click OK
-
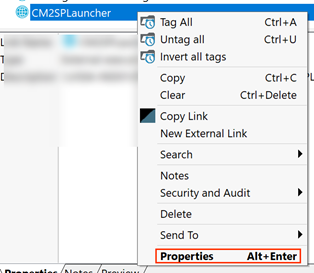
Right click on the FYB PELauncher external link > Properties
-
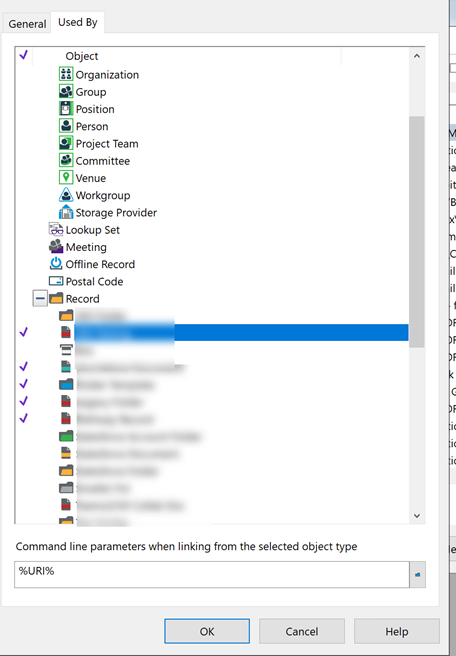
Click the “Used By” tab.

-
Select all the appropriate record types. For each selected record type, enter the parameter field %URI%.
-
Click OK
-
The external link will now be accessible via the right click menu
UNINSTALLING PRONI EXPORTER
To uninstall the PRONI Exporter manually please follow the steps below:
-
Navigate to control panel

-
Click on uninstall a program

-
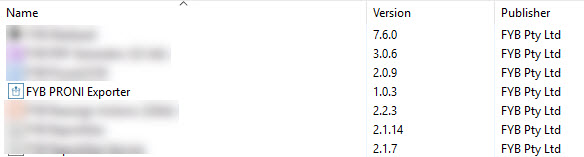
Locate PRONI Exporter in the list of Programs and feature
-
Right click on PRONI Exporter and click on Uninstall

-
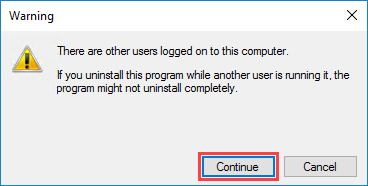
If a warning Prompt appears, click on the continue button
-
The uninstallation process will commence

-
Open IIS once the uninstallation process is completed
-
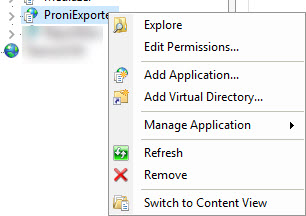
Locate PRONI Exporter in IIS, right click and press the Remove button
-
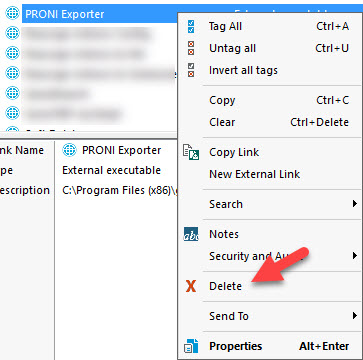
Navigate to Content Manager > External Links under the Administration tab
-
Right click PRONI Exporter and select Delete