
Folder Template Creator Installation Guide
DISCLAIMER
Any advice FYB provide in relation to setting up any FYB App, FYB Add-in, FYB Connector and or advice in relation to opening access to your on-premises or in the cloud systems will be general advice only. This means that the advice is of a general nature and will not consider your network setup, network infrastructure or any security requirements that you may have or in fact need. It is highly advised that you seek advice from internal or external providers to ensure that they are comfortable with what is required prior to going ahead with any deployment, setup, or configuration for external access.
LICENSE DETAILS
Please contact FYB for a valid license if you are yet to obtain one for your Add-in.
If migrating from a previous version of Folder Template Creator, please contact Accounts to receive your new Folder Template Reader license.
Folder Template Creator will now require 2 separate licenses, one for Folder Template Creator web application, and a Folder Template Reader license for the dll.
INSTALLATION COMPONENTS
The following installation components are required to ensure full functionality of the FYB Folder Template Creator:
- Folder Template Creator Web Application
- This is a server-side installation
- Folder Template Creator Reader
- This is a server-side installation
The Folder Template Creator Web Application must be installed first.
INSTALLING FOLDER TEMPLATE CREATOR WEB APPLICATION
LICENSE
-
Create a folder to house the license file (.lic) on the IIS Server
-
Place the license file in this folder
NoteYou will be asked to enter this location during the installation.
TRUSTED USER ACCOUNT
Add the account that will run the application pool as a Trusted User Account in Enterprise Studio. Please refer to your Enterprise Studio help file on adding trusted accounts. If using a system account (application pool identity, network service etc) you will be required to enter the details as DOMAIN\ServerName$ If using a dedicated windows service account, you will be required to enter the details as DOMAIN\username.
INSTALLATION
The FYB Folder Template Creator MSI will:
- Deploy the installation files
- Setup the application pool and application in IIS
- Setup the temporary folder
- Configure the application settings as specified by the user
To install Folder Template Creator, follow these steps:
-
Run command prompt as an administrator and launch the foldertemplatecreator-2.3.x.msi
-
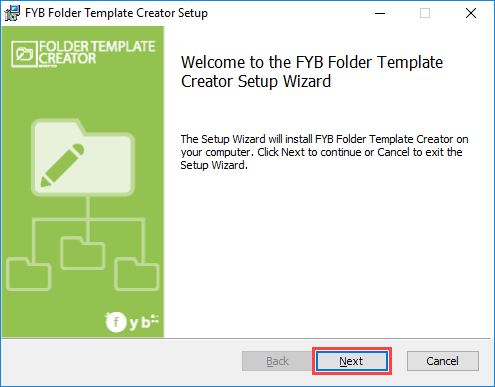
Click on the Next button
-
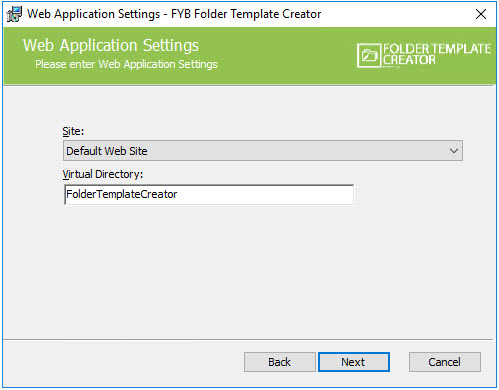
On the Web Application Settings screen, select a Site to host the application and enter a name for the virtual directory
NoteYou can use an existing virtual directory or create a new one with the installer.
IIS DirectoryThe application must be installed under the dedicated site as an application. It cannot be installed at the site level

-
Click on the Next button
-
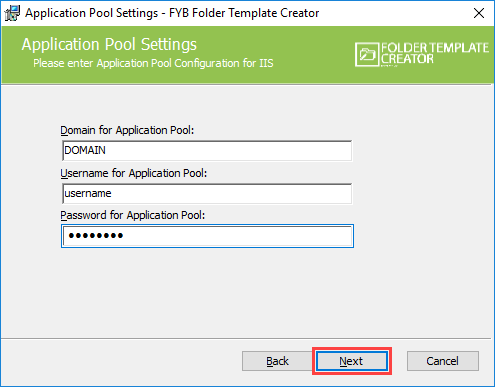
On the Application Pool Settings screen, enter the domain, username, and password for the Application Pool identity
-
Click on the Next button
-
Enter your Configuration Settings below and click Next
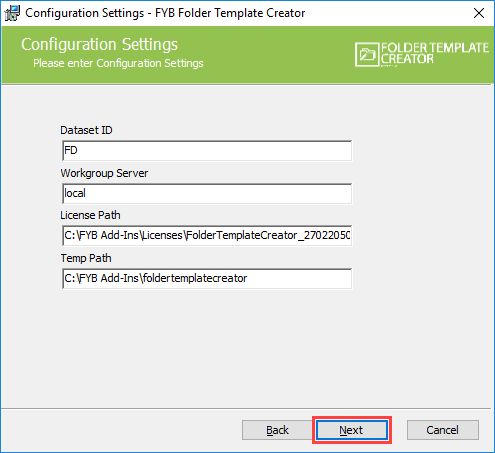
NAME DESCRIPTION Dataset ID The two alphanumeric character dataset identifier. Workgroup Server Content Manager workgroup server name. This should generally be set to local Workgroup Server URL Content Manager workgroup server URL. License Path The path to your license including the .lic file. Temp Path A temporary location to application files when Folder Template Creator web service connects to Content Manager. -
If your environment is configured to only allow OpenId authentication (e.g. Azure AD or ADFS) for your Content Manager, you'll receive the following message:

-
Click OK to navigate to the Open Id settings screen and enter the required values.
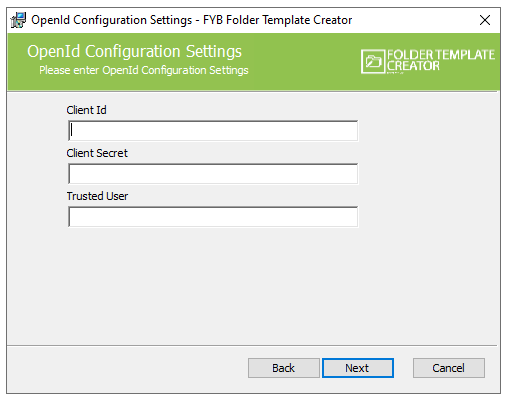 Note
A designated CM Location is required to be nominated as the Trusted User.
No specific permissions are required to be provided.
NAME DESCRIPTION Client Id The Client/App Id of the Open Id application used to secure Content Manager. For ADFS authentication, this will be the username of the Confidential Client app. Client Secret The Client/App Id of the Open Id application used to secure Content Manager. For ADFS authentication, this will be the password of the Confidential Client app. Trusted User The Network Login value of the Content Manager Confidential Client app location. For ADFS authentication, this will be the username of the Confidential Client app. -
Open ID Settings (Optional). The values of the required fields can be found in the respective Open ID guides.
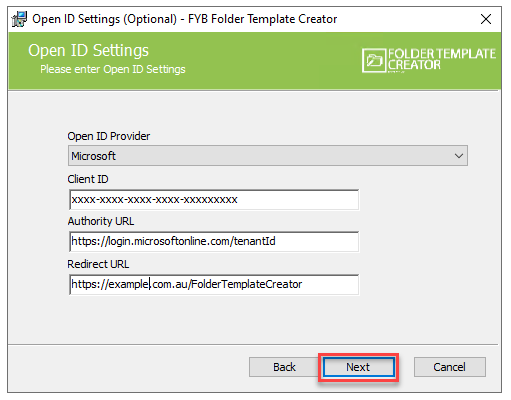
NAME DESCRIPTION Open ID Provider Choose an Open ID Provider or select none. Client ID The Client ID of the selected Open ID provider Authority URL The Authority URL of the Open ID provider Redirect URL the Folder Template Creator URL -
On the Email Settings Screen, enter the configuration settings below and click on the Next button
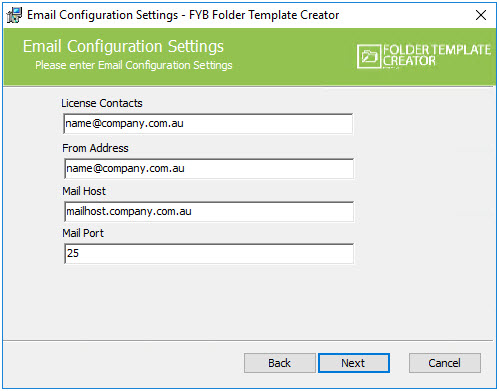
NAME DESCRIPTION License Contacts The list of email addresses that will receive a notification when the Folder Template Creator License is about to expire. From Address The email address that all emails are sent from. Mail Host The email host system that will send all email notifications. Mail Port The Simple Mail Transfer Protocol port that will assist the host mail system send all emails. -
On the Custom Setup screen select the install location and click on the Next button
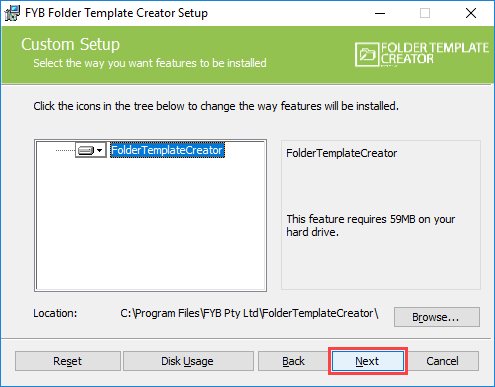
-
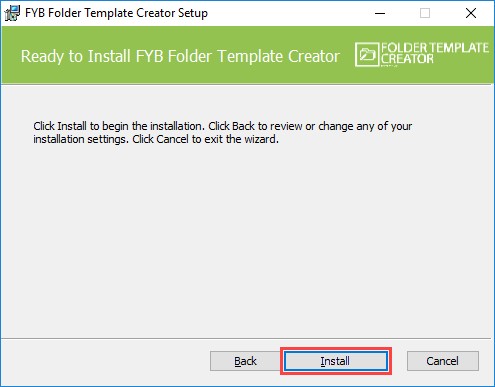
From the Confirm Installation window click on the Install button
-
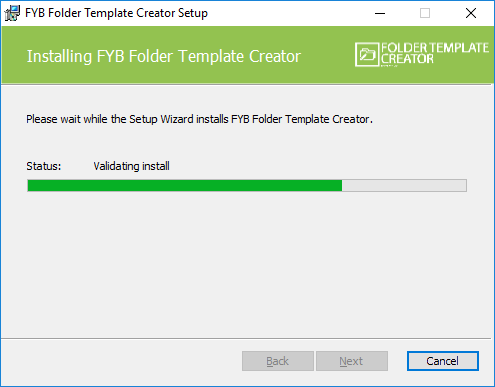
The installation process will commence
-
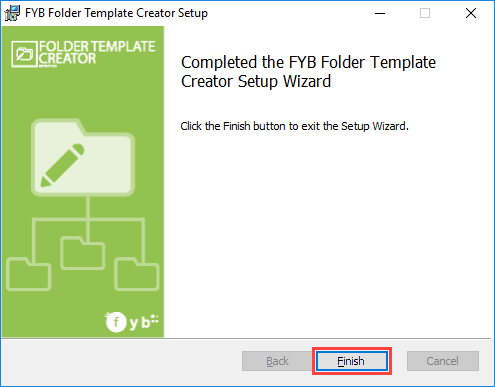
Once the installation is complete, click on the Finish button
COMMAND-LINE ARGUMENTS (OPTIONAL)
The following command-line arguments can be passed to the MSI if required.
| ARGUMENT | PURPOSE |
|---|---|
| WEB_APP_POOL_IDENTITY_DOMAIN | Sets the App Pool domain for the application pool |
| WEB_APP_POOL_IDENTITY_NAME | Sets the App Pool username for the account running the application pool. Use "" around the username if there are any special characters |
| WEB_APP_POOL_IDENTITY_PWD | Sets the App Pool password for the account running the application pool. Use "" around the username if there are any special characters |
| DBID | Sets the Database ID that connects to Content Manager dataset to run the application |
| WORKGROUP_SERVER | Sets the Workgroup Server Name that connects to Content Manager dataset to run the application |
| LICENSE_PATH | Sets the license that connects to the application |
| TEMP_PATH | Sets the temporary path that connects to the application |
| LIC_CONTACTS | Sets the email address of who will be contacted regarding the expiring license |
| FROM_ADDRESS | Sets the email address all emails are sent from |
| MAIL_HOST | Sets the mail host |
| MAIL_PORT | Sets the mail port |
CONFIGURATION
IIS CONFIGURATION
-
After the installation process is complete, you will be able to locate the application installed within the site selected during installation
-
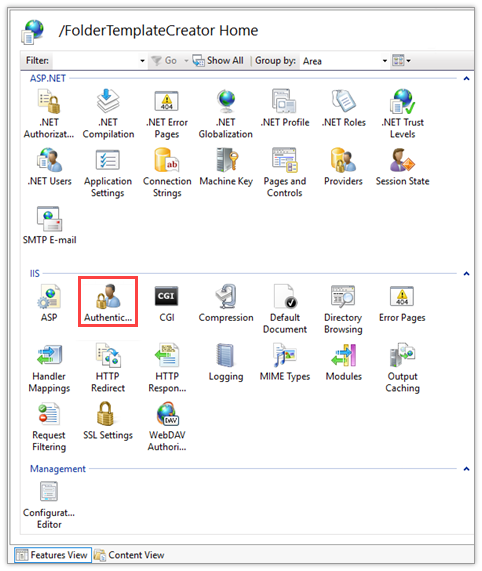
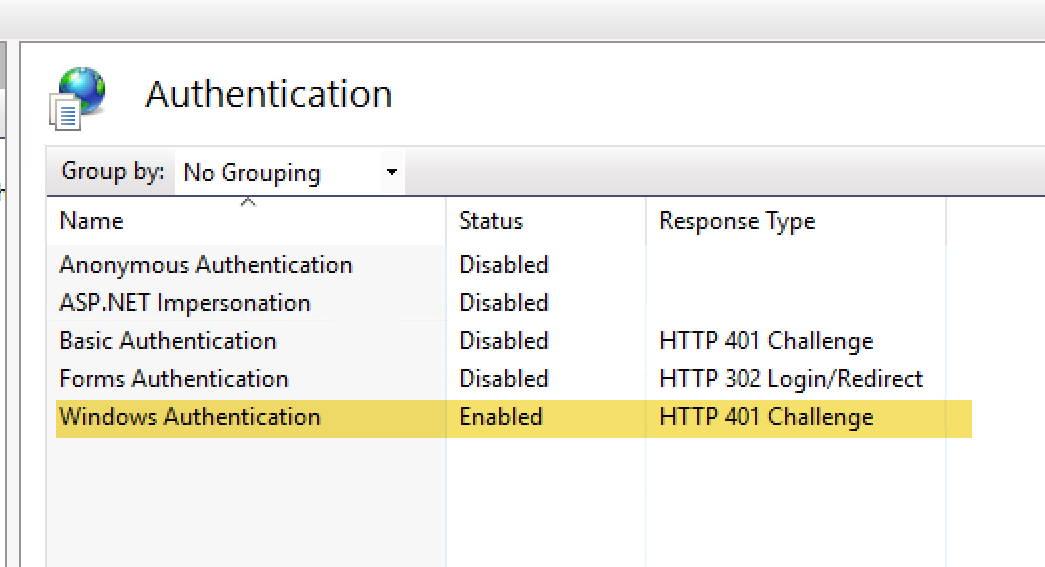
From the Features View double click on Authentication button and ensure that only Windows Authentication is enabled if you are not using Open ID Authenticaion
 Important
If you are using Open ID Authentication, ensure only Anonymous Authentication is enabled
-
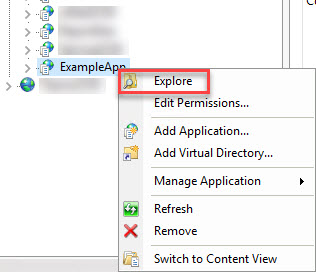
Right click the application in IIS and select theexplore option
-
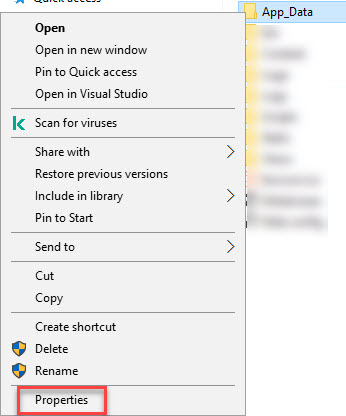
Right click on the app data folder and select properties
-
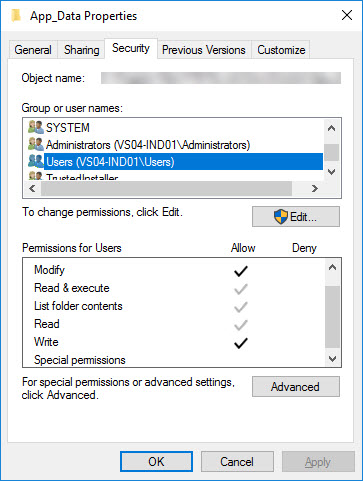
Navigate to the security tab and ensure users have read, write and modify permissions
-
Click on Application Pools

-
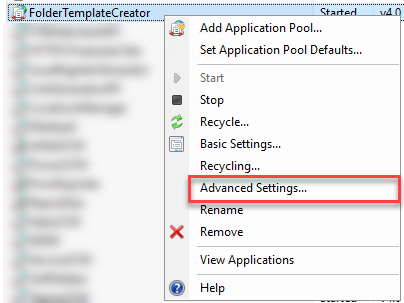
Within the application pool listing screen, right click on Folder Template Creator application pool and select the Advanced Settings option from the drop-down menu
-
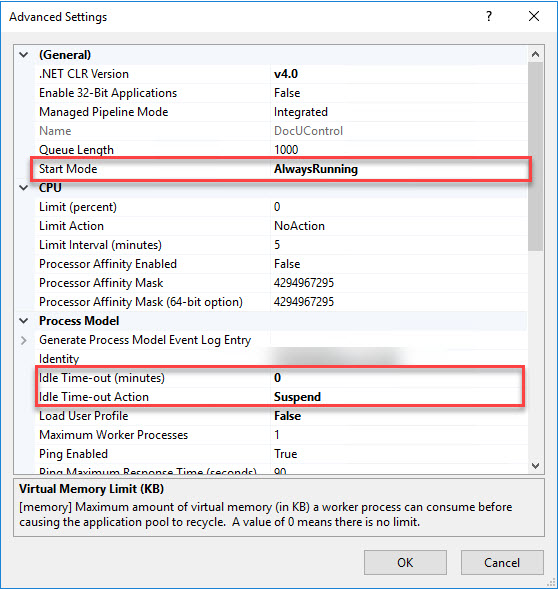
Within the Advanced Settings window, set Start Mode to AlwaysRunning, Idle Time-out Action to Suspend and Idle Time-out Action (minutes) to 0
-
Click on the OK button
-
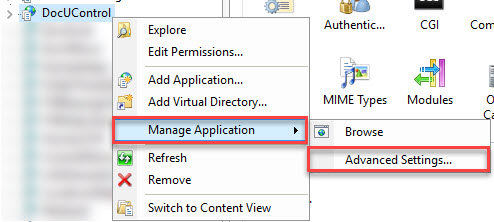
Select the Folder Template Creator application in IIS and navigate to its Advanced Settings
-
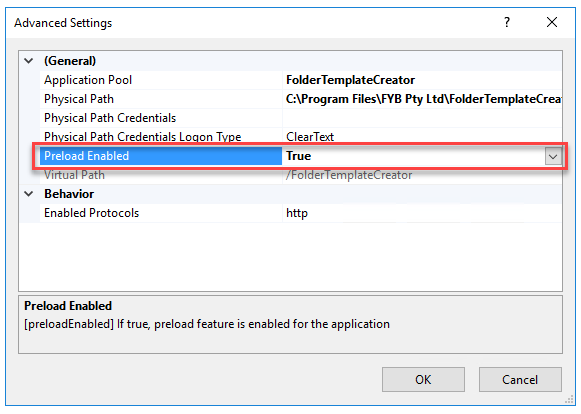
Set Preload Enabled to True and click on the OK button
ENABLING FOLDER TEMPLATE CREATOR FOR A HTTPS SITE
By default, Folder Template Creator is set up to connect to a http site. To set up the application for HTTPS connection, please complete the following:
-
Right click the application in IIS and select explore
-
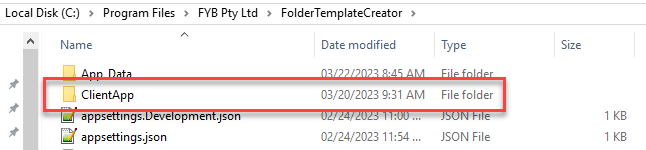
Click on the Client App > Build
-
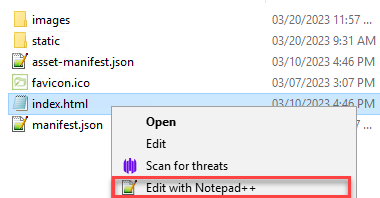
Right Click > Edit the Index.html file
-
Update the Content Security Policy from http to https

-
Save the file.
INSTALLING FOLDER TEMPLATE CREATOR READER ADDIN
INSTALLATION
During the web application install the Folder Template Creator Reader will have been deployed to the following location: C:\Program Files\FYB Pty Ltd\FolderTemplateCreator\App_Data
Please note the folder template reader contains its own license, which is separate to that of Folder Template Creator web application. Ensure you are using the Folder Template Reader license provided.
-
Locate the config.xml at the path above and edit it. Update the license path to use the shared license path

-
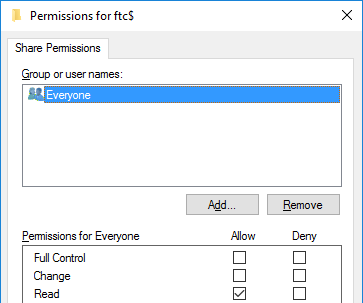
For users to run the Folder Template Creator Reader Add-In you will need to set up a hidden share to the folder it is stored in (by default this is the App_Data folder of the web application but this can be relocated if required)

-
Give Everyone Read permission
-
Take note of the shared path (FQDN path) as it will be required
NoteFolder Template Creator Reader comes with both a 32bit and 64bit version. Content Manager will only load the applicable version depending on the user’s machine.
CONFIGURATION
-
Navigate to Content Manager > Administration > External Links

-
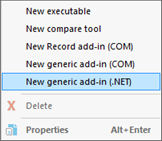
Select New generic add-in (.NET) or right click > New generic add-in (.NET)
-
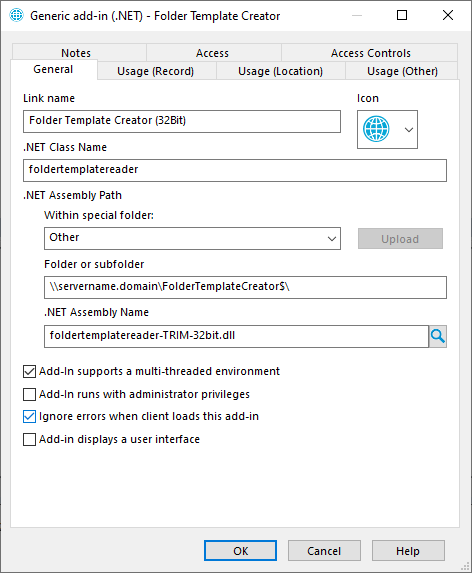
Enter in the following detail and click the OK button
PROPERTY VALUE Link Name Folder Template Creator (32bit) or Folder Template Creator (64bit). .NET Class Name foldertemplatereader Note: Class name must match exactly as shown. Folder or Subfolder The FQDN shared path created in step 2 of the previous section .NET Assembly Name foldertemplatereader-32bit.dll or foldertemplatereader-64bit.dll. Add-In supports a multi-threaded environment Yes. Ignore errors when client loads add-in Yes. This is important to ensure users do not receive error messages if using both 32bit and 64bit environments.
The following example is for a 32bit version
-
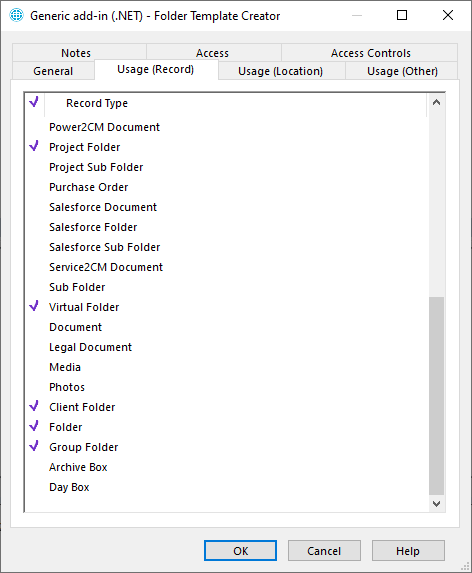
Go to the Used by Tab and select the folder record types that you wish to use the add-in with
NoteOnly parent folder record types need to be ticked, sub folder record types do not
-
Click the OK button to complete the installation of the Record Add In
CM WEB CLIENT CONFIGURATION (OPTIONAL)
If you wish to use Folder Template Creator with the Content Manager web client then two additional changes are required.
- The account running the folder template creator application pool will require full control on the license folder network share (e.g., \SERVER-NAME\FYBADDINS$\LICENSE)
- The account running the folder template creator application pool will require full control on the reader folder network share (e.g., \SERVER-NAME\FTC$)
Any templates you wish to use with the Web Client cannot use the creation pop-up feature.

UNINSTALLATION
WEB APPLICATION
To uninstall the Folder Template Creator please follow the steps below:
-
Navigate to control panel

-
Click on the uninstall a program option

-
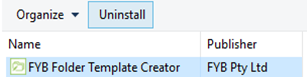
Select FYB Folder Template Creator in the list of Programs and feature, and select Uninstall
-
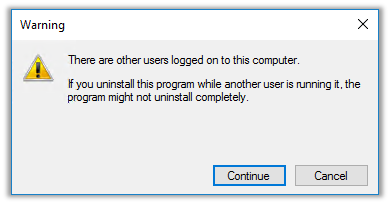
If a warning Prompt appears, click on the continue button
-
The uninstallation process will commence

-
Open IIS once the uninstallation process is completed
-
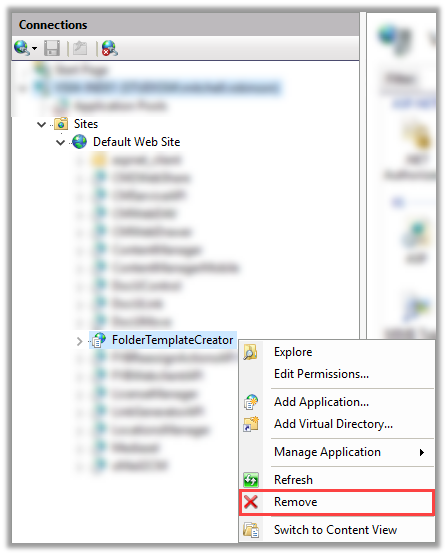
Locate Folder Template Creator in IIS, right click and click Remove.
-
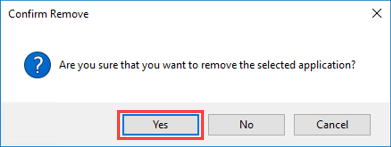
When the prompt appears, click on the Yes button
-
Folder Template Creator is now uninstalled
READER ADD-IN
To uninstall the Folder Template Creator Reader Add-In please follow the steps below:
-
Navigate to Content Manager Context > Administration> External Links

-
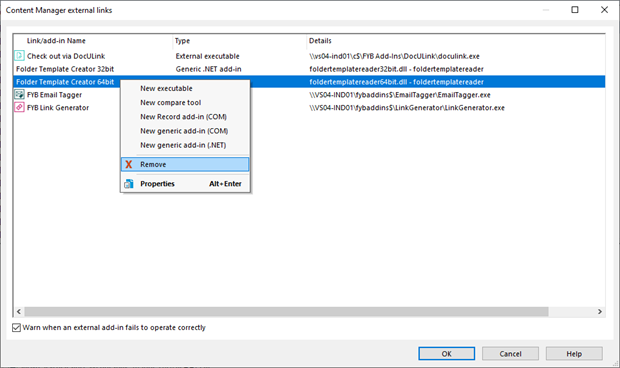
Right Click on the Folder Template Creator (32 / 64 bit) and click on the Remove option
-
The Folder Template Creator Add In has been removed