
FYB Connect CM2SP Entra ID App Registration
OVERVIEW
To use CM2SP, you are required to register the application on Azure Active Directory. The application will be used to acquire an access token to make web API requests to access certain Microsoft resources for a tenant (organisation). The app is registered via the Azure Web portal
APP REGISTRATION
-
Sign in to the Azure web portal using the link below https://azure.microsoft.com/en-gb/features/azure-portal/
-
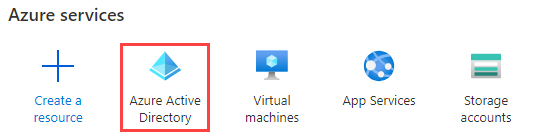
Once signed in, click on Azure Active Directory
-
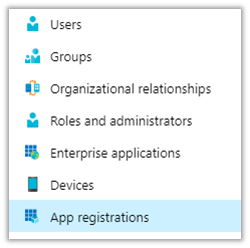
Click on App Registrations from the left menu
-
Click on the New registration button

-
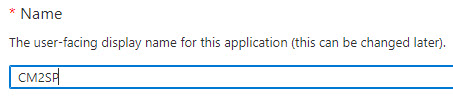
Enter CM2SP into the name input field
-
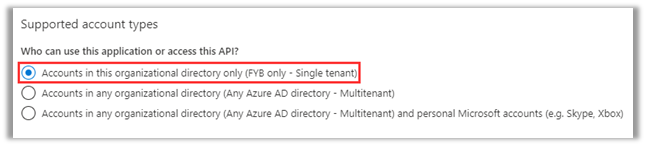
Under Supported account types section enabled Accounts in this organizational directory option
-
Click on the Register button
AUTHENTICATION
-
Click AUTHENTICATION
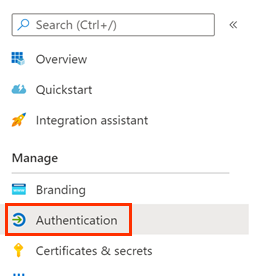
-
Under Platform configurations click Add a platform

-
Click Single-page application

-
For the Redirect URI field, type in the URL configured for FYB Connect, followed by /cm2sp/
NoteThe URI is case sensitive; the route must match exactly the pattern below, where the only variable that needs to be replaced is the domain. Please include the trailing slash in the URL and ensure all characters are in lowercase. Example: https://[domain]/fybconnect/cm2sp/

-
Click the Configure button

GRANTING API PERMISSION
The application will require various API permissions. Please follow the steps below to add the required permissions for CM2SP.
-
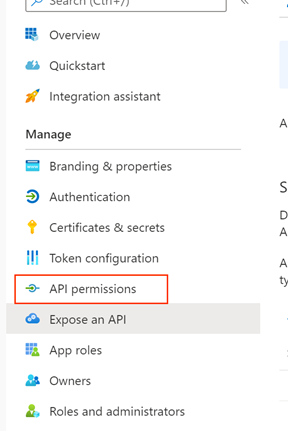
Click on the API permissions option from the left menu
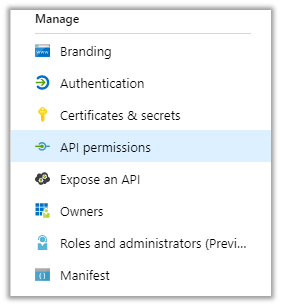
-
Click on the Add Permissions button

-
When the right-hand permission panel appears, click on Microsoft Graph (This will be at the very top)
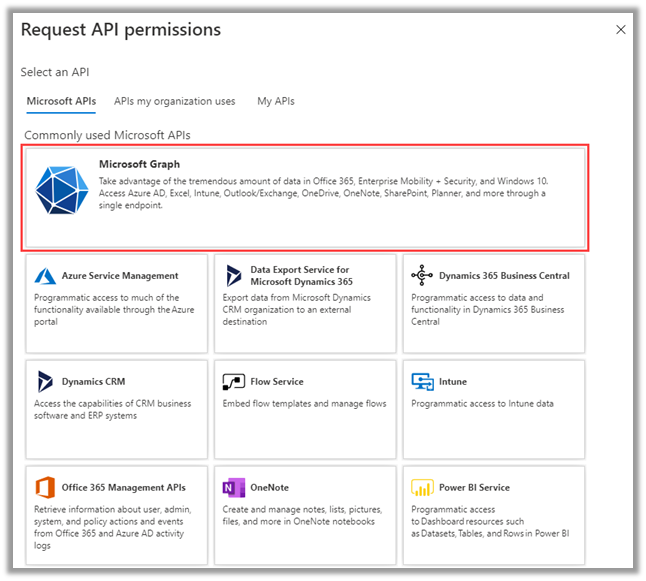
-
Click on Application permissions
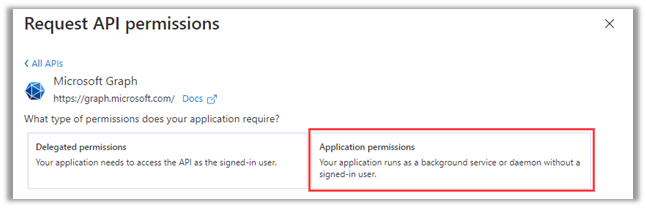
-
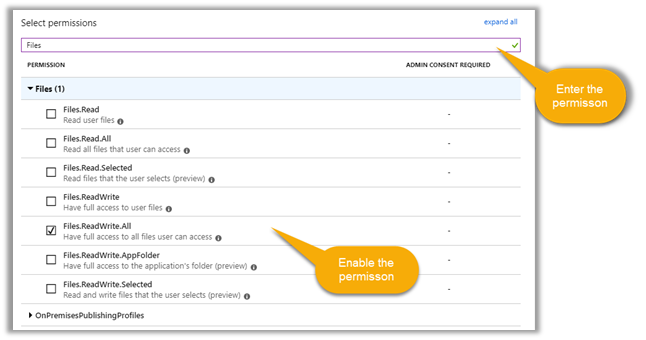
Using the select permission window, add the following permissions to the application
-
Files.ReadWrite.All
-
Scroll down to the bottom of the panel and click the Add Permission button

-
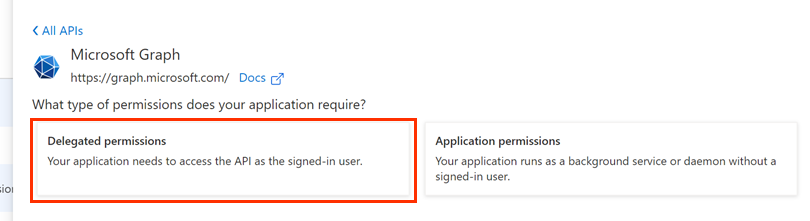
Go back and repeat Steps 2 and 3, except this time select Delegate permissions
-
Using the select permissions window, add the following delegate permissions to the application
- Files.ReadWrite.All
- Sites.Read.All
-
Click on Grant Admin Consent
 Note
Do not remove the default user.read delegated permission
API PERMISSIONS USAGE
| NAME | TYPE | DESCRIPTION | CONSENT REQUIRED | USAGE |
|---|---|---|---|---|
| Sites.Read.All | Delegated | Allows the app to read documents and list items in all site collections on behalf of the signed-in user. | Yes | Used to display all sites that the logged in user has access to in the Sites page of CM2SP |
| Files.ReadWrite.All | Delegated | Allows the app to read, create, update, and delete all files the signed-in user can access. | Yes | Used to allow user initiated archives to transfer documents from Content Manager to SharePoint |
| Files.ReadWrite.All | Application | Read and write files in all site collections. Required for the scheduler to transfer files to SharePoint without user interaction | Yes | This permission is used by the background scheduler to move documents from Content Manager to SharePoint. |
NAVIGATING AZURE WEB PORTAL
HOW TO GET THE APPLICATION ID
Please follow the steps below to retrieve the application ID on the Azure portal. This is required for the installation.
-
Once signed in to the Azure portal, click on Azure Active Directory
-
Click on App registrations

-
Click on the required application (CM2SP created previously)
-
Click on Overview

-
Copy the Application (client) ID to the clipboard (you will need this value for the MSI)

HOW TO GET THE TENANT INFORMATION
Please follow the steps below to retrieve the Tenant ID and Tenant Name on the Azure portal. This is required for the installation.
-
Once signed in to the Azure portal, click on Azure Active Directory
-
Click on Overview

-
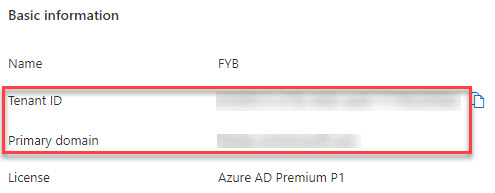
The Tenant ID can be found under the Tenant ID section, and the Tenant Name can be found under the Primary Domain Section
EXPOSE THE API
Applying a custom scope to the registration will prevent unauthorised access to the CM2SP API endpoints.
-
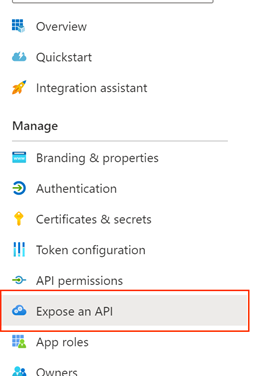
In the Left Menu, click on Expose an API
-
Next to the Application ID URI click on Set
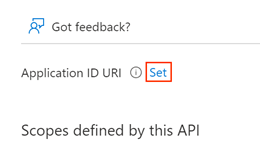
-
Click Save
NoteDo not change the Application ID URI. It must be in the following format: api://{client id}
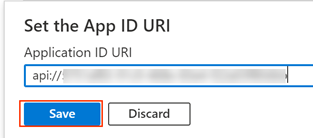
-
Click Add a scope
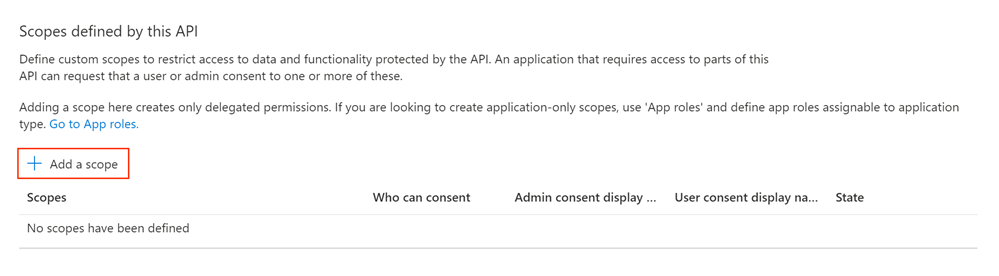
-
Specify the values below in the Add a scope window, then click Add scope
NoteThe scope must be named Grant.Access
Field Value Scope Name Grant.Access Who can consent? Admins and users Admin Consent display name Grant Access to CM2SP Admin consent description Grant Access to CM2SP State Enabled 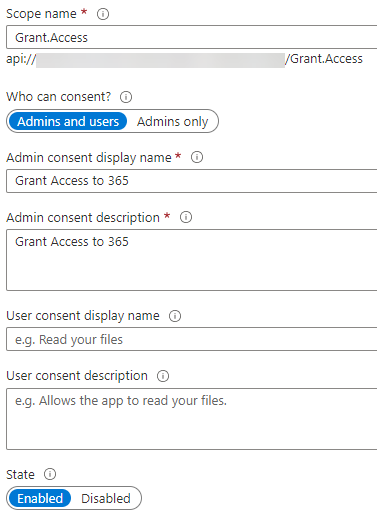
-
Once the scope has been added, click on API permissions
-
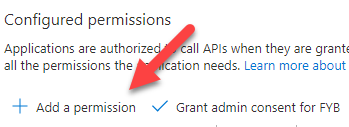
Click on Add a permission
-
Click My APIs

-
Click on the previously created CM2SP Azure app registration

-
Click on the Grant.Access scope and then click Add permissions at the bottom of the screen

-
Click on Grant admin consent

CERTIFICATE-BASED AUTHENTICATION
The background scheduler component of the application utilises certificate-based authentication to verify its identity to Microsoft Azure. As such, you will need to register a certificate for your application on Azure AD. You can choose to use an existing certificate if you have one (the same certificate used for the CM2SP site), or otherwise, you can create/purchase a new certificate for this purpose. Please follow the steps below on how to upload a certificate:
-
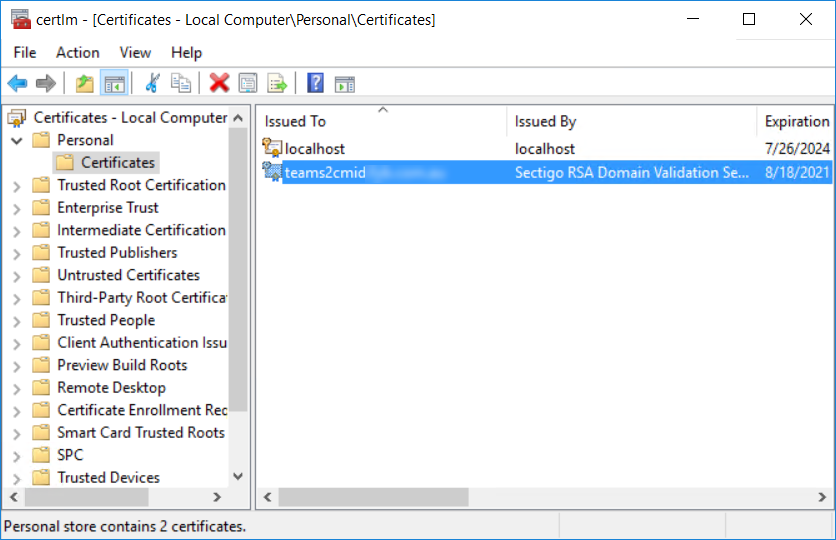
After obtaining a copy of your certificate (.pfx), install the certificate in the Certificate Manager tool under local machine on the server where the application will be installed on
-
Ensure the certificate has been given a friendly name; this is required when installing the app on the server

-
Please ensure the account that will be running the application pool for the application has access to the certificate private key
-
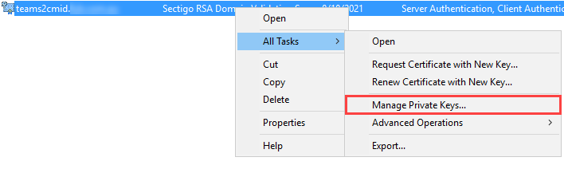
Right-click the certificate > All Task > Manage Private Key
-
Grant the account running the app pool full control permission on the certificate
-
Export the public key from the certificate using this guide (https://docs.microsoft.com/en-us/azure/application-gateway/certificates-for-backend-authentication). You will only need to complete steps 1 to 7 in the Export authentication certificate (for v1 SKU) section
-
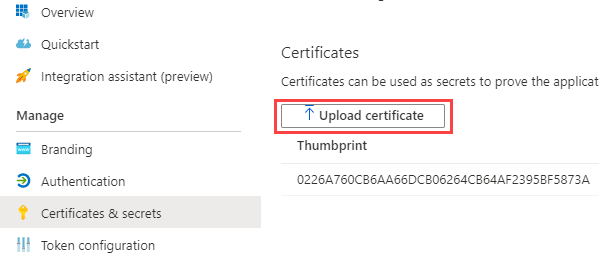
Upload your certificate public key (.CER) to Microsoft Azure for the 365|2CM application by going to the Certificates & secrets section
UPDATING THE CERTIFICATE FRIENDLY NAME
If the certificate in the Entra app has expired and the new certificate has a different friendly name, follow the steps below to update the certificate's friendly name in FYB Connect:
-
Navigate to the CM2SP install directory (C:\Program Files\FYB Pty Ltd\FYBConnect\CM2SP)
-
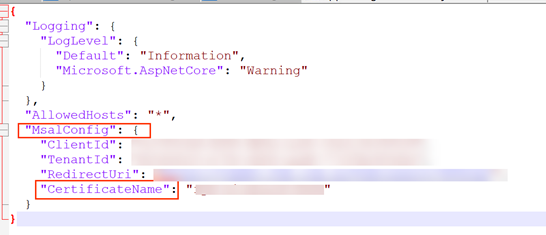
Open the appsettings.Production.json file as an Administrator
-
Within the MsalConfig section, update the value of the CertificateName property to the value of the new certificate's friendly name
-
Save the file
-
Perform an app pool restart on the CM2SP application within IIS
VALUES REQUIRED FOR INSTALLATION
The following values will be required for the installation of CM2SP. Please ensure that the person responsible for the installation has these values.
- Redirect URI
- Application ID
- Tenant ID
| Name | Description |
|---|---|
| Redirect URI | The URI where Azure will send the authentication payload upon successful authentication. Please refer to the Redirect URI section to acquire the redirect URI. |
| Application ID | Application ID of the registered CM2SP application. Please refer to the HOW TO GET THE APPLICATION ID section for further info. |
| Tenant ID | The organisation tenant unique identifier on Azure Portal. Please refer to the HOW TO GET THE TENANT INFORMATION section for further info. |
| Certificate Friendly Name | The friendly name of the nominated certificate (.pfx) installed on the machine. This certificate is used to prove the application's identity by encrypting the application's claims in the form of a JWT token. |